
BASICS
Understand the workspace before starting
Software overview
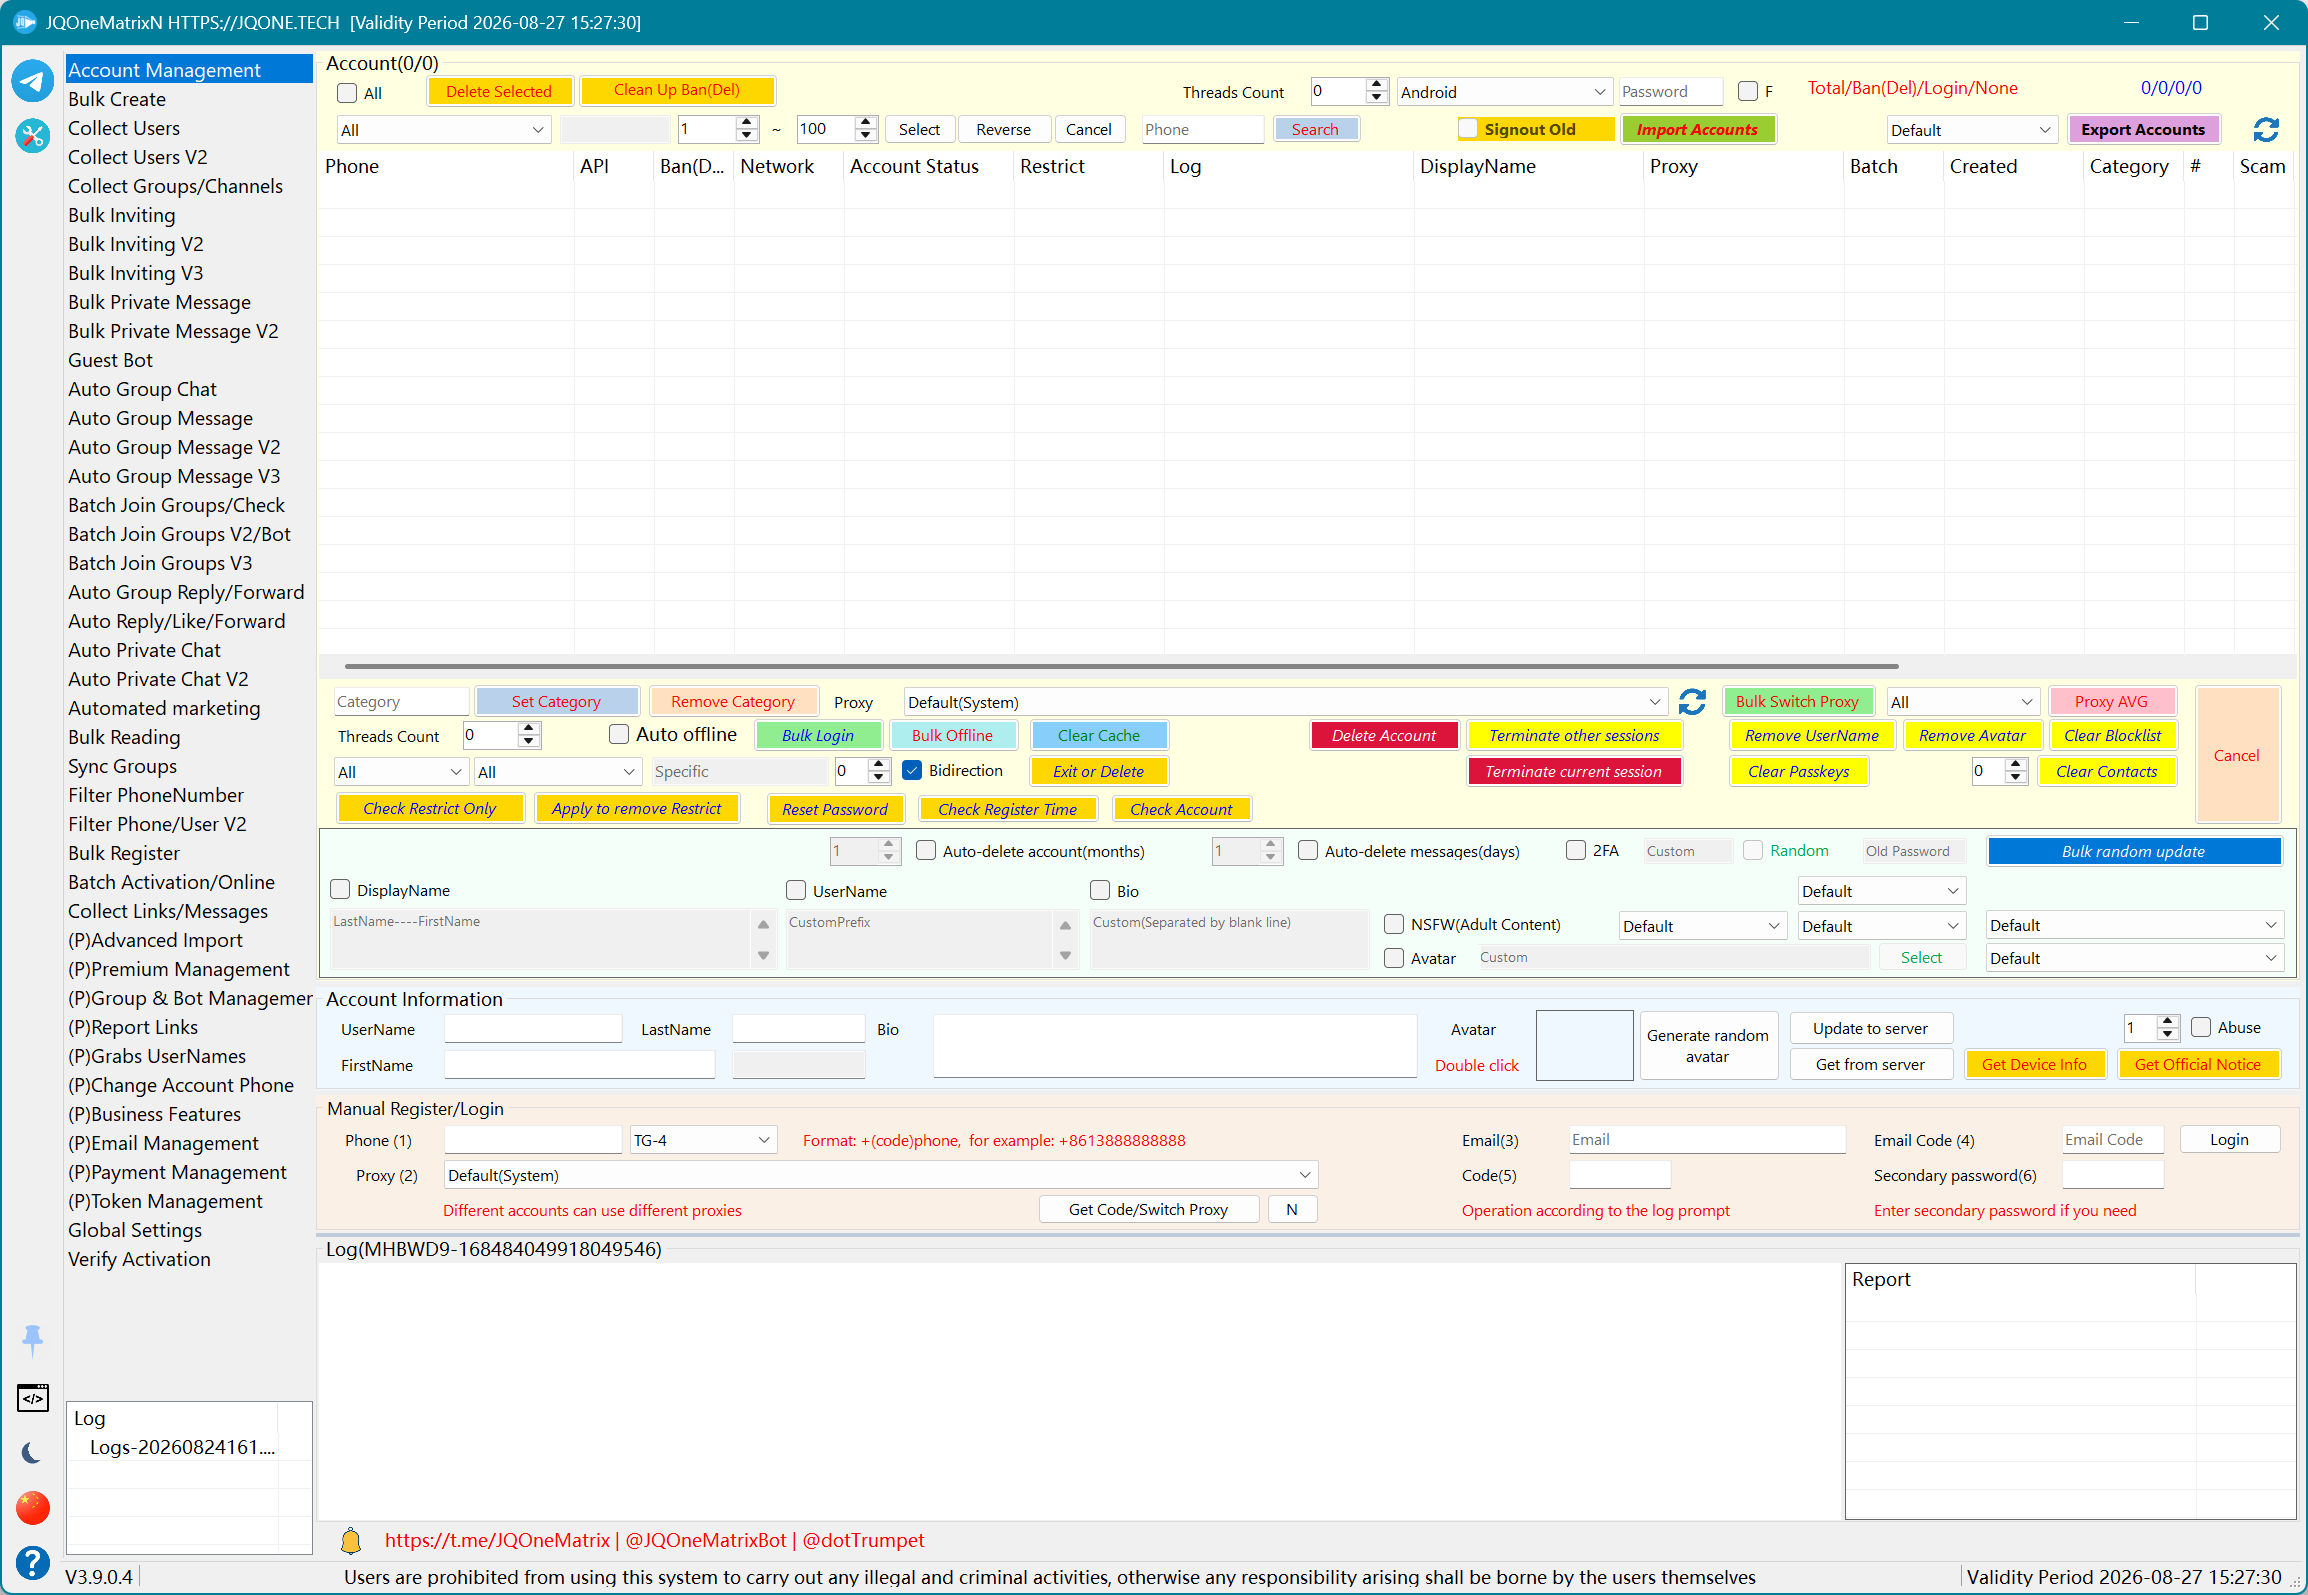
JQOneMatrix is a Windows workspace for multi-account Telegram operations. Select a feature on the left, manage accounts or task data above, configure the task in the center, and review logs and reports below.
- The main icon on the left opens Telegram features; the settings icon opens shared tools.
- The upper and middle areas manage accounts, data, and task settings; the lower area contains logs and reports.
- The pin controls topmost, the terminal opens Global Log, the flag switches language, and the version entry shows updates.
- The title area shows license validity, current version, and official contact information.
All features
The names below follow the current Entry order without menu numbers. (P) marks an additional advanced feature.
Shared tools
- Proxy List:Import, add, test, filter, and save task proxies.
- Dictionary/Data Set:Maintain random strings, system languages, time zones, Telegram languages, Telegram versions, and system SDK data.
- Remove Duplicate:Remove duplicate text or list entries.
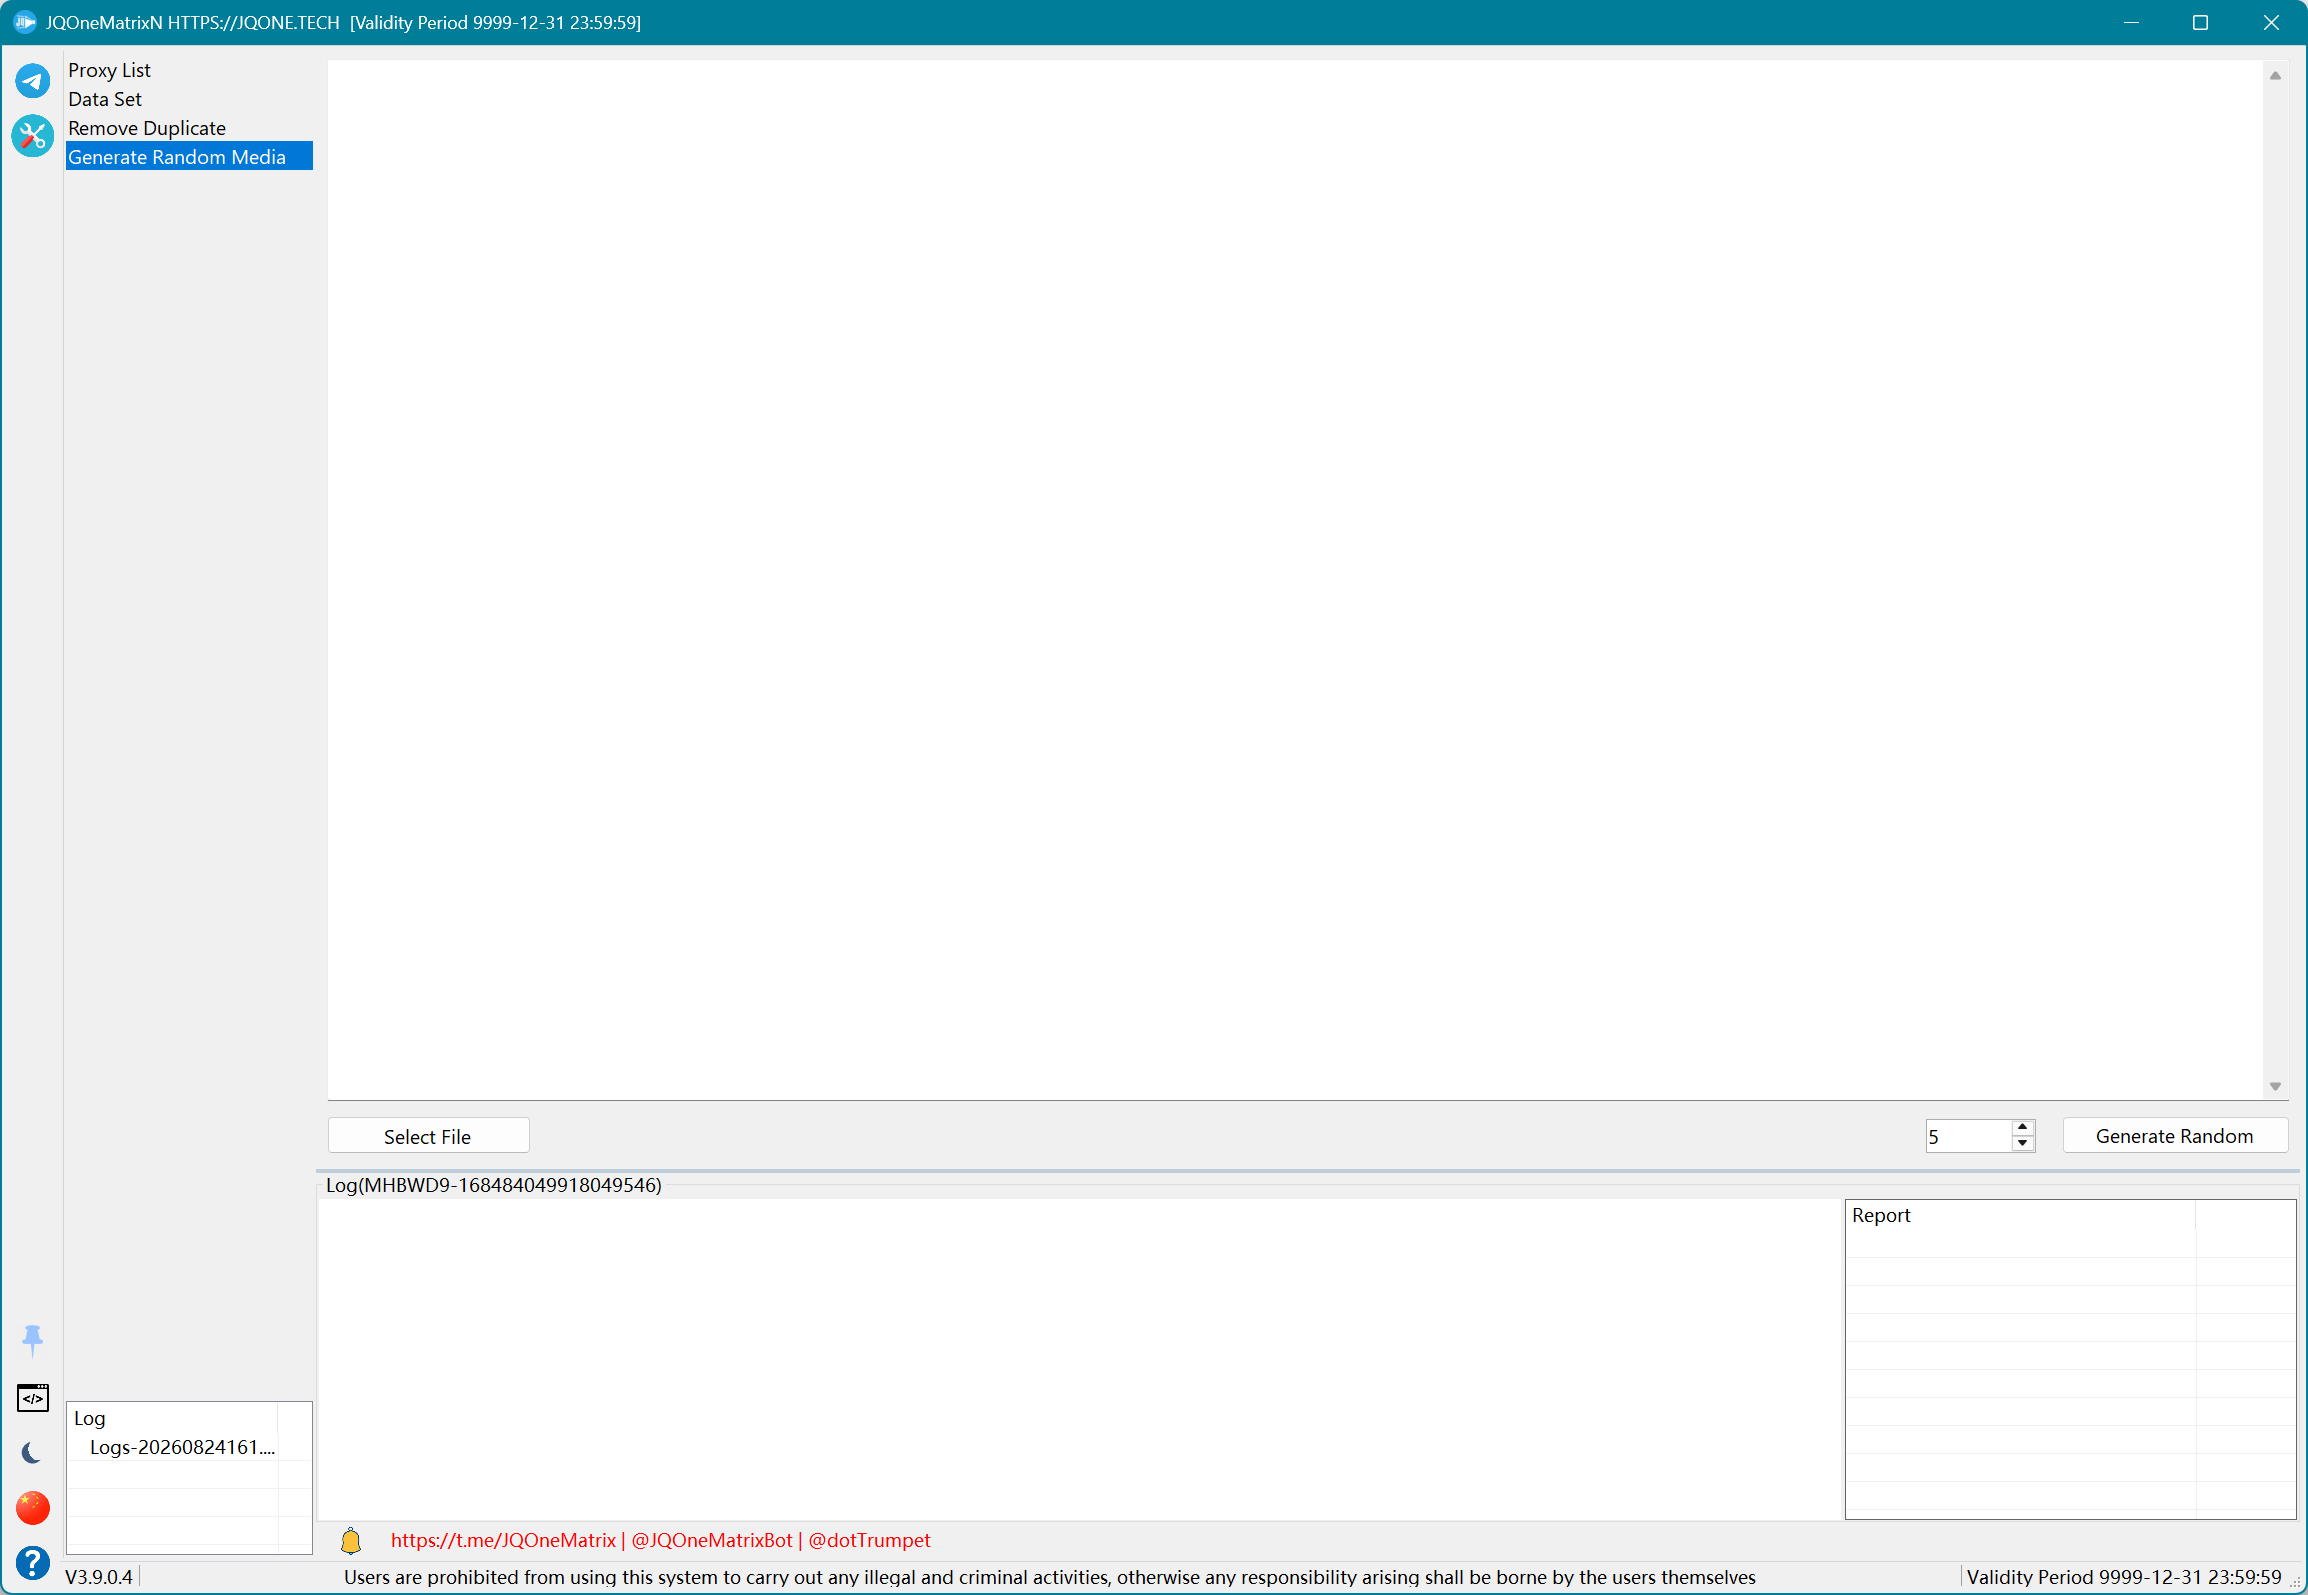
- Generate Random Media:Select a source media file and generate a randomized media file.
Message and data capabilities
- Supports plain text and Markdown or HTML where provided by a feature page.
- Supports phone numbers, usernames, private groups accessible to the application, current Telegram URLs, and Topic message links.
- Depending on the feature, supports text, images, video, voice, {random} content, and @PostBot queries.
Before use
- Confirm the license is valid and the required menu is visible.
- Check Windows time, network access, proxy availability, and disk space.
- Back up account and task data before imports, conversions, or deletion.
- Start with one or two accounts and a small dataset, then increase concurrency gradually.
Comply with applicable law and platform rules. The operator is responsible for task content, permissions, and data handling.
Message and data rules
- Message content supports plain text and, where available, Markdown or HTML.
- Targets can use phone numbers or usernames. The leading + on a phone number and @ on a username are optional because the application identifies the content.
- Group features support public links, private groups accessible to the account, and current Telegram Topic message links.
- Messaging tasks can send text, images, video, voice, and other supported media. Maintain the random-character dataset before using {random}.
- Monitoring, automatic reply, and real-time interaction features require Receive Telegram Updates in Global Settings.
- Use current Telegram URL formats and validate with a small dataset first.
@PostBot and Topic
- When a message begins with @PostBot, the remaining content is used as an @PostBot inline query and the first returned result is sent.
- Enter one @PostBot query per line. A non-empty line is selected at random, so every line should begin with @PostBot.
- For a Topic target, use a current Telegram message link copied from that Topic. Test one link with a few accounts first.
@PostBot keyword-one@PostBot keyword-two
Left Toolbar
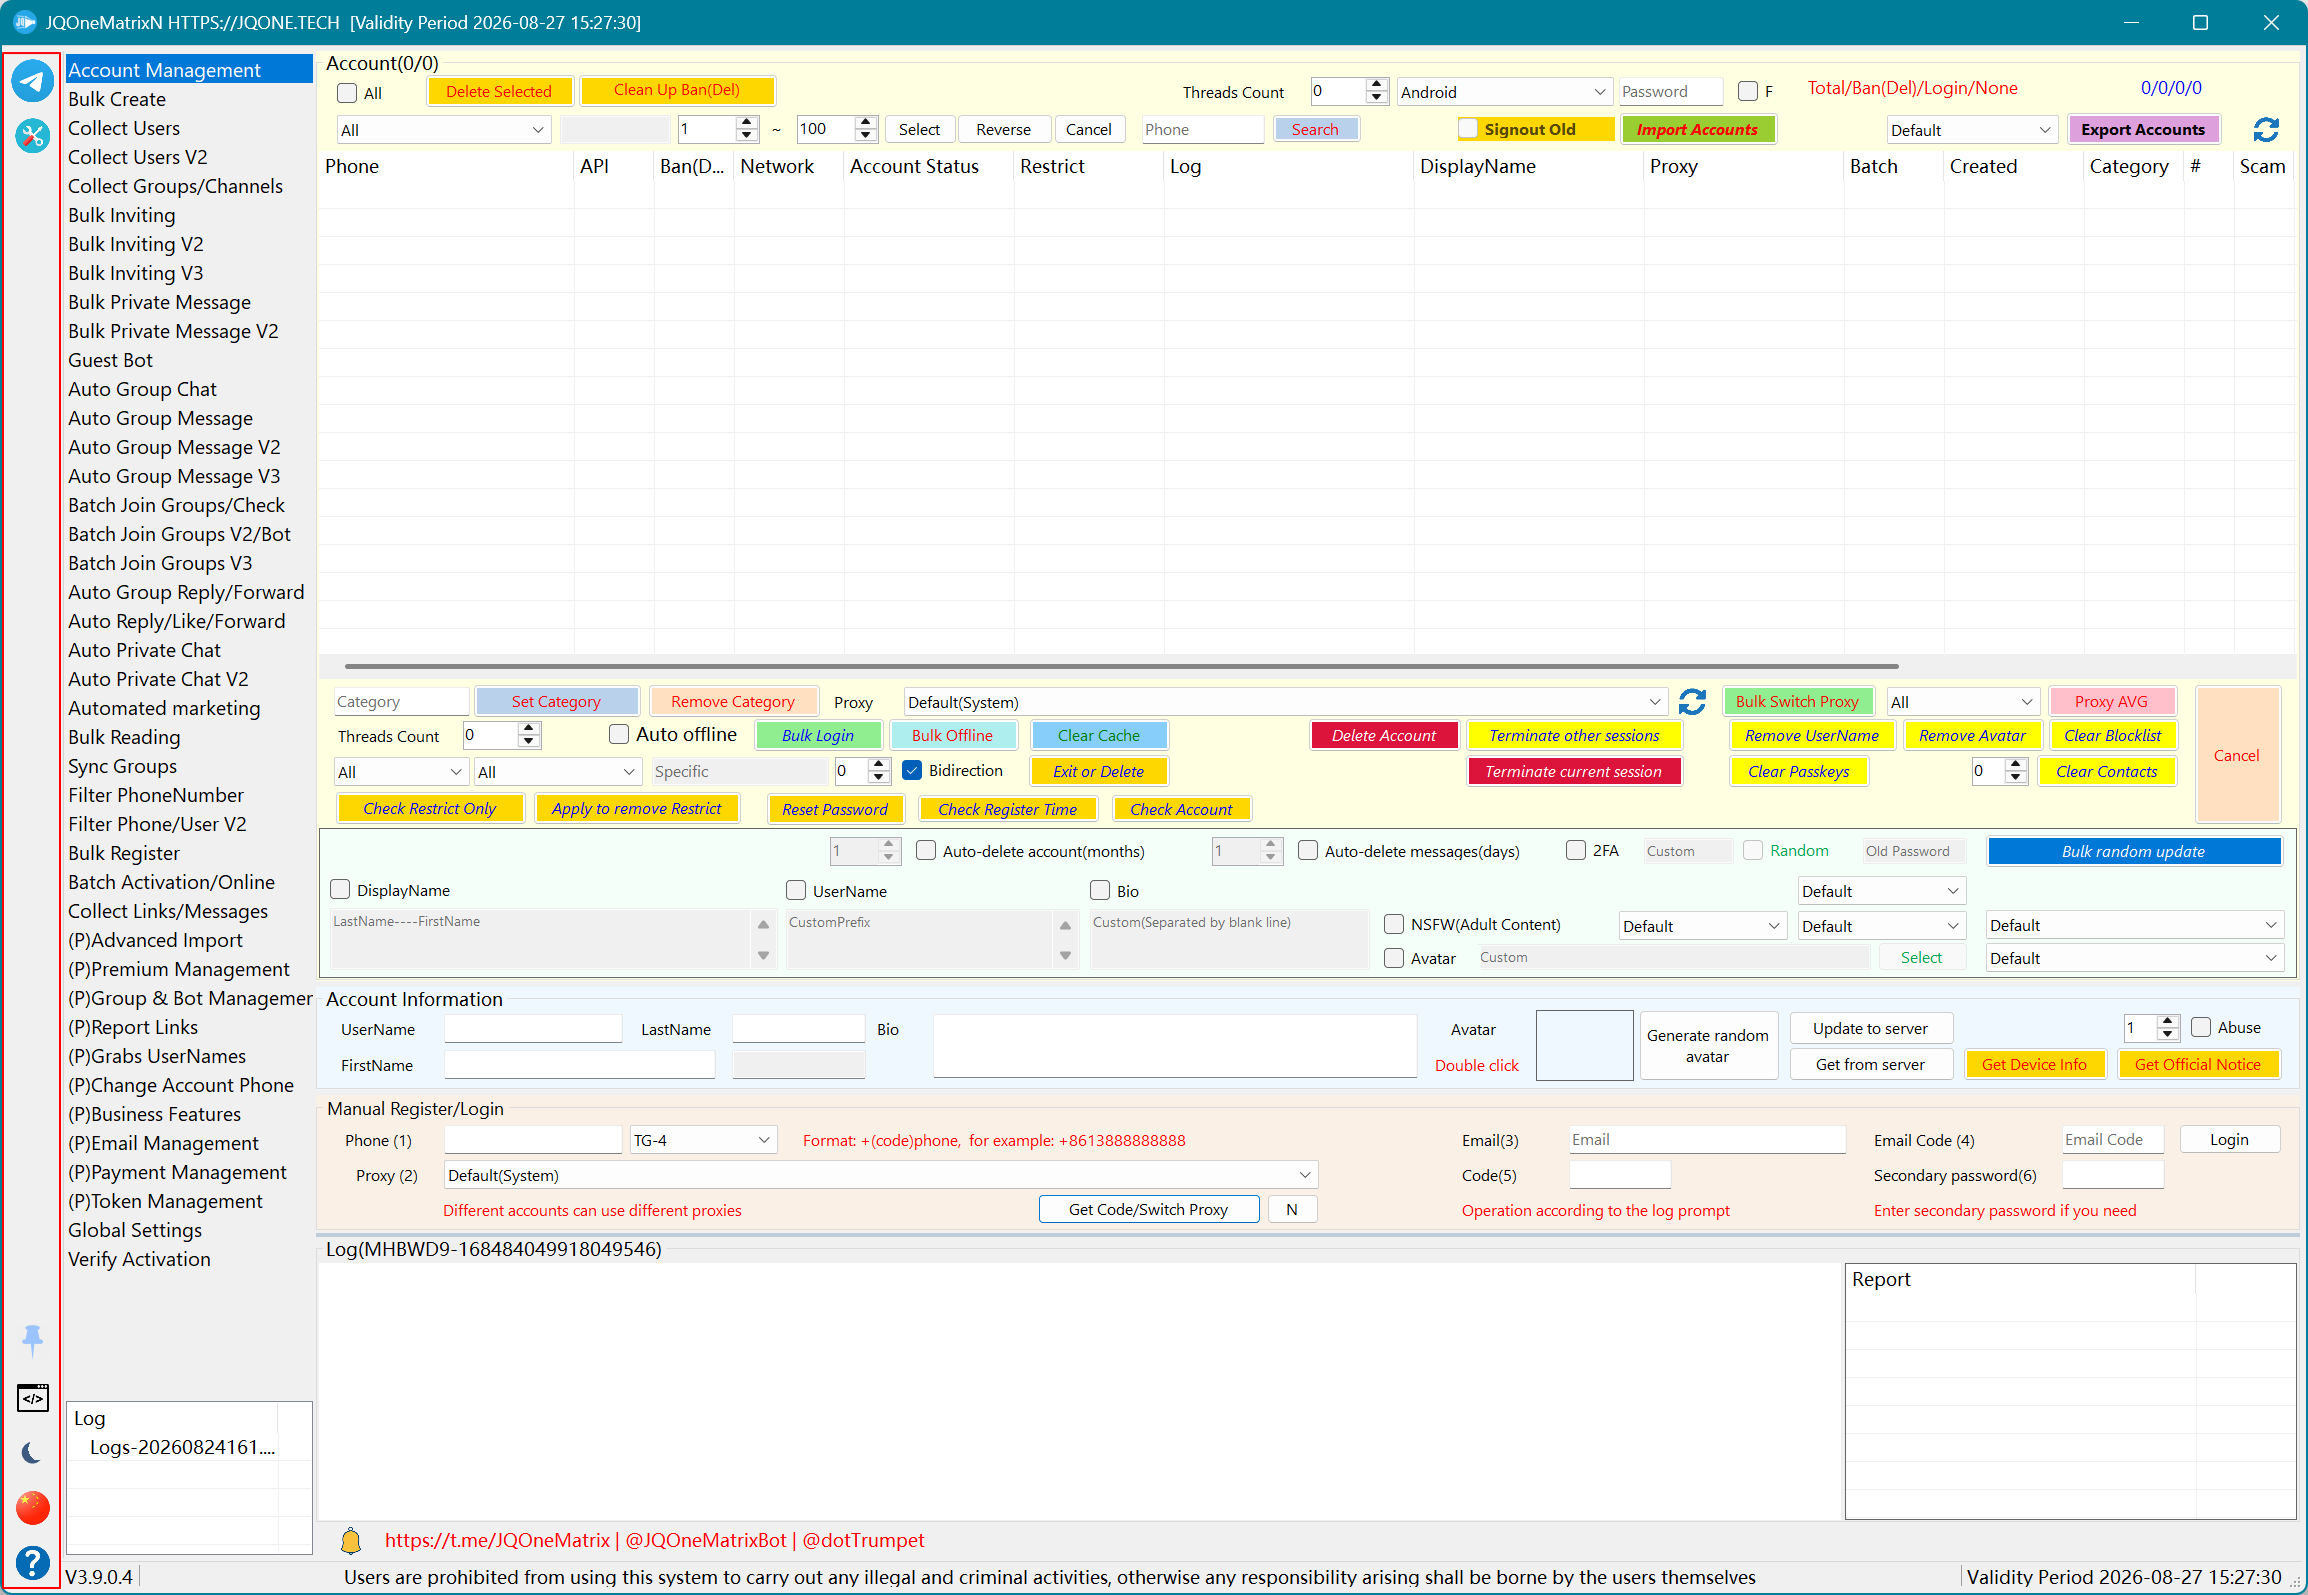
Explains the Telegram button, tools button, topmost control, and language switch.
Steps
- Select the Telegram icon to open Telegram features, then choose a function from the Entry list.
- Select the Tools icon to open shared tools such as proxies, datasets, deduplication, and random media.
- Select the pin to toggle Always on Top. The application window either remains above other windows or returns to normal stacking.
- Select the flag to switch Chinese or English and wait for the current interface text to reload.
- After switching language, follow the button names shown in that language. An already running task does not need to be recreated.
Additional information
- The main-feature icon opens Telegram features, the settings icon opens proxy/data tools, the pin controls topmost, the terminal opens Global Log, and the flag switches language.
- The version-changes entry shows update information. The interface also displays license validity, current version, official channel, and contact details.
- The toolbar changes entries and interface state; it does not replace Save, Start, or Stop actions on the active feature page.
Light/Dark Mode
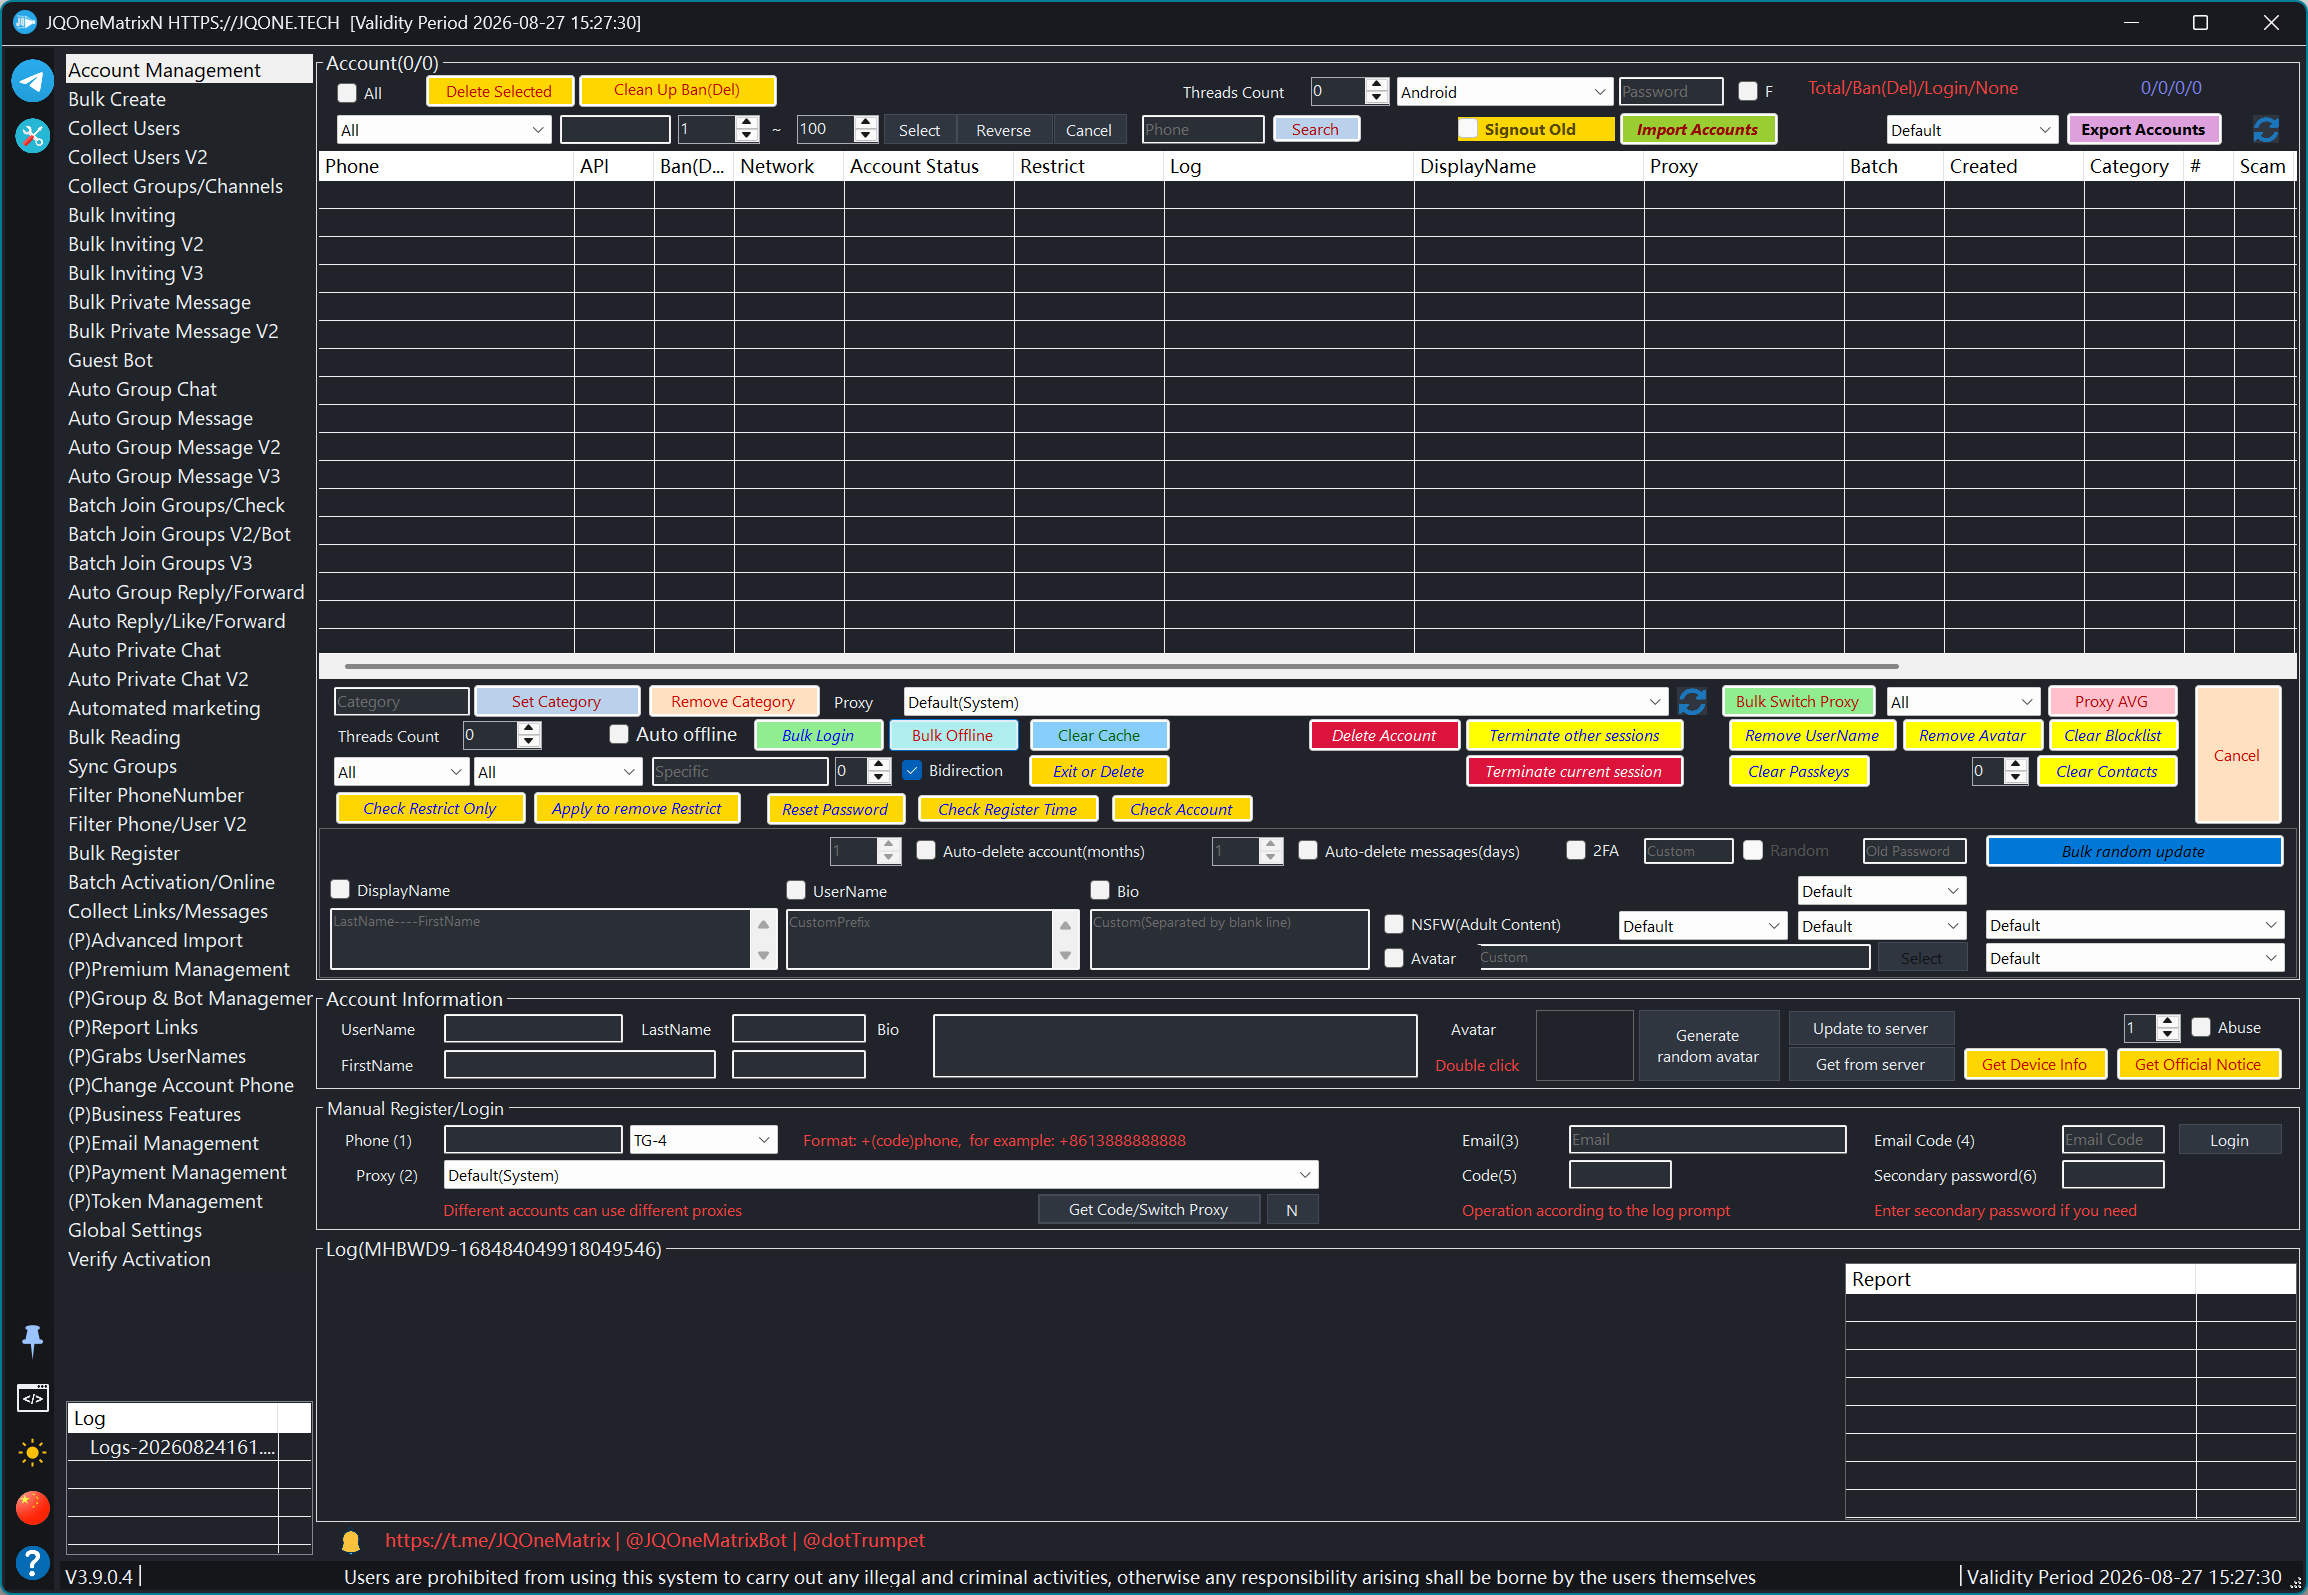
Switch the complete application between light and dark themes.
Steps
- Locate the moon or sun icon at the lower left.
- In light mode, select the moon to switch to dark mode. In dark mode, select the sun to return to light mode.
- Wait for the open feature page to apply the new background, text, and control colors.
- If a detail window is open, also confirm that its content remains readable.
Global Log
View cross-feature events and complete errors.
Steps
- Select the terminal icon on the left to open Global Log.
- Locate records by task time first, then narrow them by account and feature name.
- Select an exception or failure entry to read the complete error rather than relying on truncated list text.
- Record the time, account, feature, and full error, then return to the corresponding feature to adjust data or parameters.
- After rerunning, use the new timestamp to confirm whether the error still occurs.
Additional information
- Feature logs and Global Log are scrolling runtime logs. After closing them, use file logs for historical records.
- Persistent file logs are stored as Logs-*.txt under DataN\TelegramN_Logs.
- When private-message, inviting, screening, or other tasks generate reports, the path is printed at the end of the log and files are normally under DataN\TelegramN_Reports.
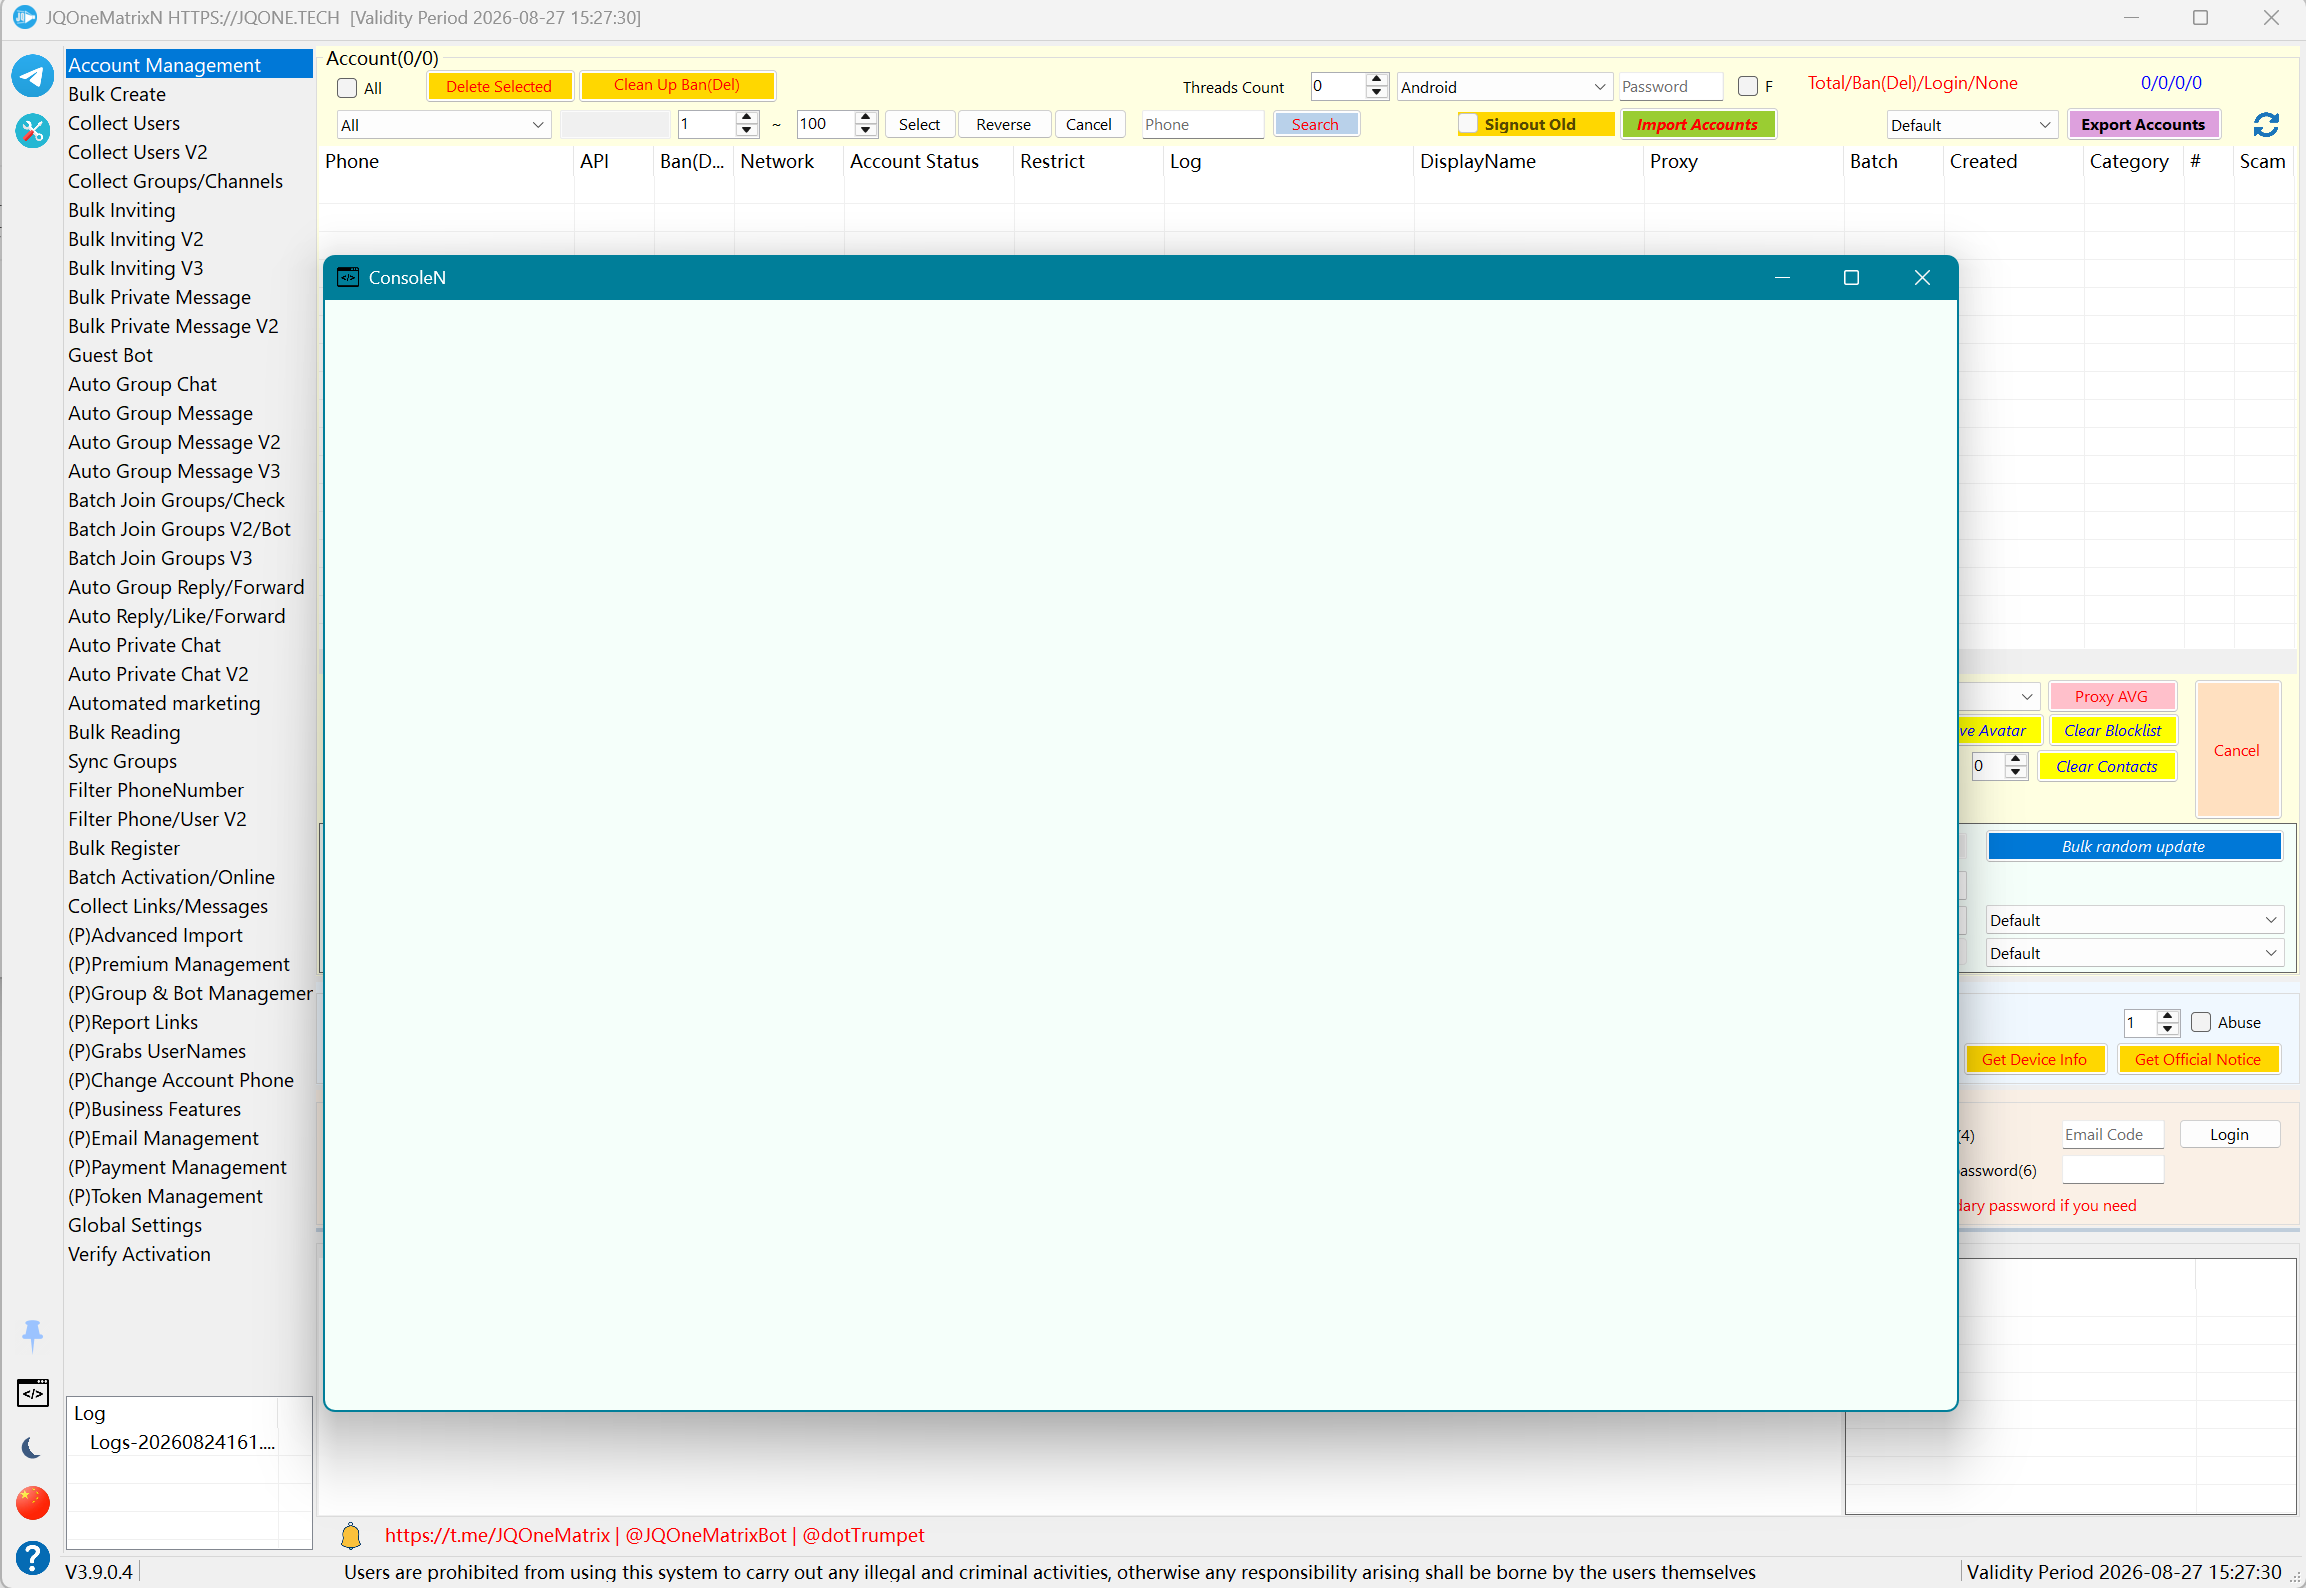
About/Version
View version, official contacts, and license validity.
Steps
- Select the question-mark icon on the left to open About.
- Read the current application version and confirm the official contact information.
- Review the license validity period and displayed license state.
- Before contacting support, record the application version, license state, and feature where the issue occurred.
Additional information
- In addition to version and license state, use the version-changes entry to review updates. When contacting support, also provide the feature name and log time.
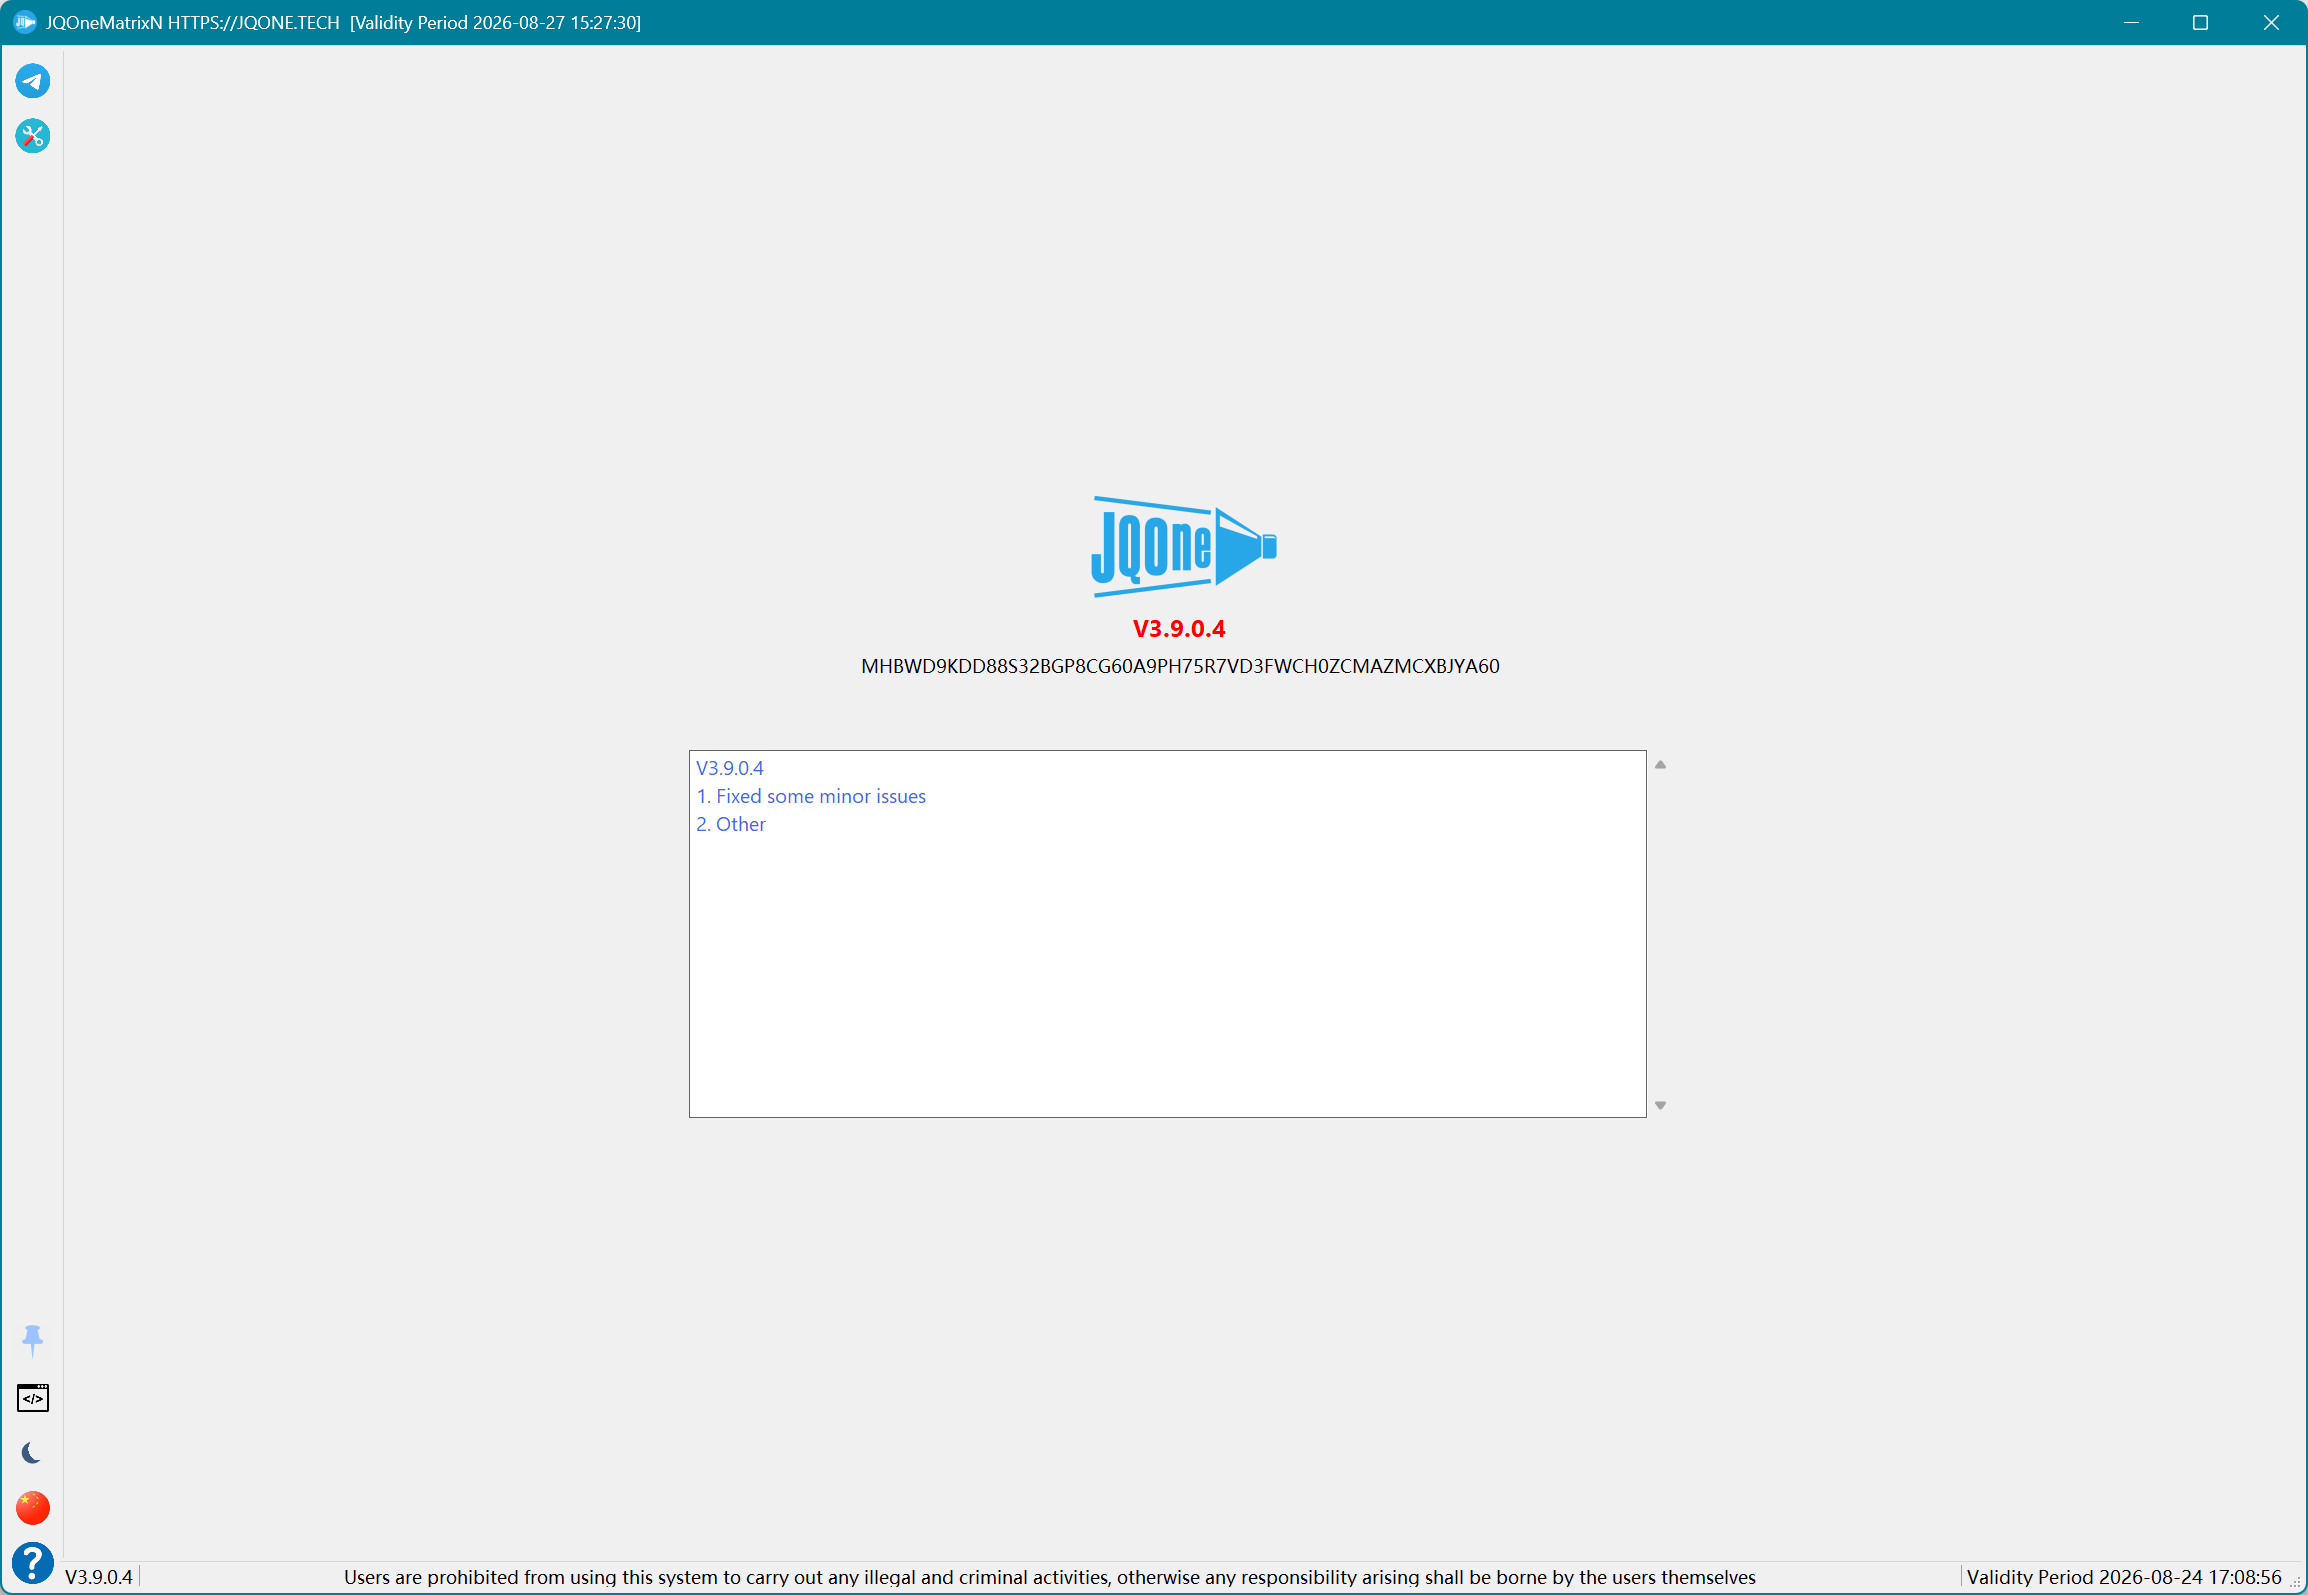
Data and Log Details
Uses one image to explain List Data, Log Data, and details.
Steps
- Find the record to inspect in List Data or Log Data on the feature page.
- Select the row and confirm that its account, target, time, or state matches the issue.
- Open the row's detail action. When a context menu is available, use its Details command.
- Review the full JSON, request data, response content, or log text that is truncated in the list.
- For troubleshooting, use the detail view's copy action to retain the complete content and compare it with Global Log at the same time.
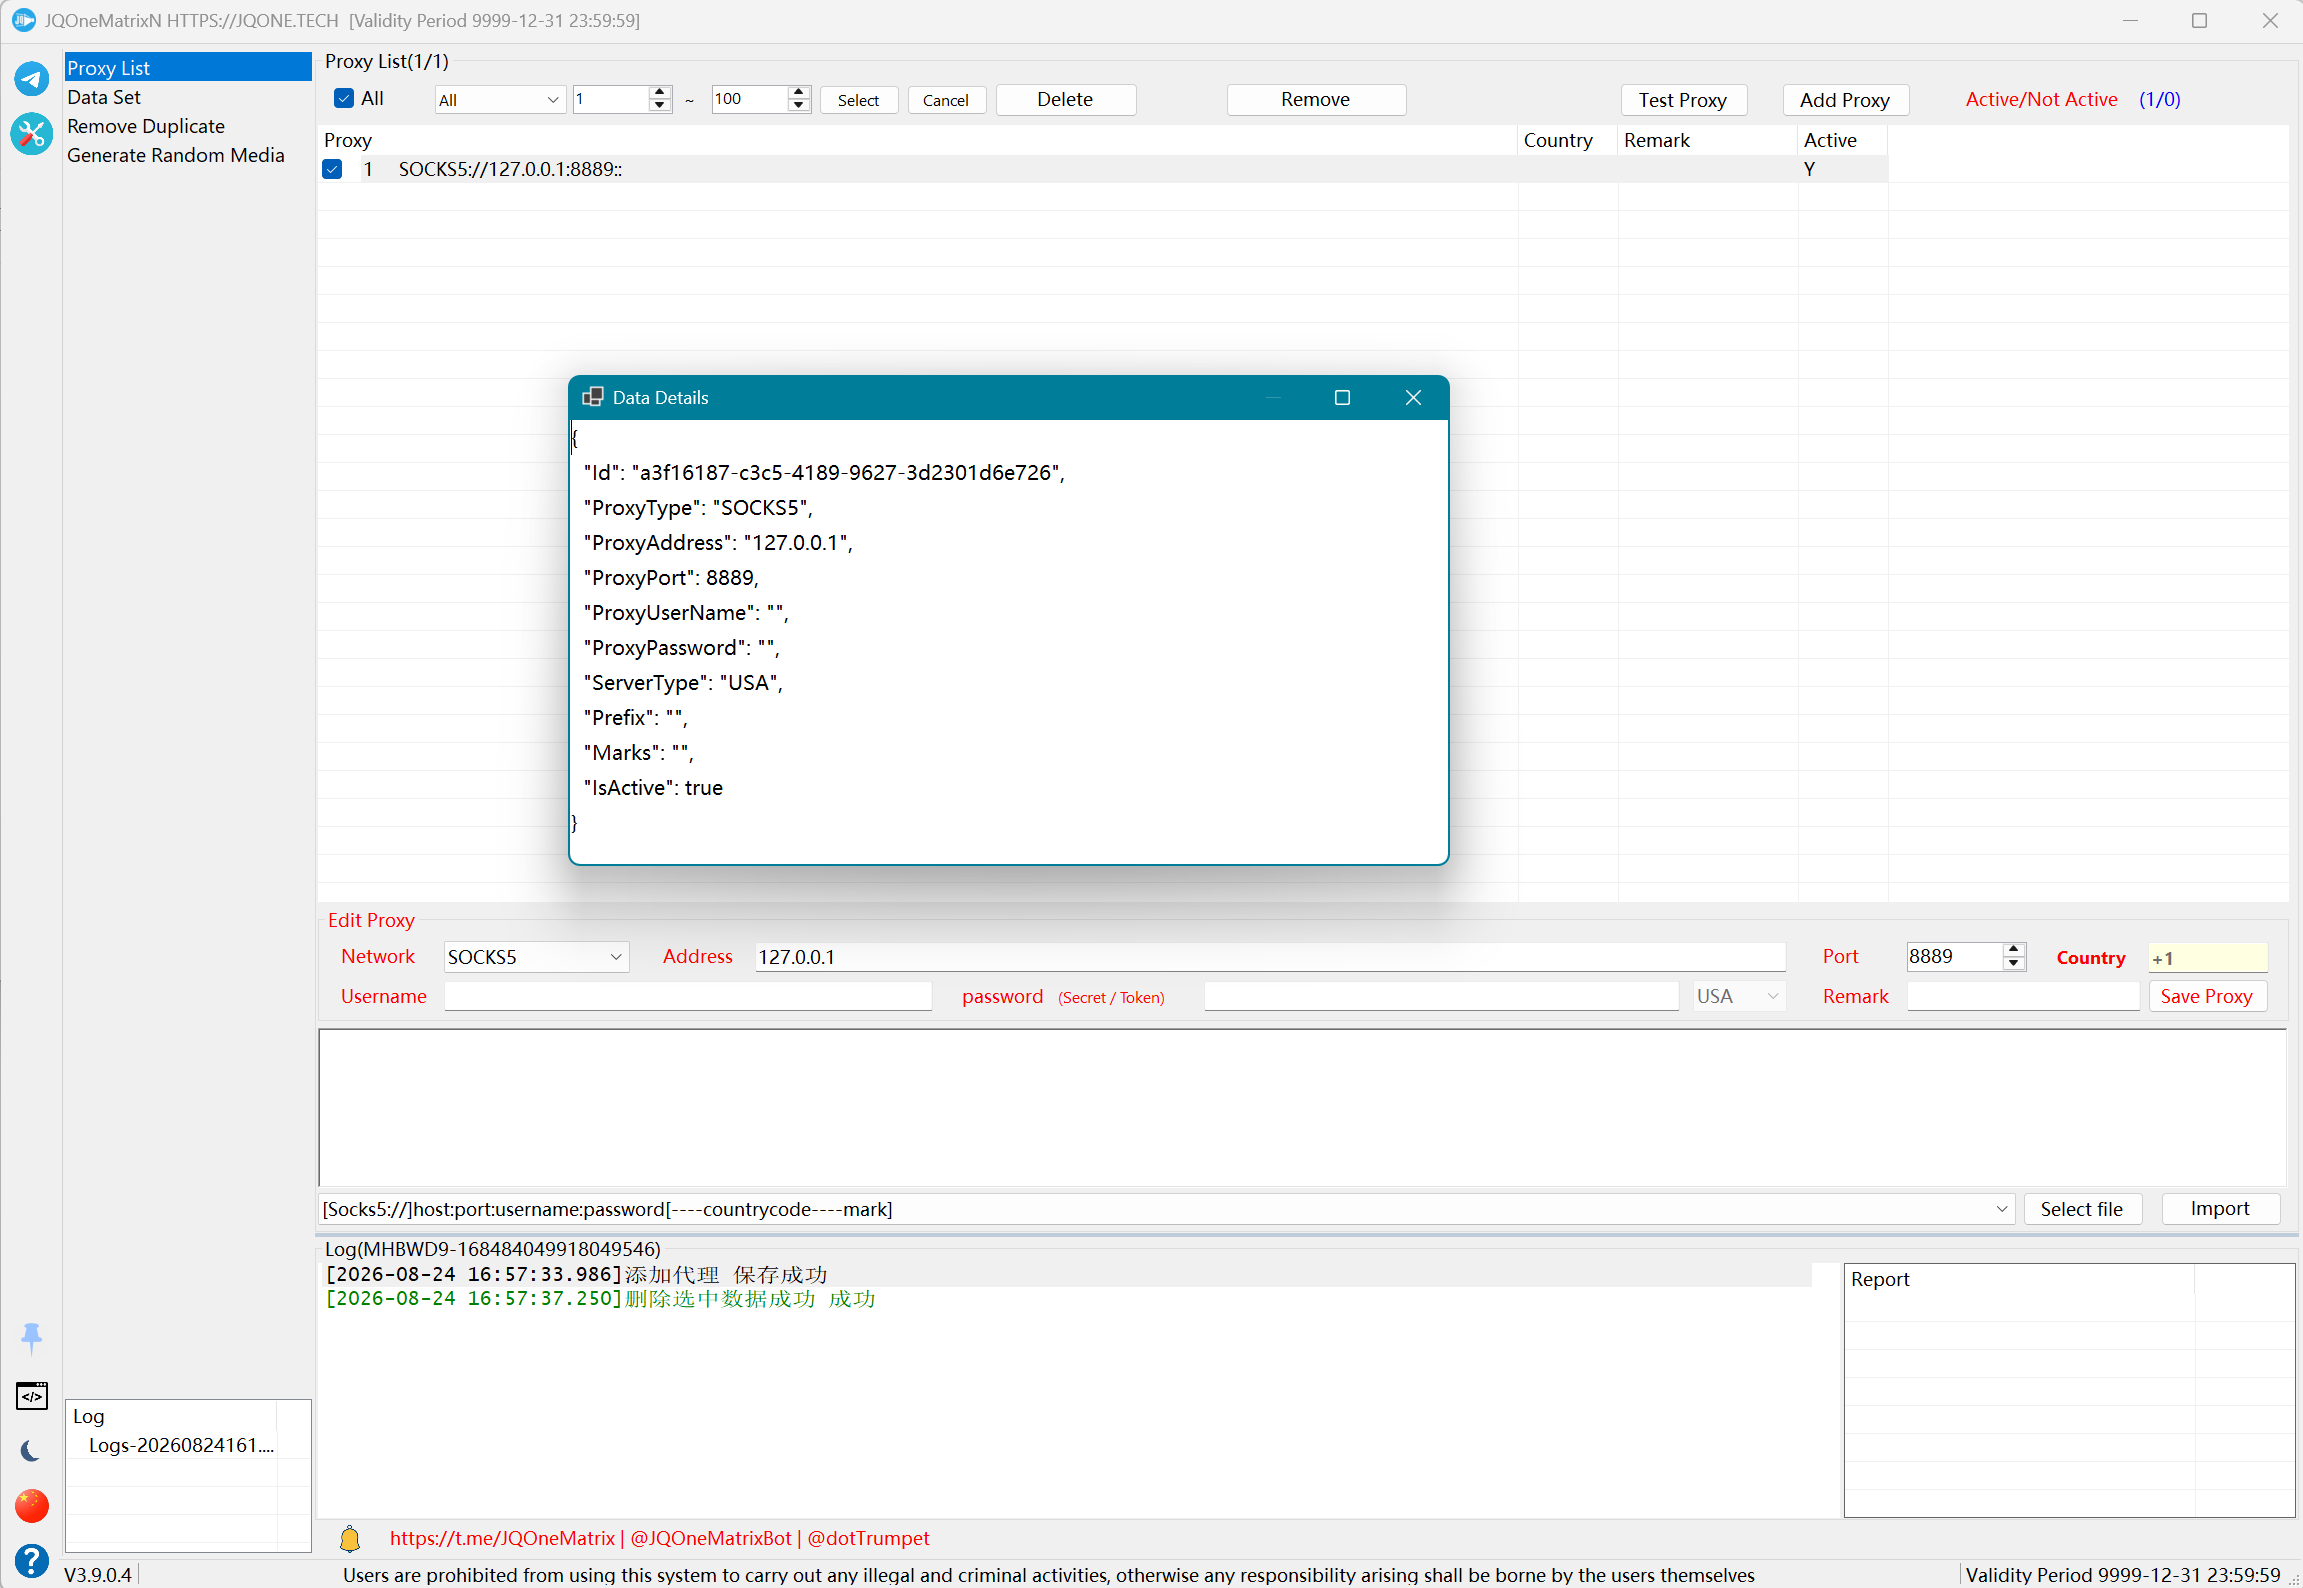
FAQ
Common startup and task checks
The software does not open
- If startup reports a missing .NET Runtime, open Microsoft's official .NET 10 download page and install .NET Desktop Runtime for Windows x64.
- Official Microsoft .NET 10 download page
- If the application previously worked but now opens no window, end the remaining JQOneMatrix.exe process in Task Manager and start it again.
- If the window opens with blank content, close the application, back up and remove DataN\LayoutCache.cache, and reopen it.
- If startup still fails, check Windows automatic time, network, proxies, license state, and file logs.
Multiple instances
- The software supports multiple instances only when licensed; license keys purchased from the Bot are single-instance by default.
- Give each instance a separate English/numeric folder, a different EXE filename, and an independent DataN, for example D:\1\JQOneMatrix1.exe and D:\2\JQOneMatrix2.exe.
- A single-instance key can be moved between devices but cannot run multiple instances at once. A multi-instance key runs multiple instances on one device only.
- Do not let multiple instances operate on the same account, Session, or data directory.
License and computer changes
- Changing computers signs out the previous device. Do not repeatedly activate across multiple devices.
- Trial keys allow 3 activations, day keys allow 3, and monthly keys allow 12.
- After the limit is reached, use the last successfully activated device. Provide machine code, software version, and activation source when requesting support.
Network and proxies
- The application UI and Telegram account connection are different network layers; account sign-in and tasks require Telegram connectivity.
- A system VPN and per-account proxy are also different layers. Import and test proxies first, then assign them to accounts or tasks.
- None uses the system default network. The application does not provide proxy or VPN service.
Logs and reports
- Feature logs show the current task, while Global Log shows cross-feature events and complete errors. Both are scrolling runtime logs.
- Persistent logs are under DataN\TelegramN_Logs and task reports are normally under DataN\TelegramN_Reports. The exact report path appears at the end of the task log.
- Microsoft Excel is recommended for task reports. WPS may cause formatting errors or report corruption.
DataN directory
- TelegramN:base Session files.
- TelegramN_BAK:backup of deleted Sessions; clean only after confirming they are no longer needed.
- TelegramN_Logs:persistent file logs organized by time.
- TelegramN_New:New-device Sessions created by batch registration.
- TelegramN_Reports:reports generated by tasks.
- TelegramN_Temp:temporary files; leftovers can be cleaned when the application is closed and no task is running.
- JQOneN.data / JQoneNSub.data:primary and secondary data files.
- LayoutCache.cache:layout cache; back it up and remove it when the interface is blank.
- Passports.cache:registration cache for account, password, country, and related data.
- Images:user avatars and related images.
Import password and F
- For standard import, entering a password and selecting F makes the entered password replace the JSON password.
- For Import New with a password but without F, the JSON password is tried first. If it fails, the entered password is retried and saved when successful.
- For Import New with a password and F selected, the entered password is tried first and the JSON password is used as fallback.
- Test the Password and F combination with a few accounts before batch import.
Network error logs
- When a log contains Tcp R or a connection exception, start with network troubleshooting.
- Check complete application startup, Windows networking, local routing, and proxy connectivity in order.
- A dynamic-proxy API may return the same exit IP for a period, increasing shared disconnect and restriction risk across accounts.
- Check proxy IP allowlists, validity, and long-connection stability. One successful test does not guarantee a stable long connection.
Telegram update synchronization
Receiving Telegram updates keeps account messages and state synchronized with the server. Auto group reply, auto private chat, reactions, and other monitoring features require it; when disabled, trigger messages may not arrive.
Synchronize Windows time
- Right-click the taskbar clock and open Adjust date and time.
- Enable automatic time and choose the correct time zone or enable automatic time-zone selection.
- Select Sync now, confirm the time is updated, and restart the application.
- Incorrect time can affect sign-in, licensing, and network requests.
Bulk private-message FAQ
- Test with 1–3 accounts and a small recipient set. If multiple accounts fail, check content, links, @ mentions, target data, and proxies.
- Avoid using identical content indefinitely. Historical guidance suggests revising content after about 500 sends, but this is not a current fixed limit.
- Follow Telegram rules and do not send illegal, fraudulent, harassing, or unauthorized content.
Bulk inviting FAQ
- Prefer a stable owner account and backup administrators with permission. Do not start large invitation tasks immediately in a newly created group.
- Historical guidance is 10–25 users per account per day, 1,000–2,000 per group per day, and waiting about half a month for a new group. These are not current fixed limits.
- Stop immediately on many failures, success logs without membership growth, or continuing membership decline. Do not repeatedly process the same users in a short period.
Group-message preparation and troubleshooting
- Maintain the random-character dataset before using {random}. Choose Default, Markdown, or HTML on the feature page and validate media and links first.
- Avoid using an identical message indefinitely. Use a few accounts and groups to check format, permission, account state, and proxy.
- Message content must comply with Telegram rules and applicable law.
Bulk registration FAQ
- Test a small batch first. For larger batches, prepare multiple stable proxies and preferably align number country with proxy exit country.
- For immediate bans, Peer Flood directly after registration, or USER_NOT_MUTUAL_CONTACT, check number source, proxy, device settings, contact relationship, and account restrictions.
- A provider's Username may mean API Username rather than its login username.
Switch account proxies
- Import and test proxies in Proxy List first.
- Select accounts in Account Management and use bulk proxy switch or proxy distribution.
- None means the system default network. A successful test does not guarantee a stable Telegram long connection.
Data and backup
Stop tasks and close related instances before copying Sessions, caches, imports, or outputs. Back up the complete DataN folder or complete related subfolder rather than individual files. Back up before cleaning TelegramN_BAK, TelegramN_Temp, or LayoutCache.cache.
FEATURES
Purpose and operating steps for every feature
Account Management
Manage account import, sign-in, filtering, proxies, profiles, sessions, and export.
Steps
- Select Import Accounts to load existing accounts. For a single sign-in, enter the phone number and proxy, then request the verification code.
- For single sign-in, enter the code and two-step password. For batch work, define the account scope with categories, search, indexes, and selection boxes.
- Choose the required action: bulk sign-in, bulk offline, proxy change or distribution, account check, restriction check, profile update, session cleanup, or export.
- Enter the data required by that action, such as proxy, name, username, bio, avatar, two-step password, or device parameters, then select its action button.
- Review the Network, Account, Restriction, Created, Proxy, and Log columns. Refresh account status before starting another operation.
Additional information
- Account-row colors identify status: blue is Premium; yellow is banned, deleted, invalid Session, or a disconnected device; pale yellow is Blocked/frozen; orange is task failure; pale pink is Scam.
- The ® symbol means the account ID is below the minimum ID configured in Global Settings and therefore matches the current old-account definition. ! means the account has an avatar or username.
- The rightmost # column shows the account's current group count.
- If Telegram returns EmailCode during manual sign-in, enter it in Email Code rather than the normal verification-code field.
- A None proxy uses the system's default network. Test proxies in Proxy List before bulk switching or distributing them.
Note: Test with a small number of accounts and records first. Available controls and results depend on the license, account state, target permissions, and Telegram response.
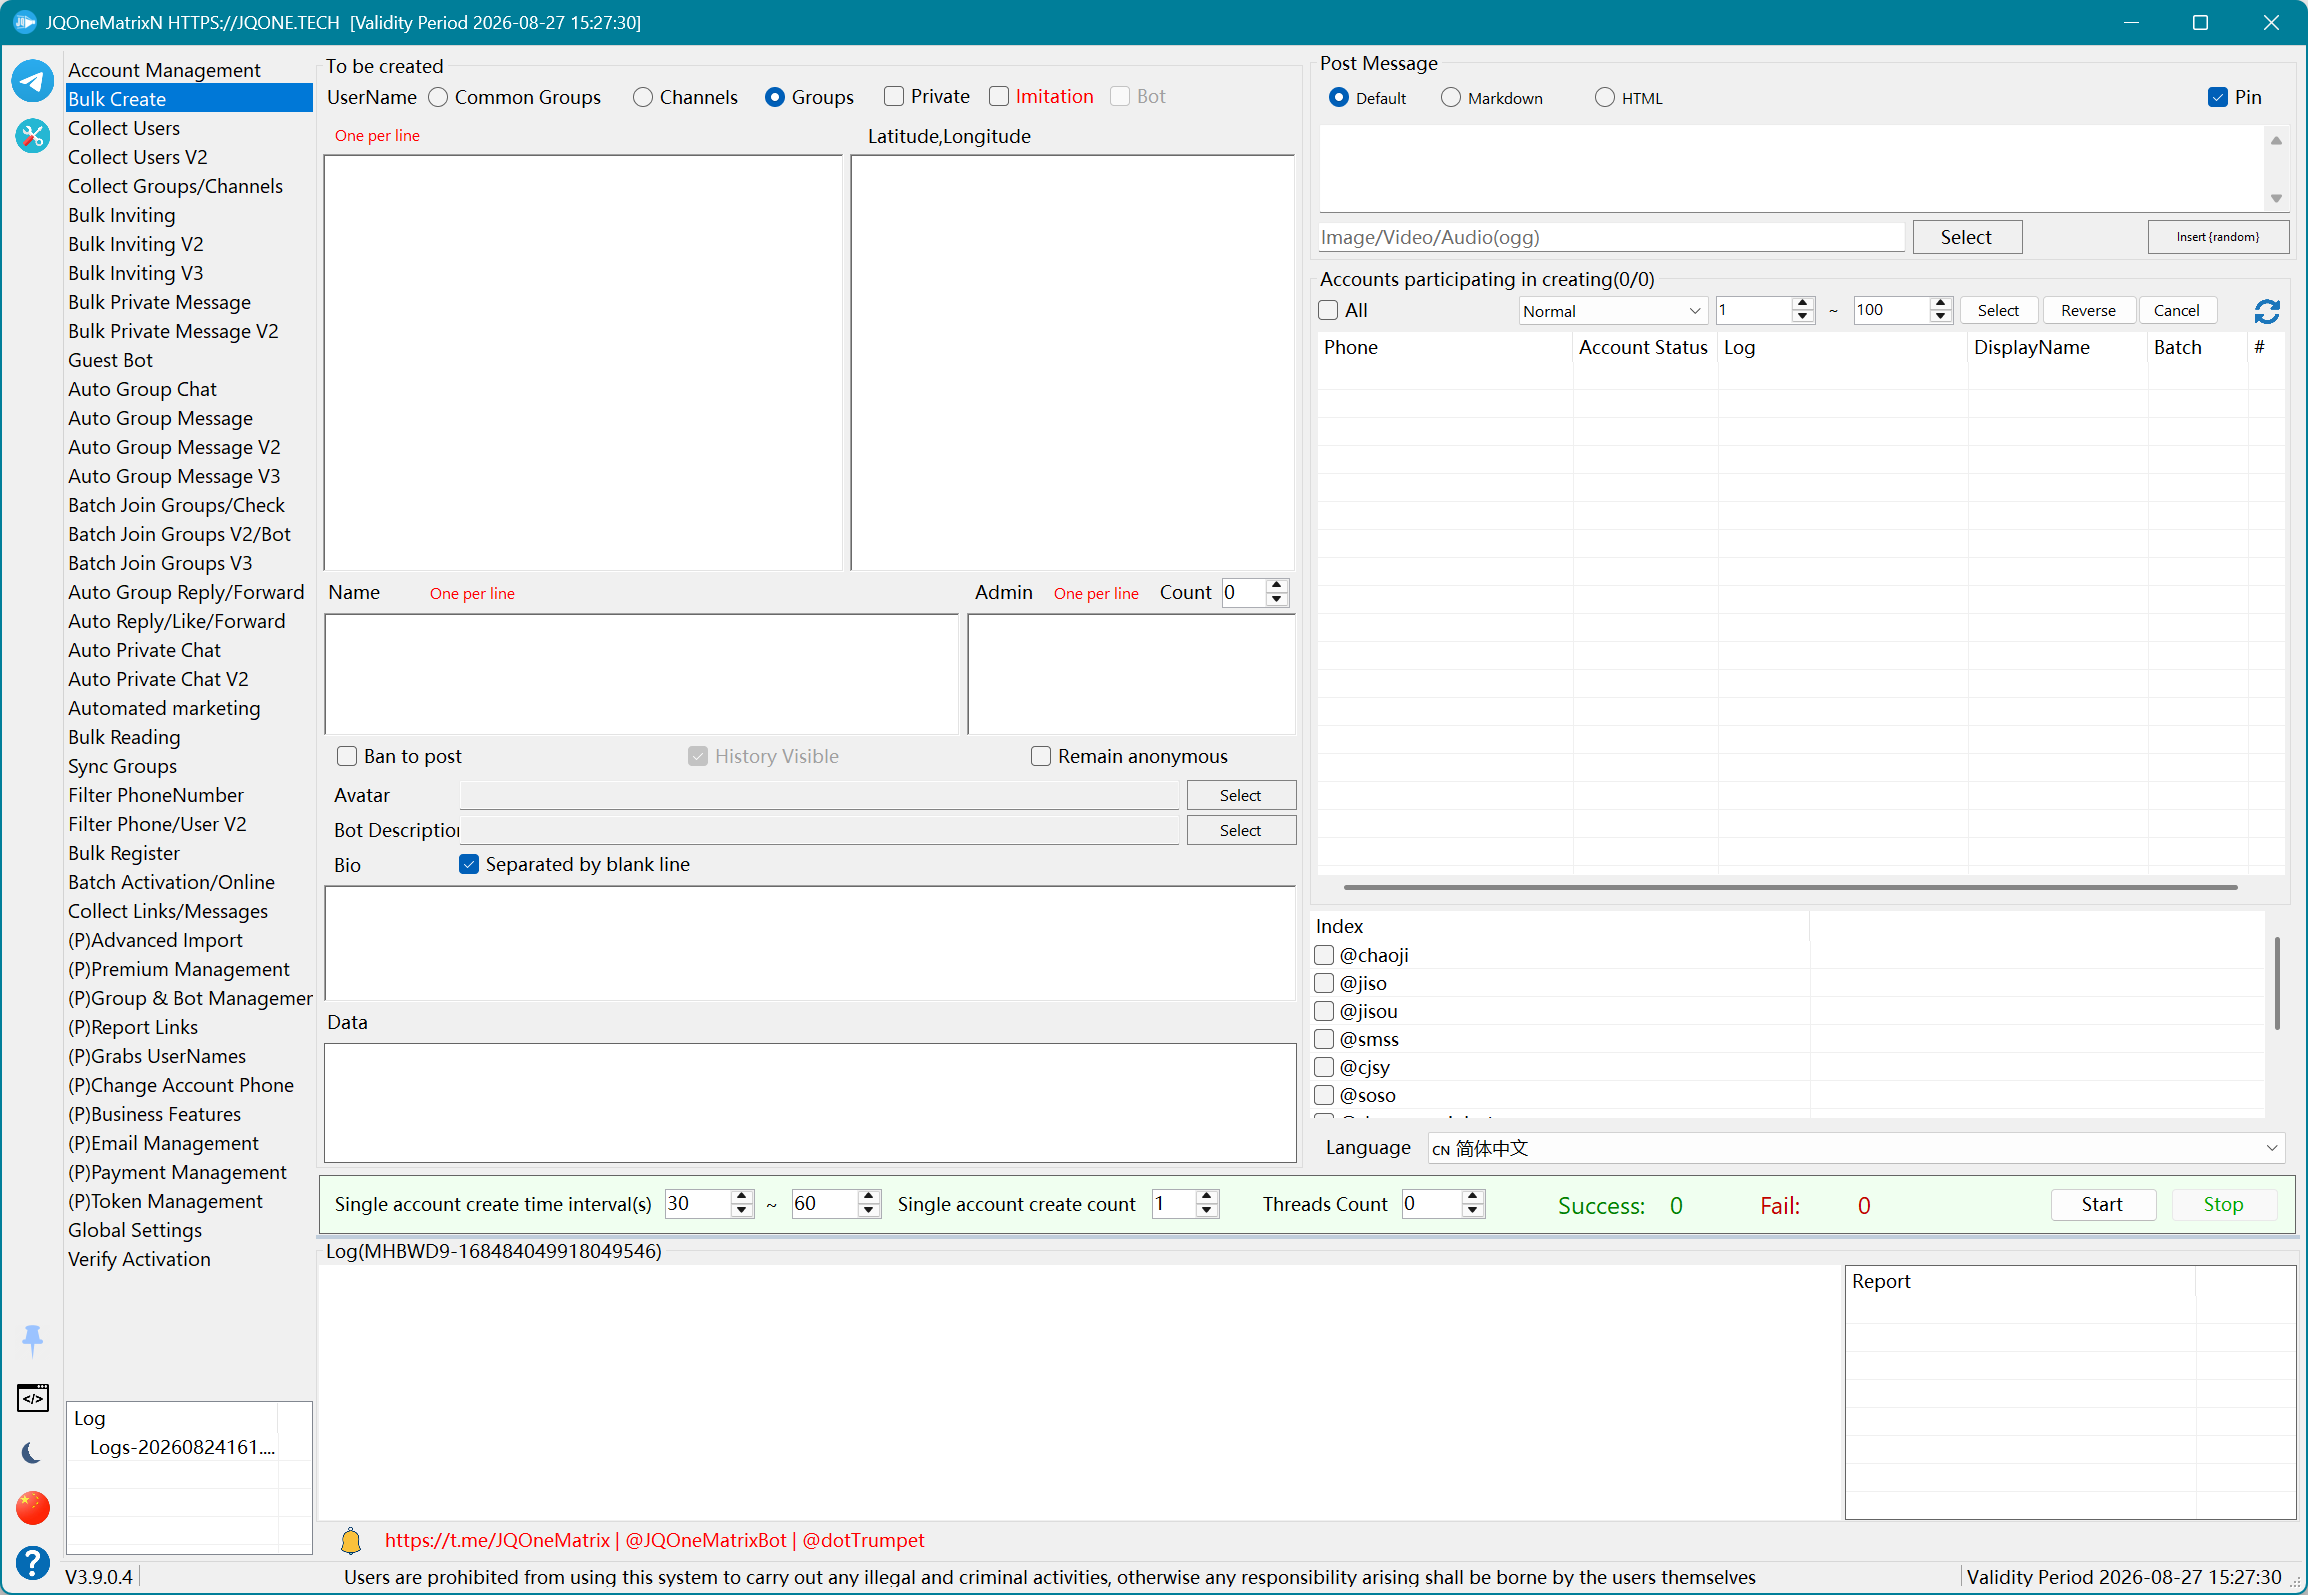
Bulk Create
Create channels or groups in bulk, assign administrators, and optionally send and pin an initial message.
Steps
- Select the creator accounts and choose Channel, Group, Standard Group, or another available creation type.
- Enter titles, bio, usernames or batch data, and quantity, then configure public/private, visible history, posting restrictions, anonymous mode, or Bot-first options.
- If needed, select group images or Bot images, enter administrators, and set the administrator limit.
- For an initial message, choose Default, Markdown, or HTML and enter content or media. When using {random}, enable the fake-message option, and enable Pin if required.
- Set threads and the minimum/maximum interval, then select Start. Check success and failure counts, or select Cancel to stop.
Note: Test with a small number of accounts and records first. Available controls and results depend on the license, account state, target permissions, and Telegram response.
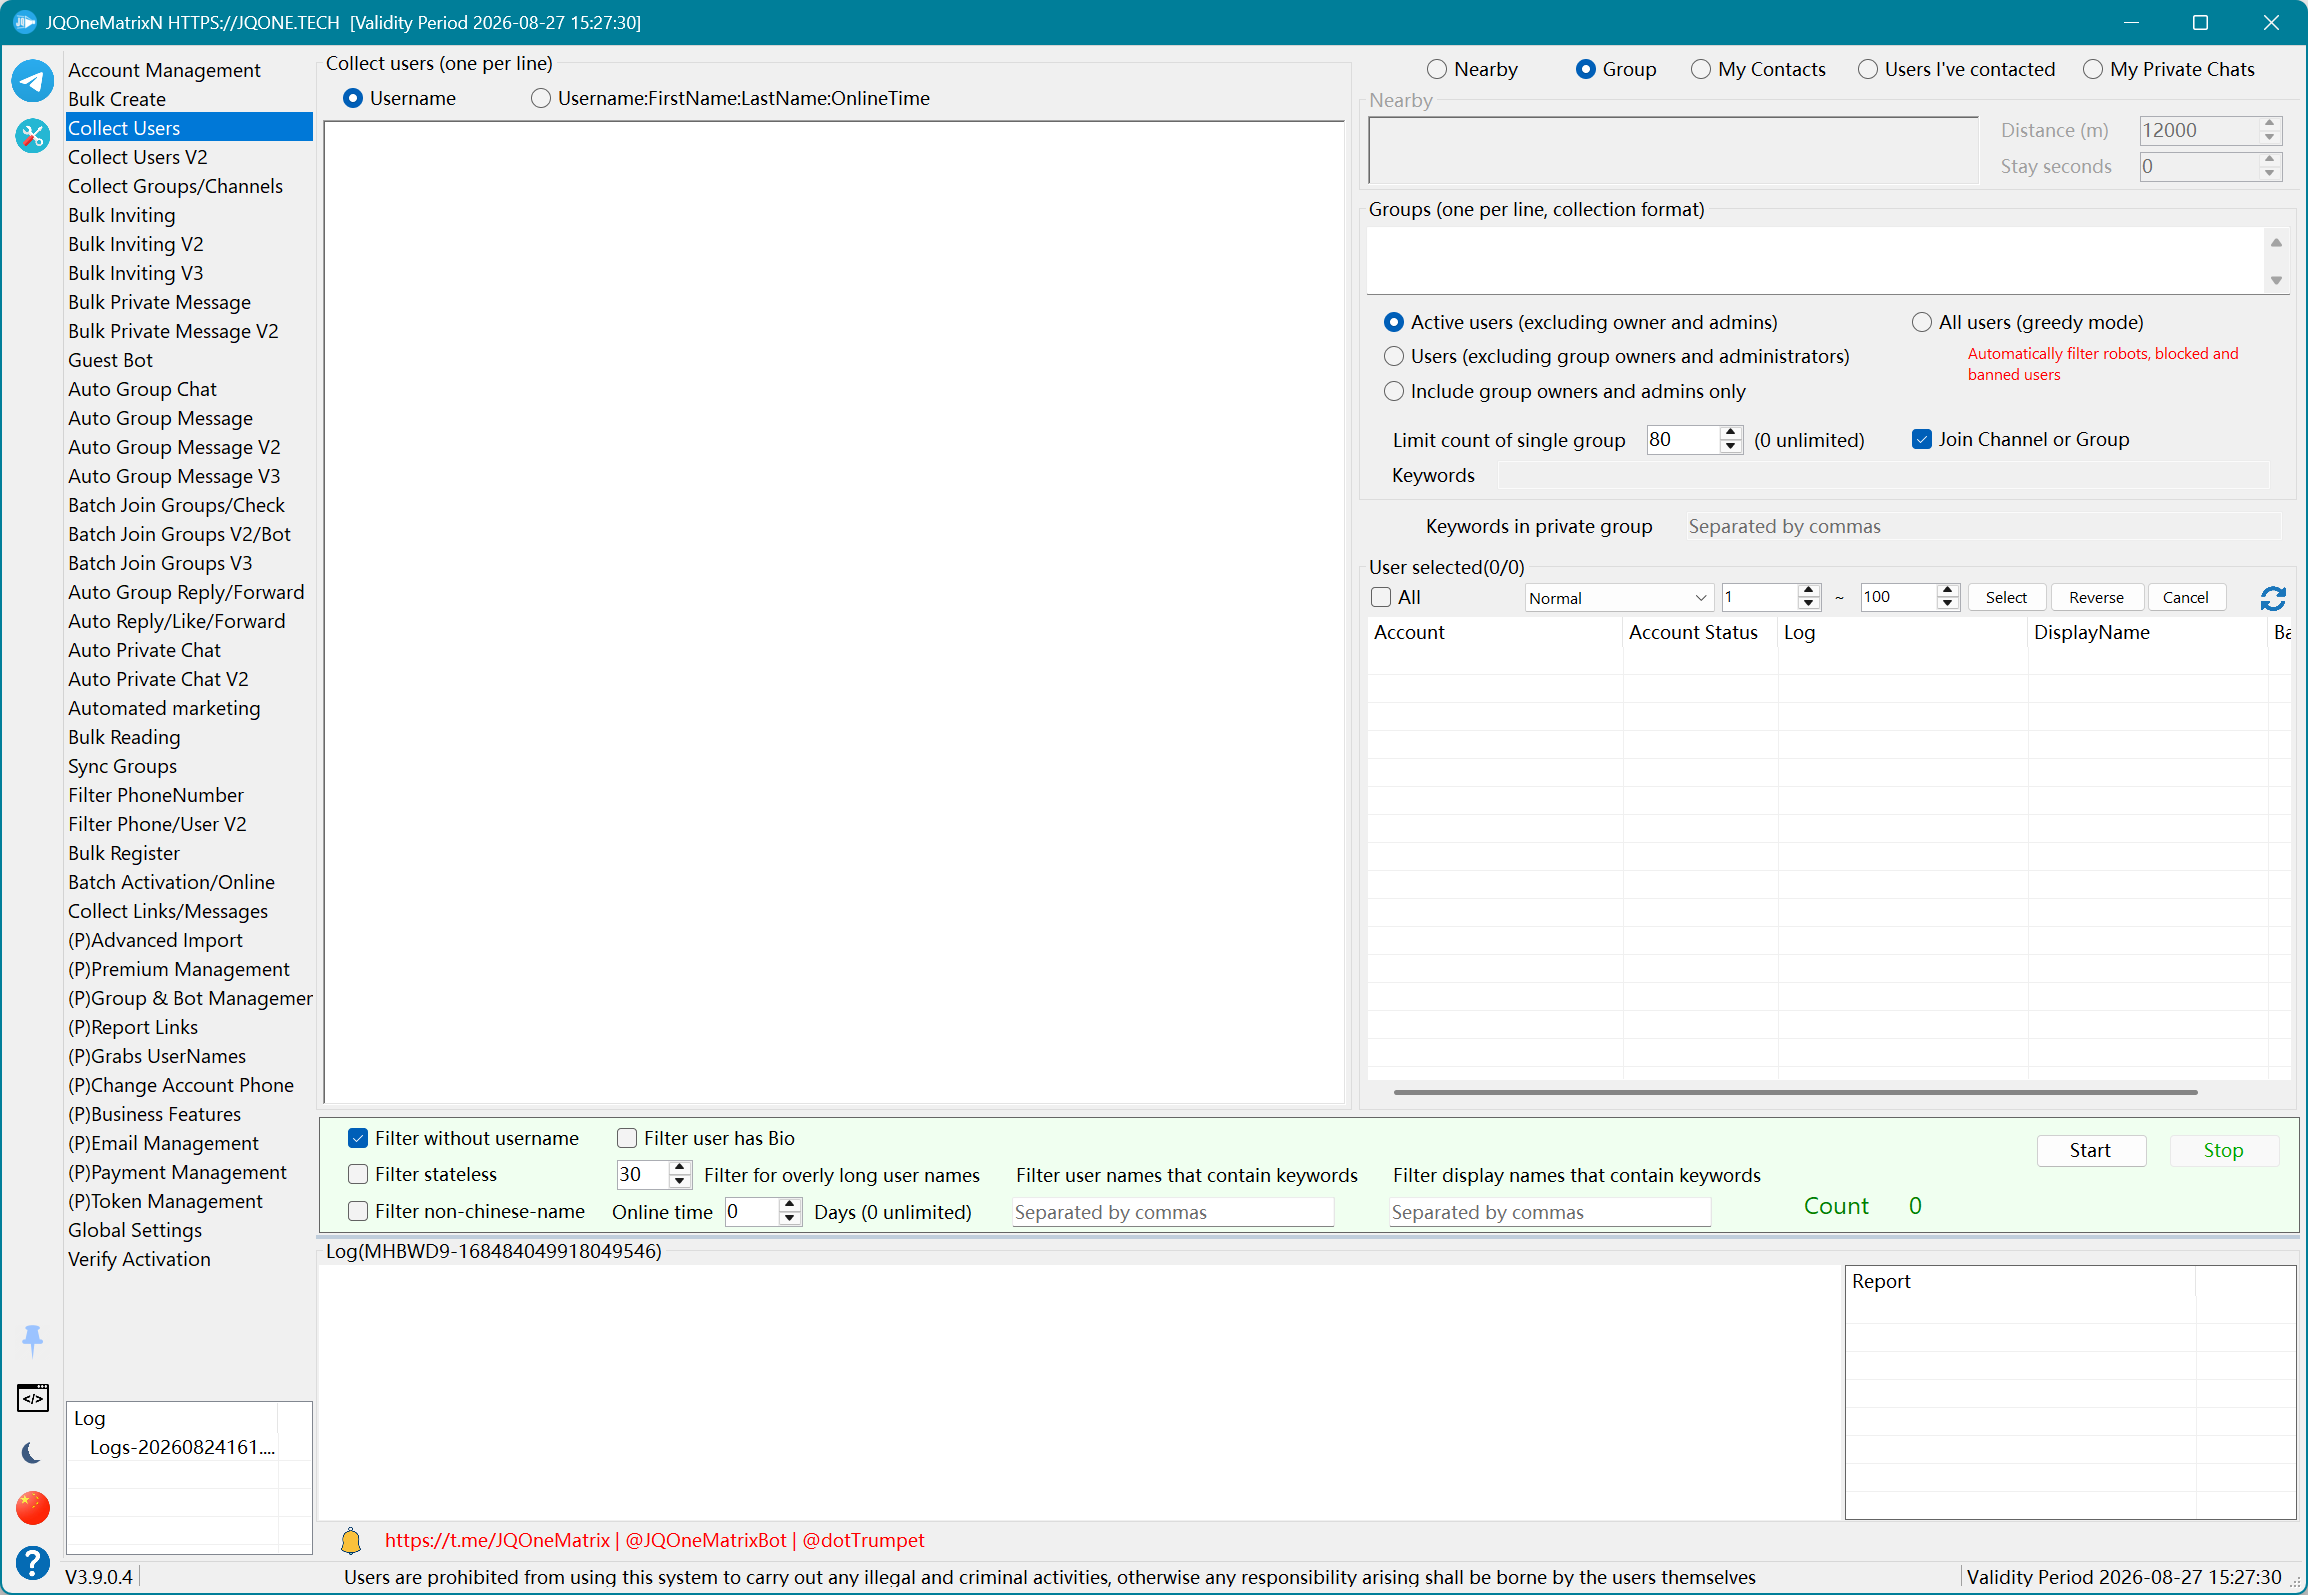
Collect Users
Collect nearby users, group or channel members, contacts, previous chats, private groups, and supported hidden-member sources.
Steps
- Choose a collection mode: custom users, group members, administrators only, recently active, greedy collection, nearby users, contacts, previous chats, or private groups.
- Enter group/channel sources or private-group keywords, or provide latitude and longitude for nearby collection. Enable Join Group and set the stay time when the source must be accessed.
- Set the per-group limit, online-day range, and username output format.
- Enable filters as needed for empty usernames, bio, status, non-Chinese names, username length, username/display-name keywords, and related groups.
- Select Start. Review the user output and report for counts and fields, or select Stop to end an active collection.
Additional information
- Telegram no longer provides the original nearby-user data, so the remaining Nearby Users entry may return no results.
- The on-screen collected count can differ from the final report because filtering and deduplication are applied before output.
Note: Test with a small number of accounts and records first. Available controls and results depend on the license, account state, target permissions, and Telegram response.
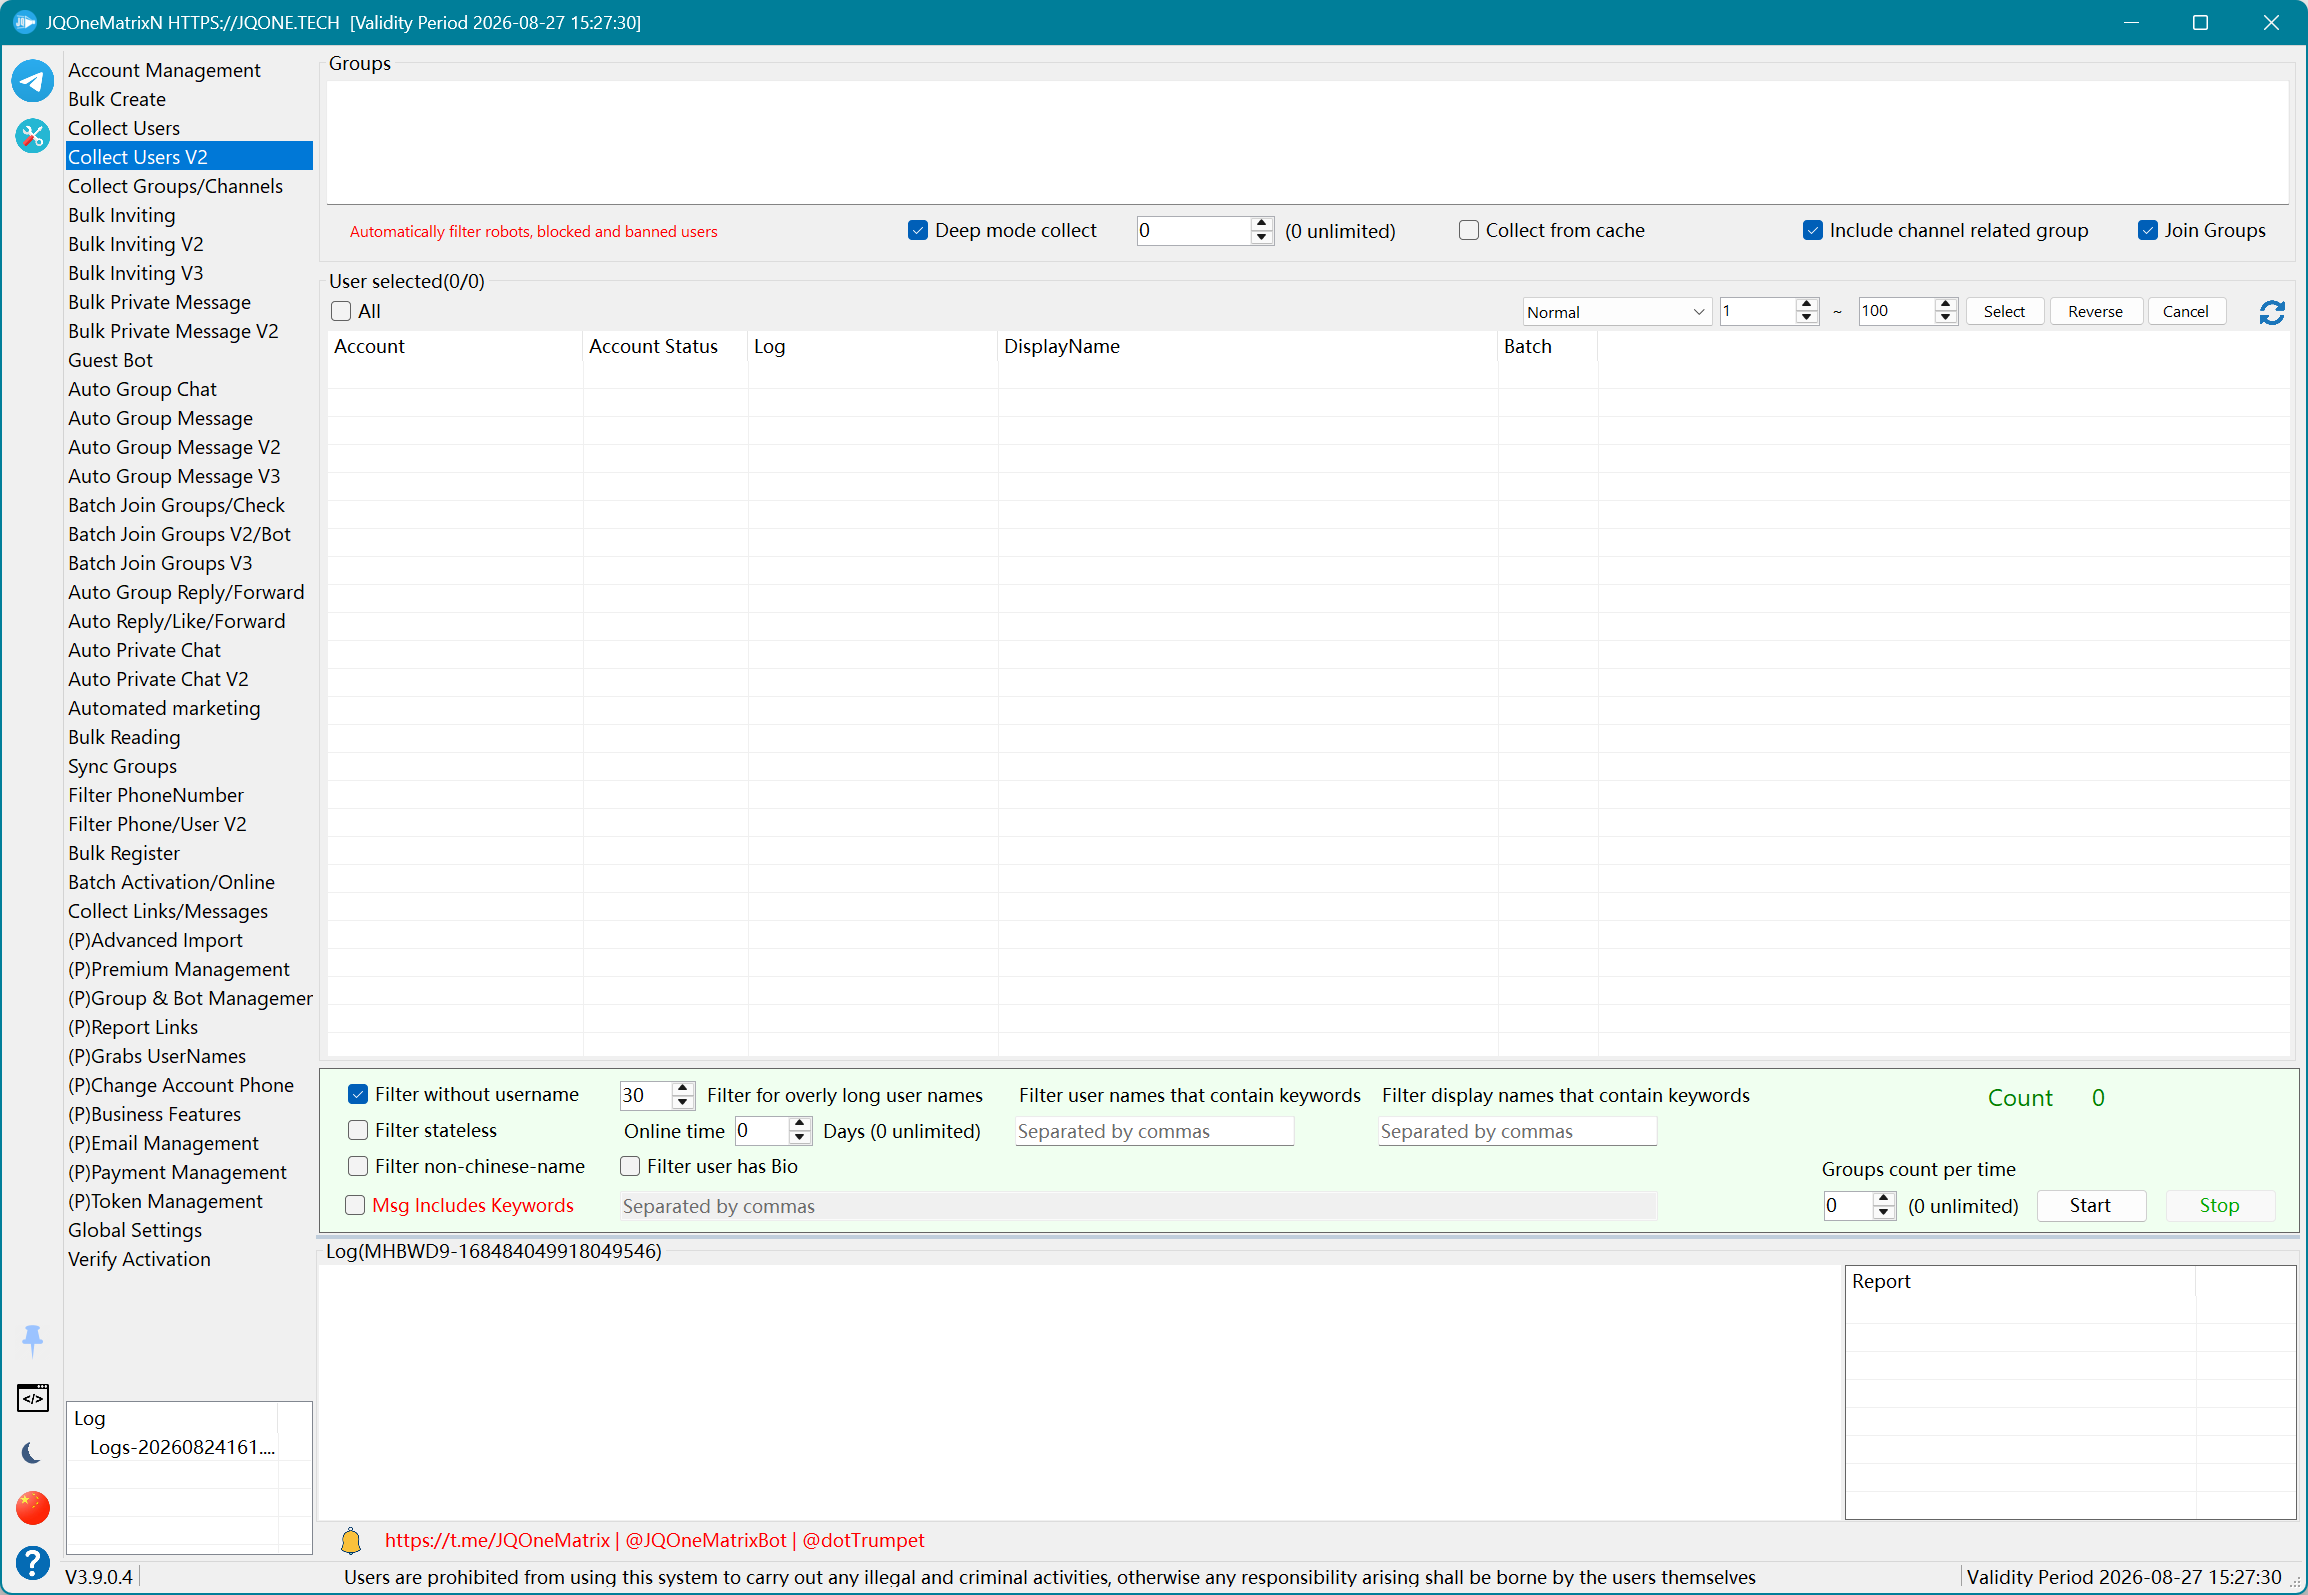
Collect Users V2
Extract users from group lists, cached data, or deep collection and filter them by message and profile conditions.
Steps
- Select worker accounts and paste the group list to process.
- Choose cache extraction or deep collection for the available data source. Enable Join Group when the accounts have not entered the source groups.
- Set the per-group collection limit and online-day range, and decide whether to include related groups.
- Configure username, bio, status, non-Chinese, length, and keyword filters. To filter by group messages, enter the message keyword and message count.
- Select Start and review the collected list and statistics. Select Stop before changing any filter.
Additional information
- This version is better suited to large, very large, and hidden-member groups.
- Deep Collection means scanning backward for the configured range from the latest message ID.
- For hidden-member groups, join with secondary accounts, enable Telegram update synchronization, wait for group messages to enter the local cache, and then use cache extraction.
Note: Test with a small number of accounts and records first. Available controls and results depend on the license, account state, target permissions, and Telegram response.
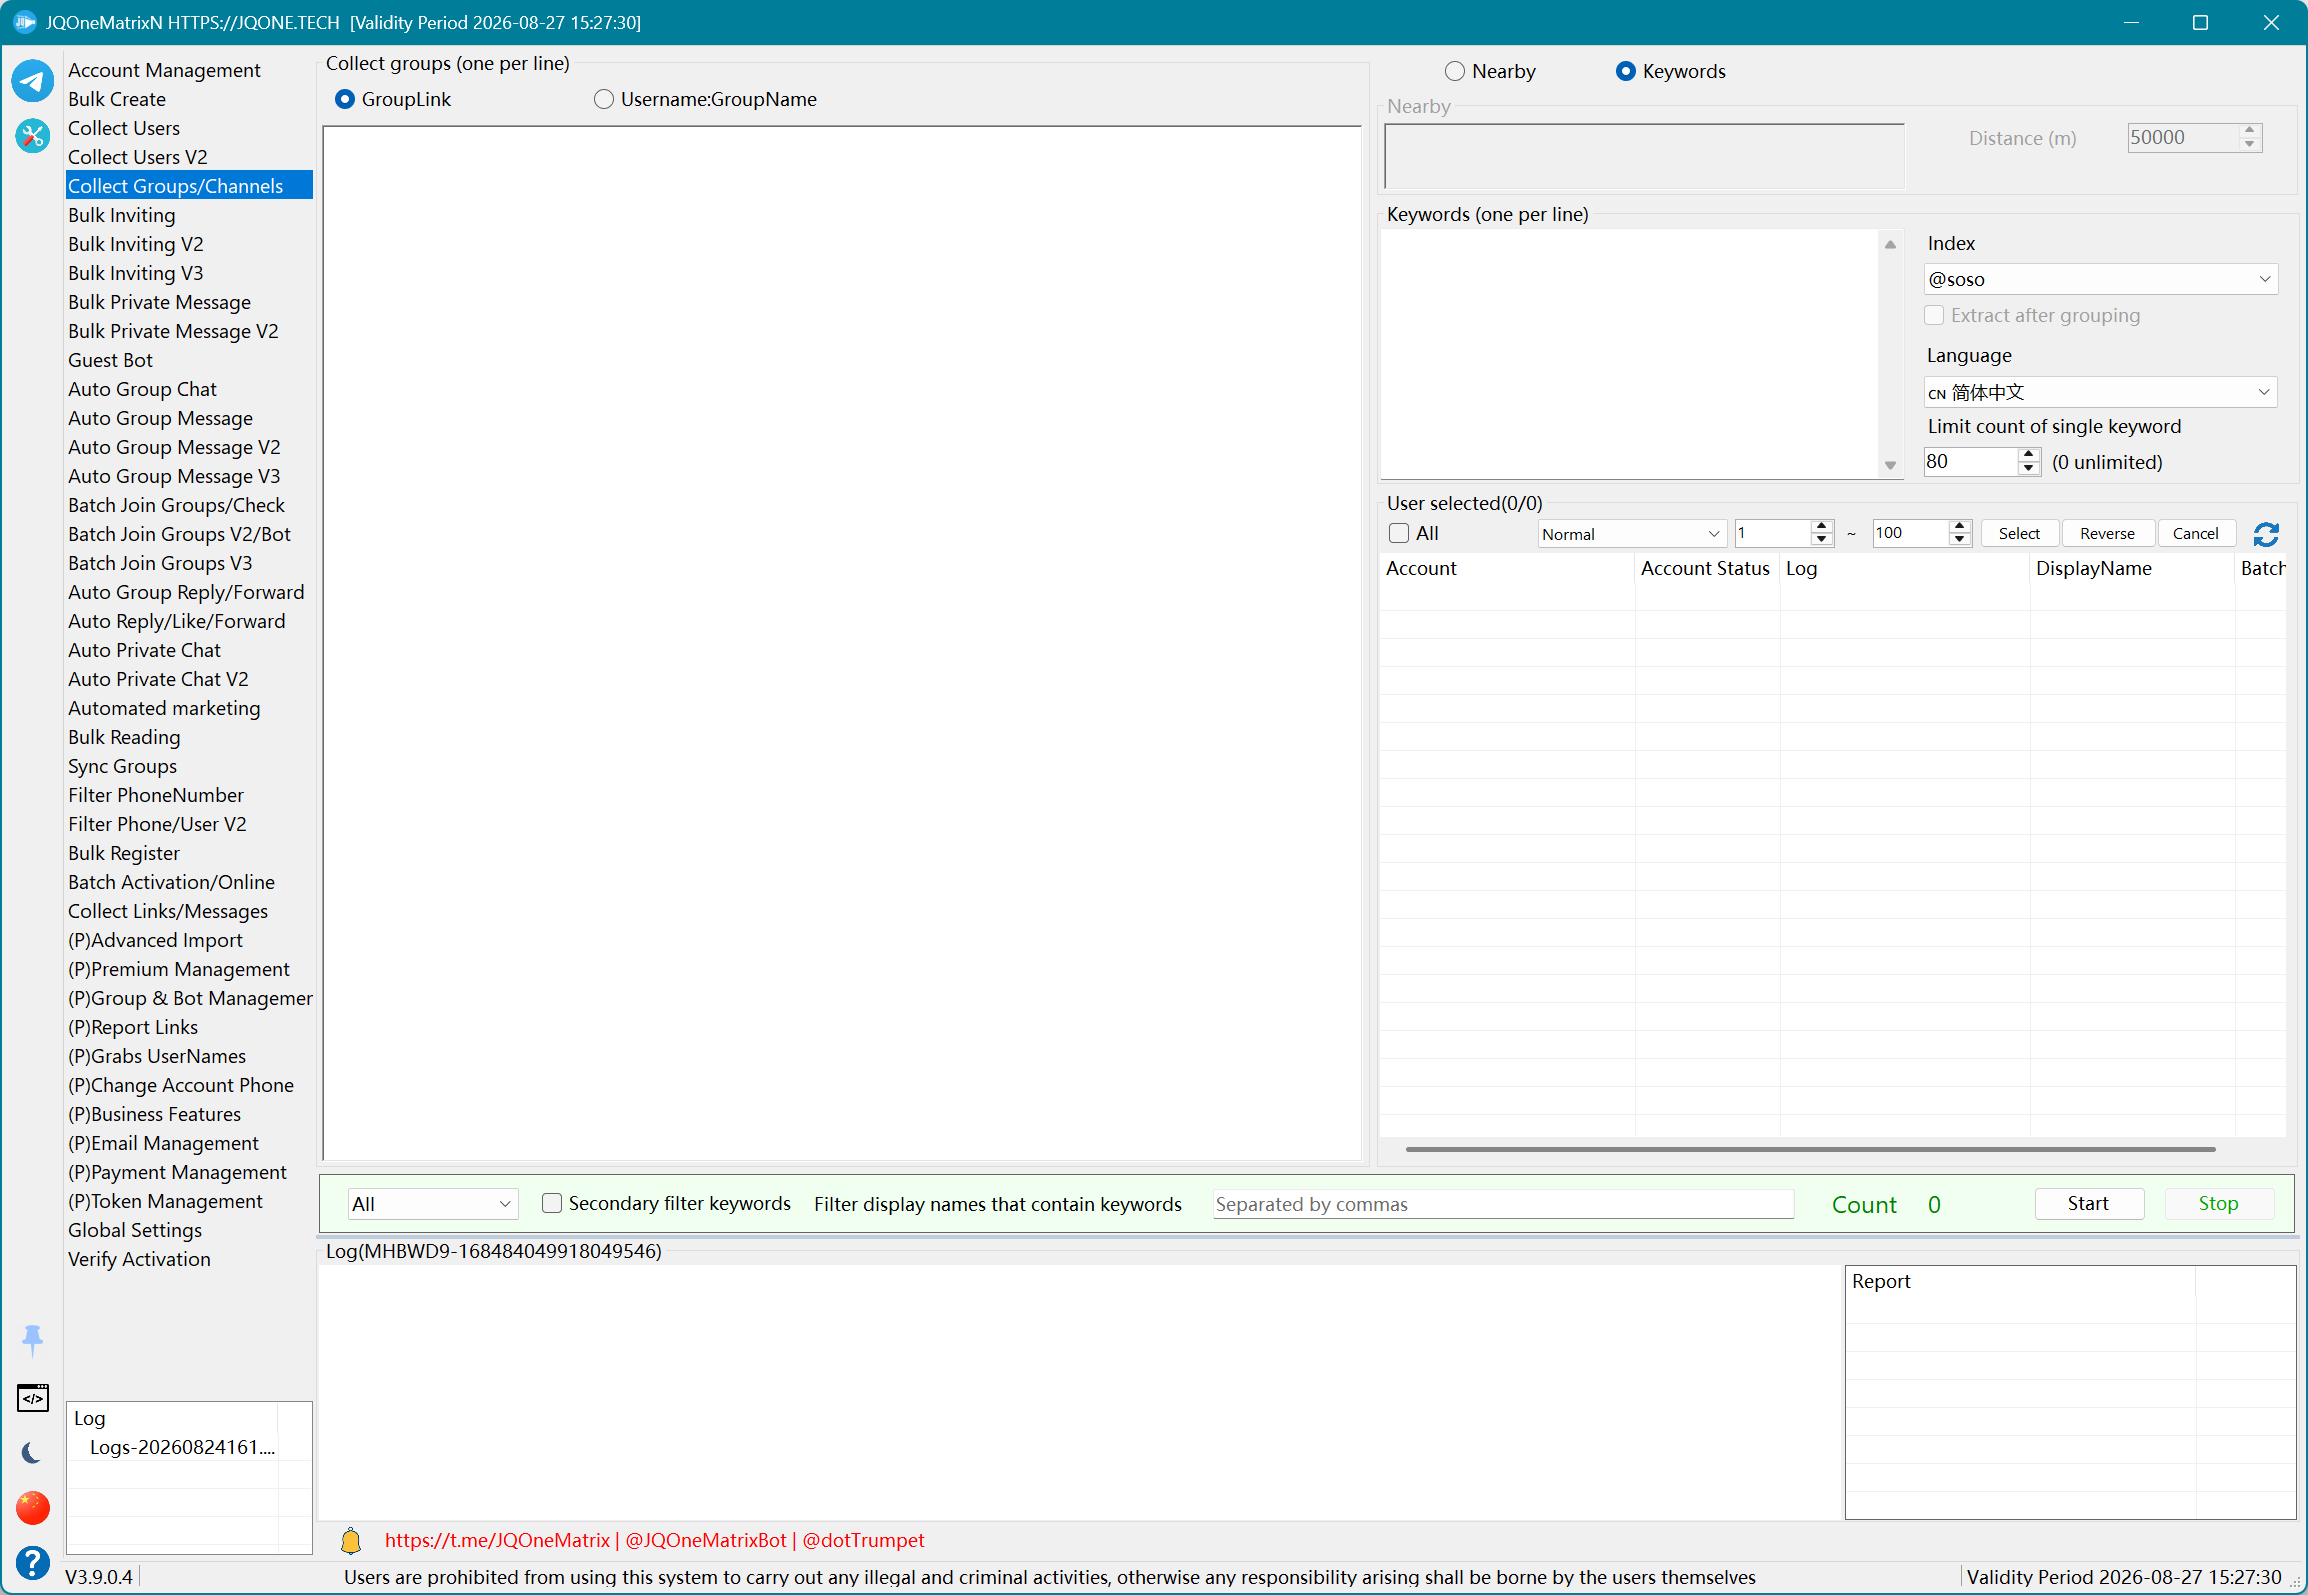
Collect Groups/Channels
Collect groups and channels through nearby groups, Telegram default search, Bot search engines, or web search.
Steps
- Select worker accounts, then choose Telegram Default Search, Bot Search, Web Search, or Nearby Groups.
- For search modes, enter keywords, language, start index, collection type, and filter type. For nearby mode, enter latitude, longitude, and distance.
- Set the collection limit per keyword. Enter a group display-name keyword when secondary filtering is required.
- Choose group-link output or the username:group-name format. You can also extract groups from My Folders when needed.
- Select Start and review group/channel types and output format. Treat an empty Nearby result as an API limitation, or select Stop to end the task.
Additional information
- Telegram Default Search uses the Telegram search capability available to the application. Bot Search and Web Search discover groups from their corresponding external sources.
- Telegram no longer provides the original nearby-group data, so the Nearby Groups entry may return no results. This does not indicate an application or account failure.
Note: Test with a small number of accounts and records first. Available controls and results depend on the license, account state, target permissions, and Telegram response.
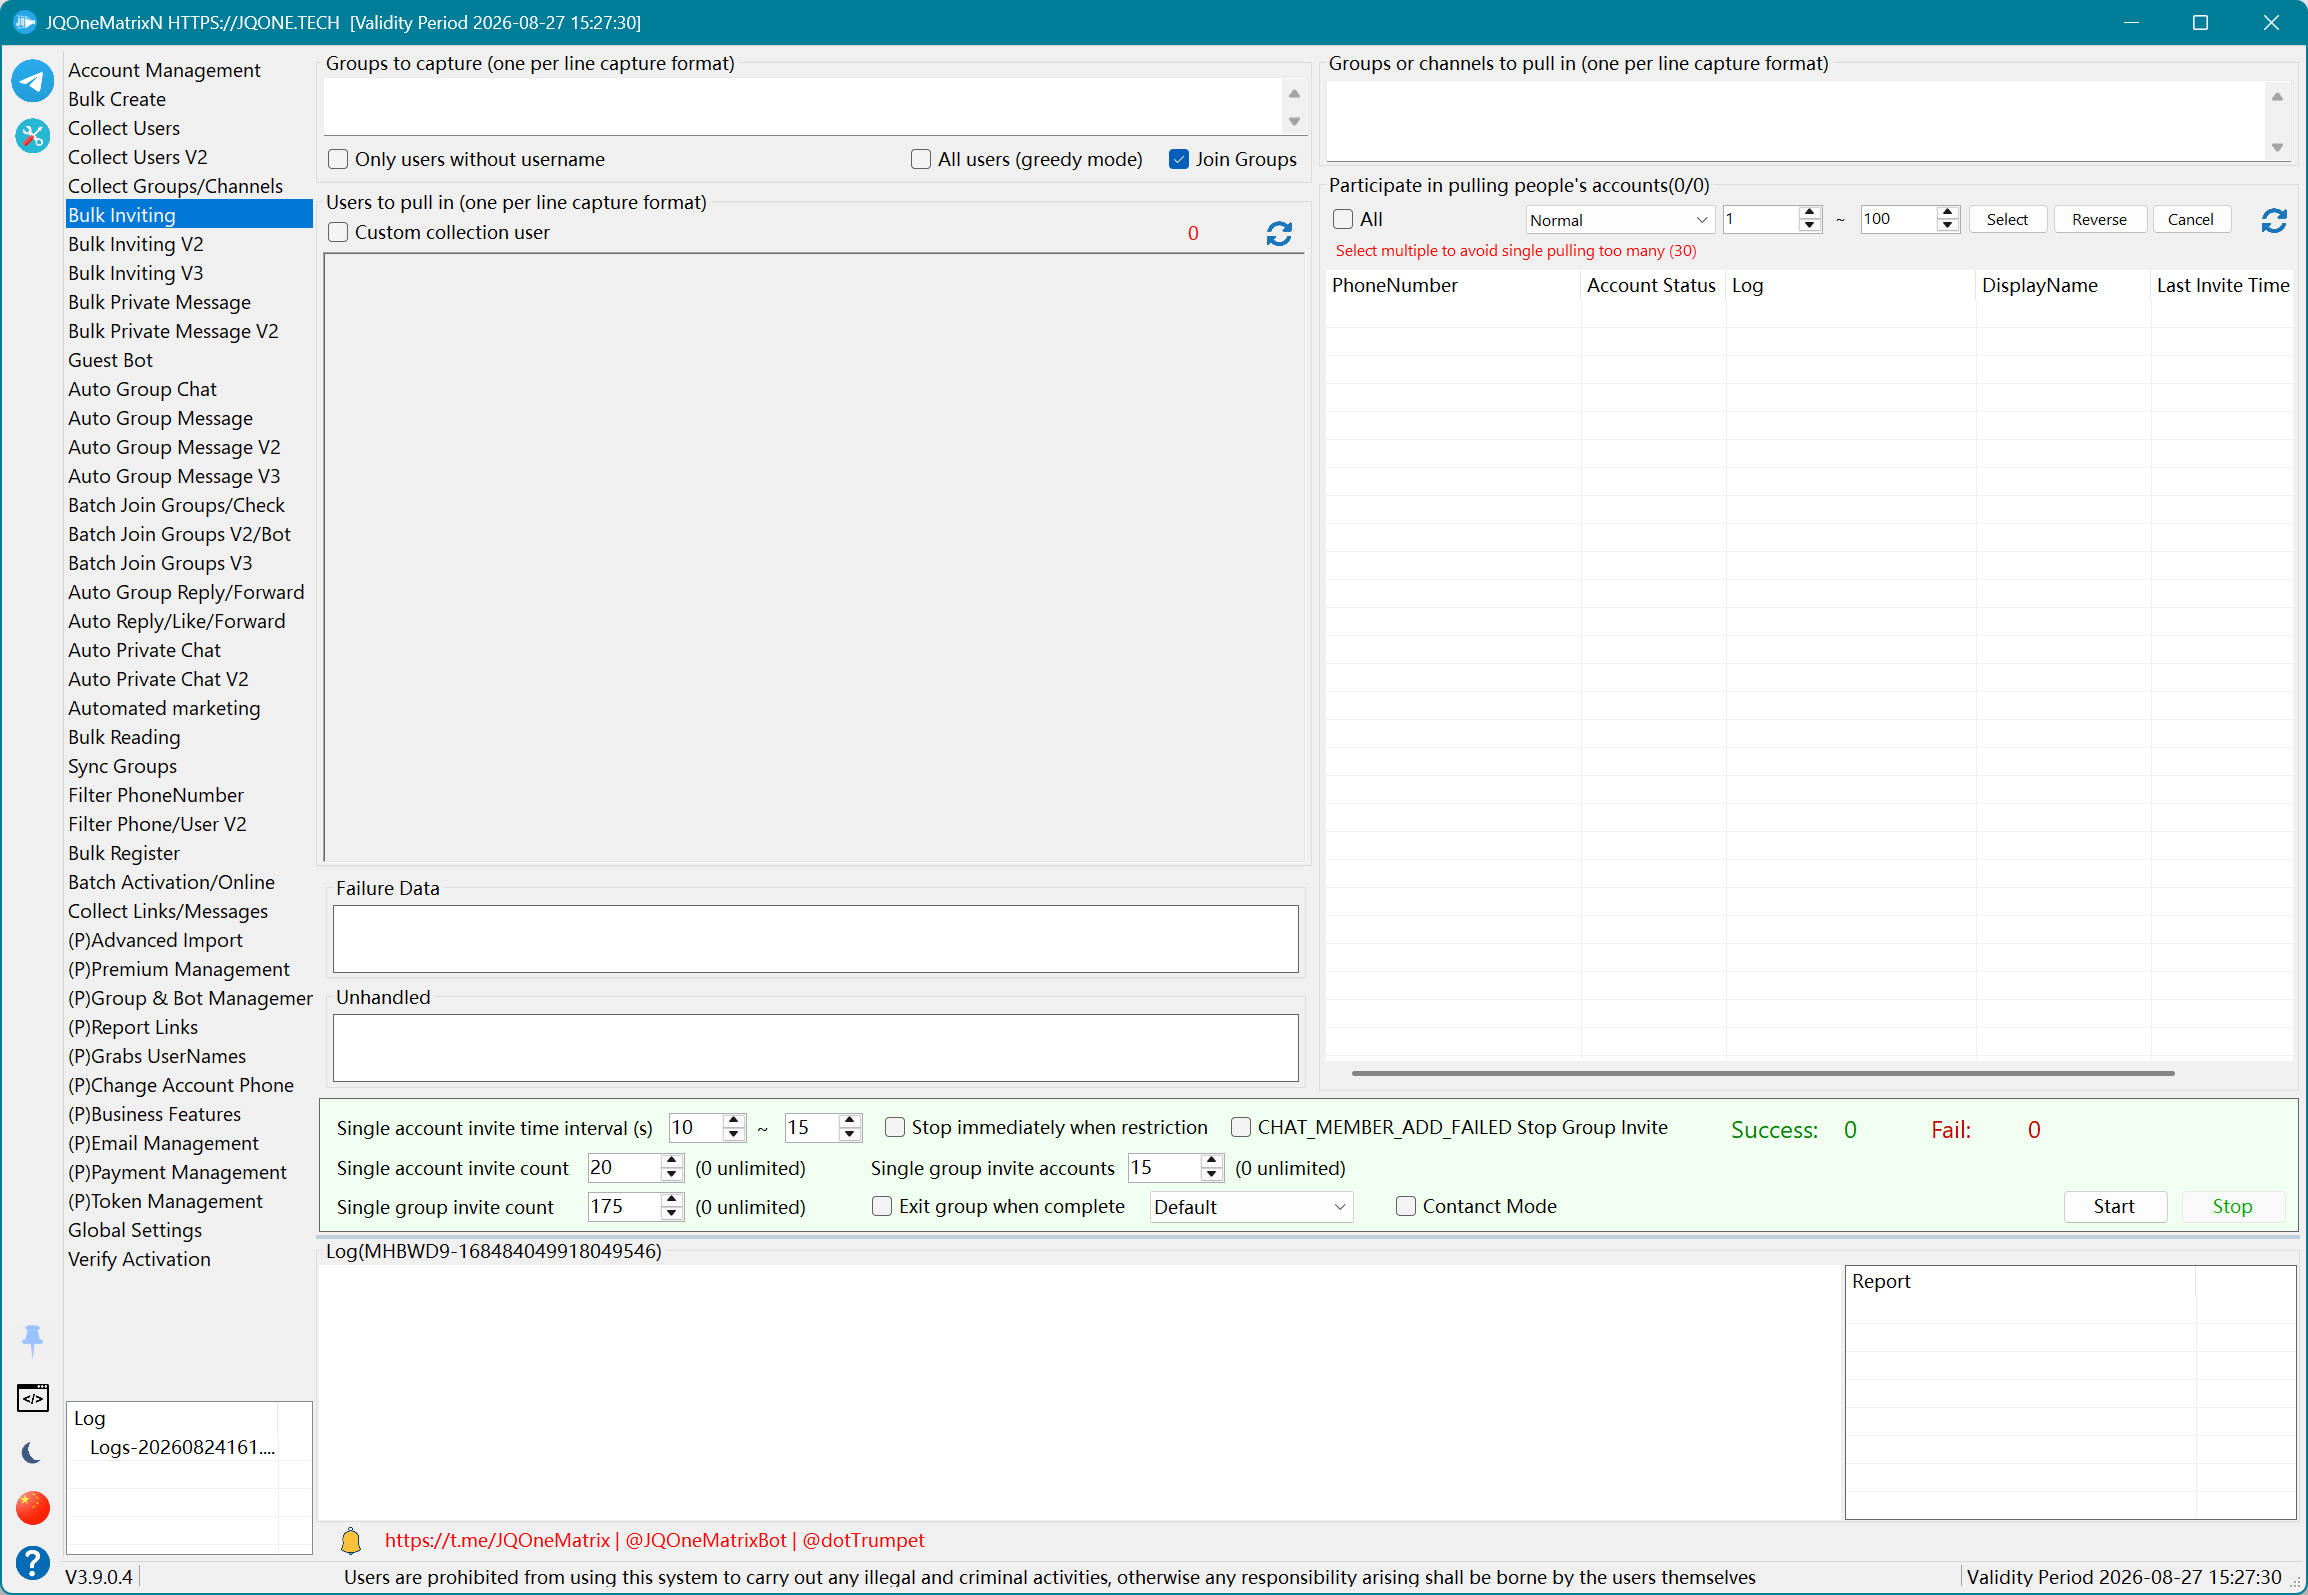
Bulk Inviting
Invite imported users directly or collect users from a source group and invite them to a target group.
Steps
- Select inviter accounts and enter target groups. Import users directly or choose collection from source groups.
- For source-group collection, enter the sources and configure custom collection, greedy mode, Join Source Group, and empty-username filtering.
- Enable contact mode when required, then set invites per account, invites per group, and accounts per group.
- Set minimum/maximum intervals, leave-on-completion, and whether to stop on account restriction or CHAT_MEMBER_ADD_FAILED.
- Select Start and review Successful, Failed, and Unprocessed users separately. Select Cancel before changing targets or limits.
Additional information
- Worker accounts must have invitation permission in the target group. Channel subscribers normally need appropriate administrator permission to invite.
- The report path is printed at the end of the task log. After closing the application, reports can be found under DataN\TelegramN_Reports.
- If many invitations fail, or logs report success while membership does not increase or keeps decreasing, stop immediately and check accounts, permissions, and target-group state.
- Historical guidance suggests 10–25 invitations per account per day, 1,000–2,000 per group per day, and waiting about half a month before large invitation tasks in a new group. These are not current fixed Telegram limits; adjust to account state and actual responses.
- Do not repeatedly invite the same users within a short period. Prefer a stable owner account and configure backup administrators with the required permissions.
Note: Test with a small number of accounts and records first. Available controls and results depend on the license, account state, target permissions, and Telegram response.
Bulk Inviting V2
Distribute invitations across target groups and accounts, with optional group-title changes before or after inviting.
Steps
- Import target groups and users, then select the participating inviter accounts.
- When contacts are required, enable Contacts Only and Bidirectional Contacts, and select contact mode as appropriate.
- For target-title changes, configure change-on-entry, random titles, unique titles, change after a specified count, and whether renaming accounts should skip inviting.
- Set invites per account per group, group joins per account, threads, interval, leave-on-completion, and both restriction stop conditions.
- Select Start and review Successful, Failed, and Unprocessed results. Select Cancel before changing the rules.
Additional information
- V2 focuses on batch targets and account distribution and is generally suitable for common inviting tasks. Actual performance still depends on account state, target permissions, and Telegram responses.
Note: Test with a small number of accounts and records first. Available controls and results depend on the license, account state, target permissions, and Telegram response.
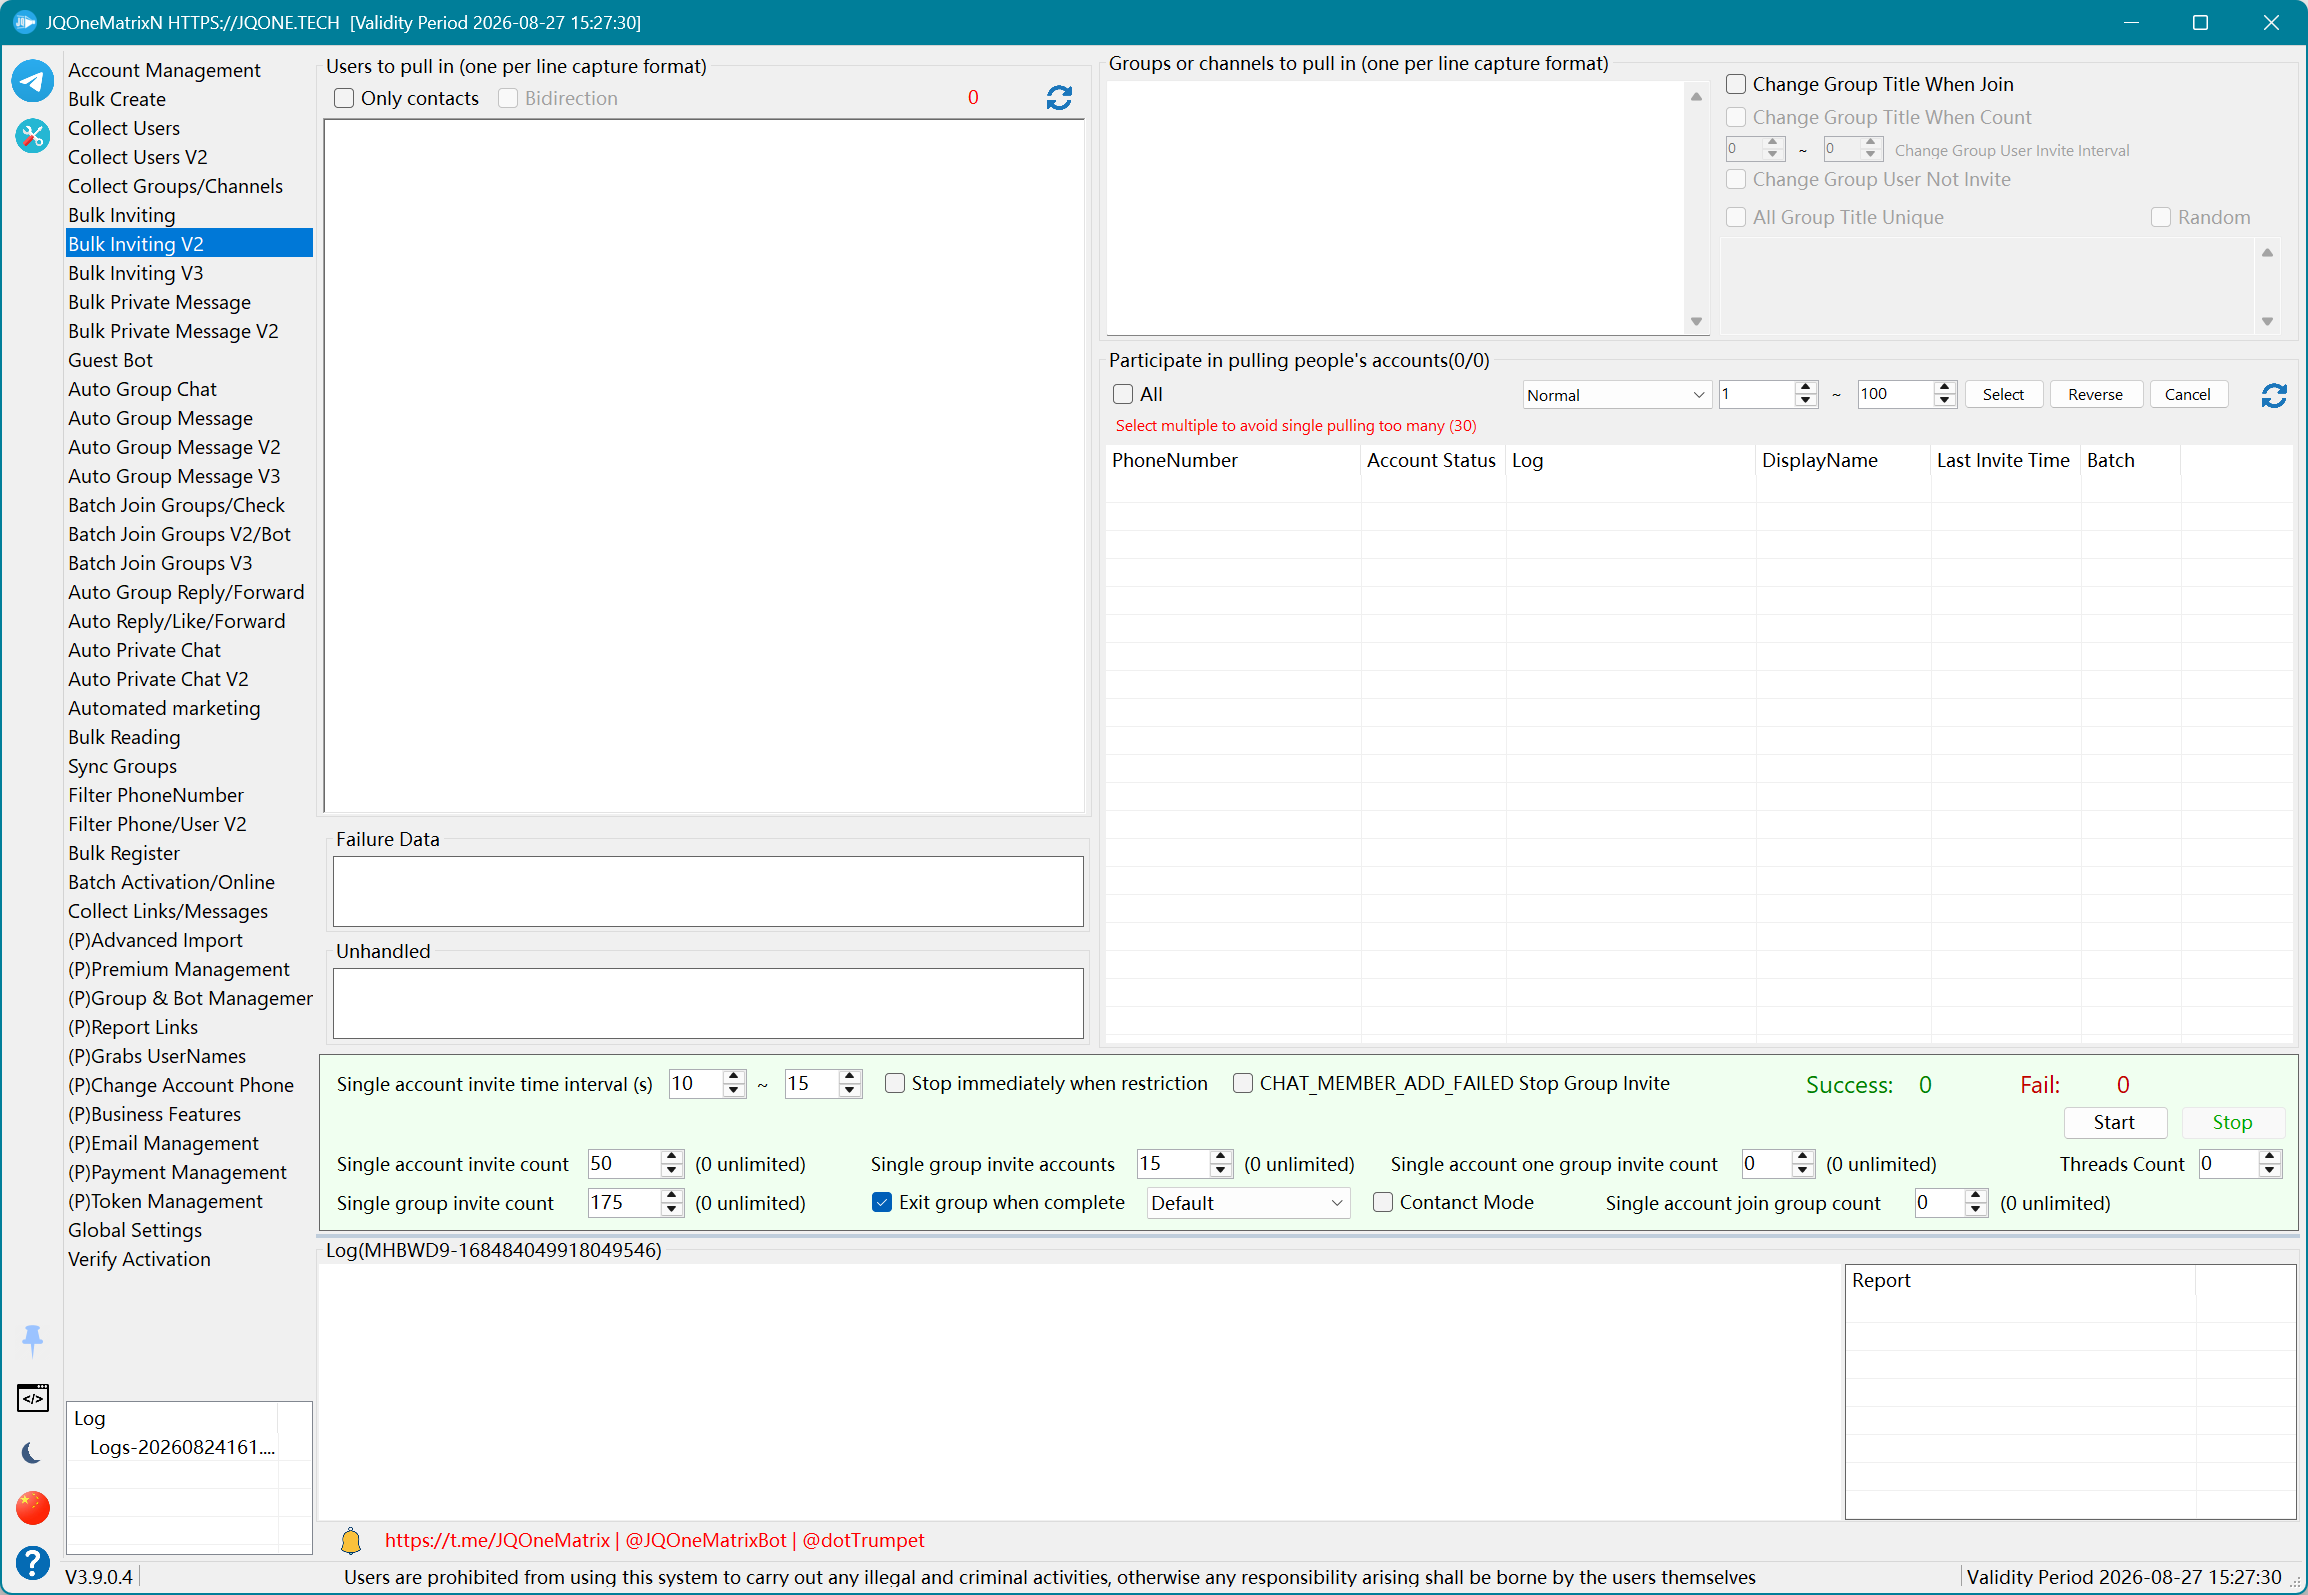
Bulk Inviting V3
Configure administrators for target groups first, then invite users with those administrators.
Steps
- Import target groups, users to invite, and administrator accounts, then confirm whether administrator mode is enabled.
- Enable Invite New Administrators Through New Links or One Account Manages Group when required, then set joins per account and invites per account per group.
- First select Set Admins (1) so the target groups receive their administrator configuration. Confirm the result in the administrator list.
- Only after administrator setup succeeds, select Start Inviting (2). Do not reverse the two phases.
- Review Successful, Failed, and Unprocessed data. Cancel the active phase before changing administrators, contact mode, leave-group, or stop conditions.
Additional information
- After Set Admins (1) creates group-to-administrator mappings, review the administrator list.
- If administrator authorization is not completed automatically, follow the mapping and manually add each administrator with the required permissions in the group.
- After changing administrators or permissions, allow time for Telegram to update before selecting Start Inviting (2).
Note: Test with a small number of accounts and records first. Available controls and results depend on the license, account state, target permissions, and Telegram response.
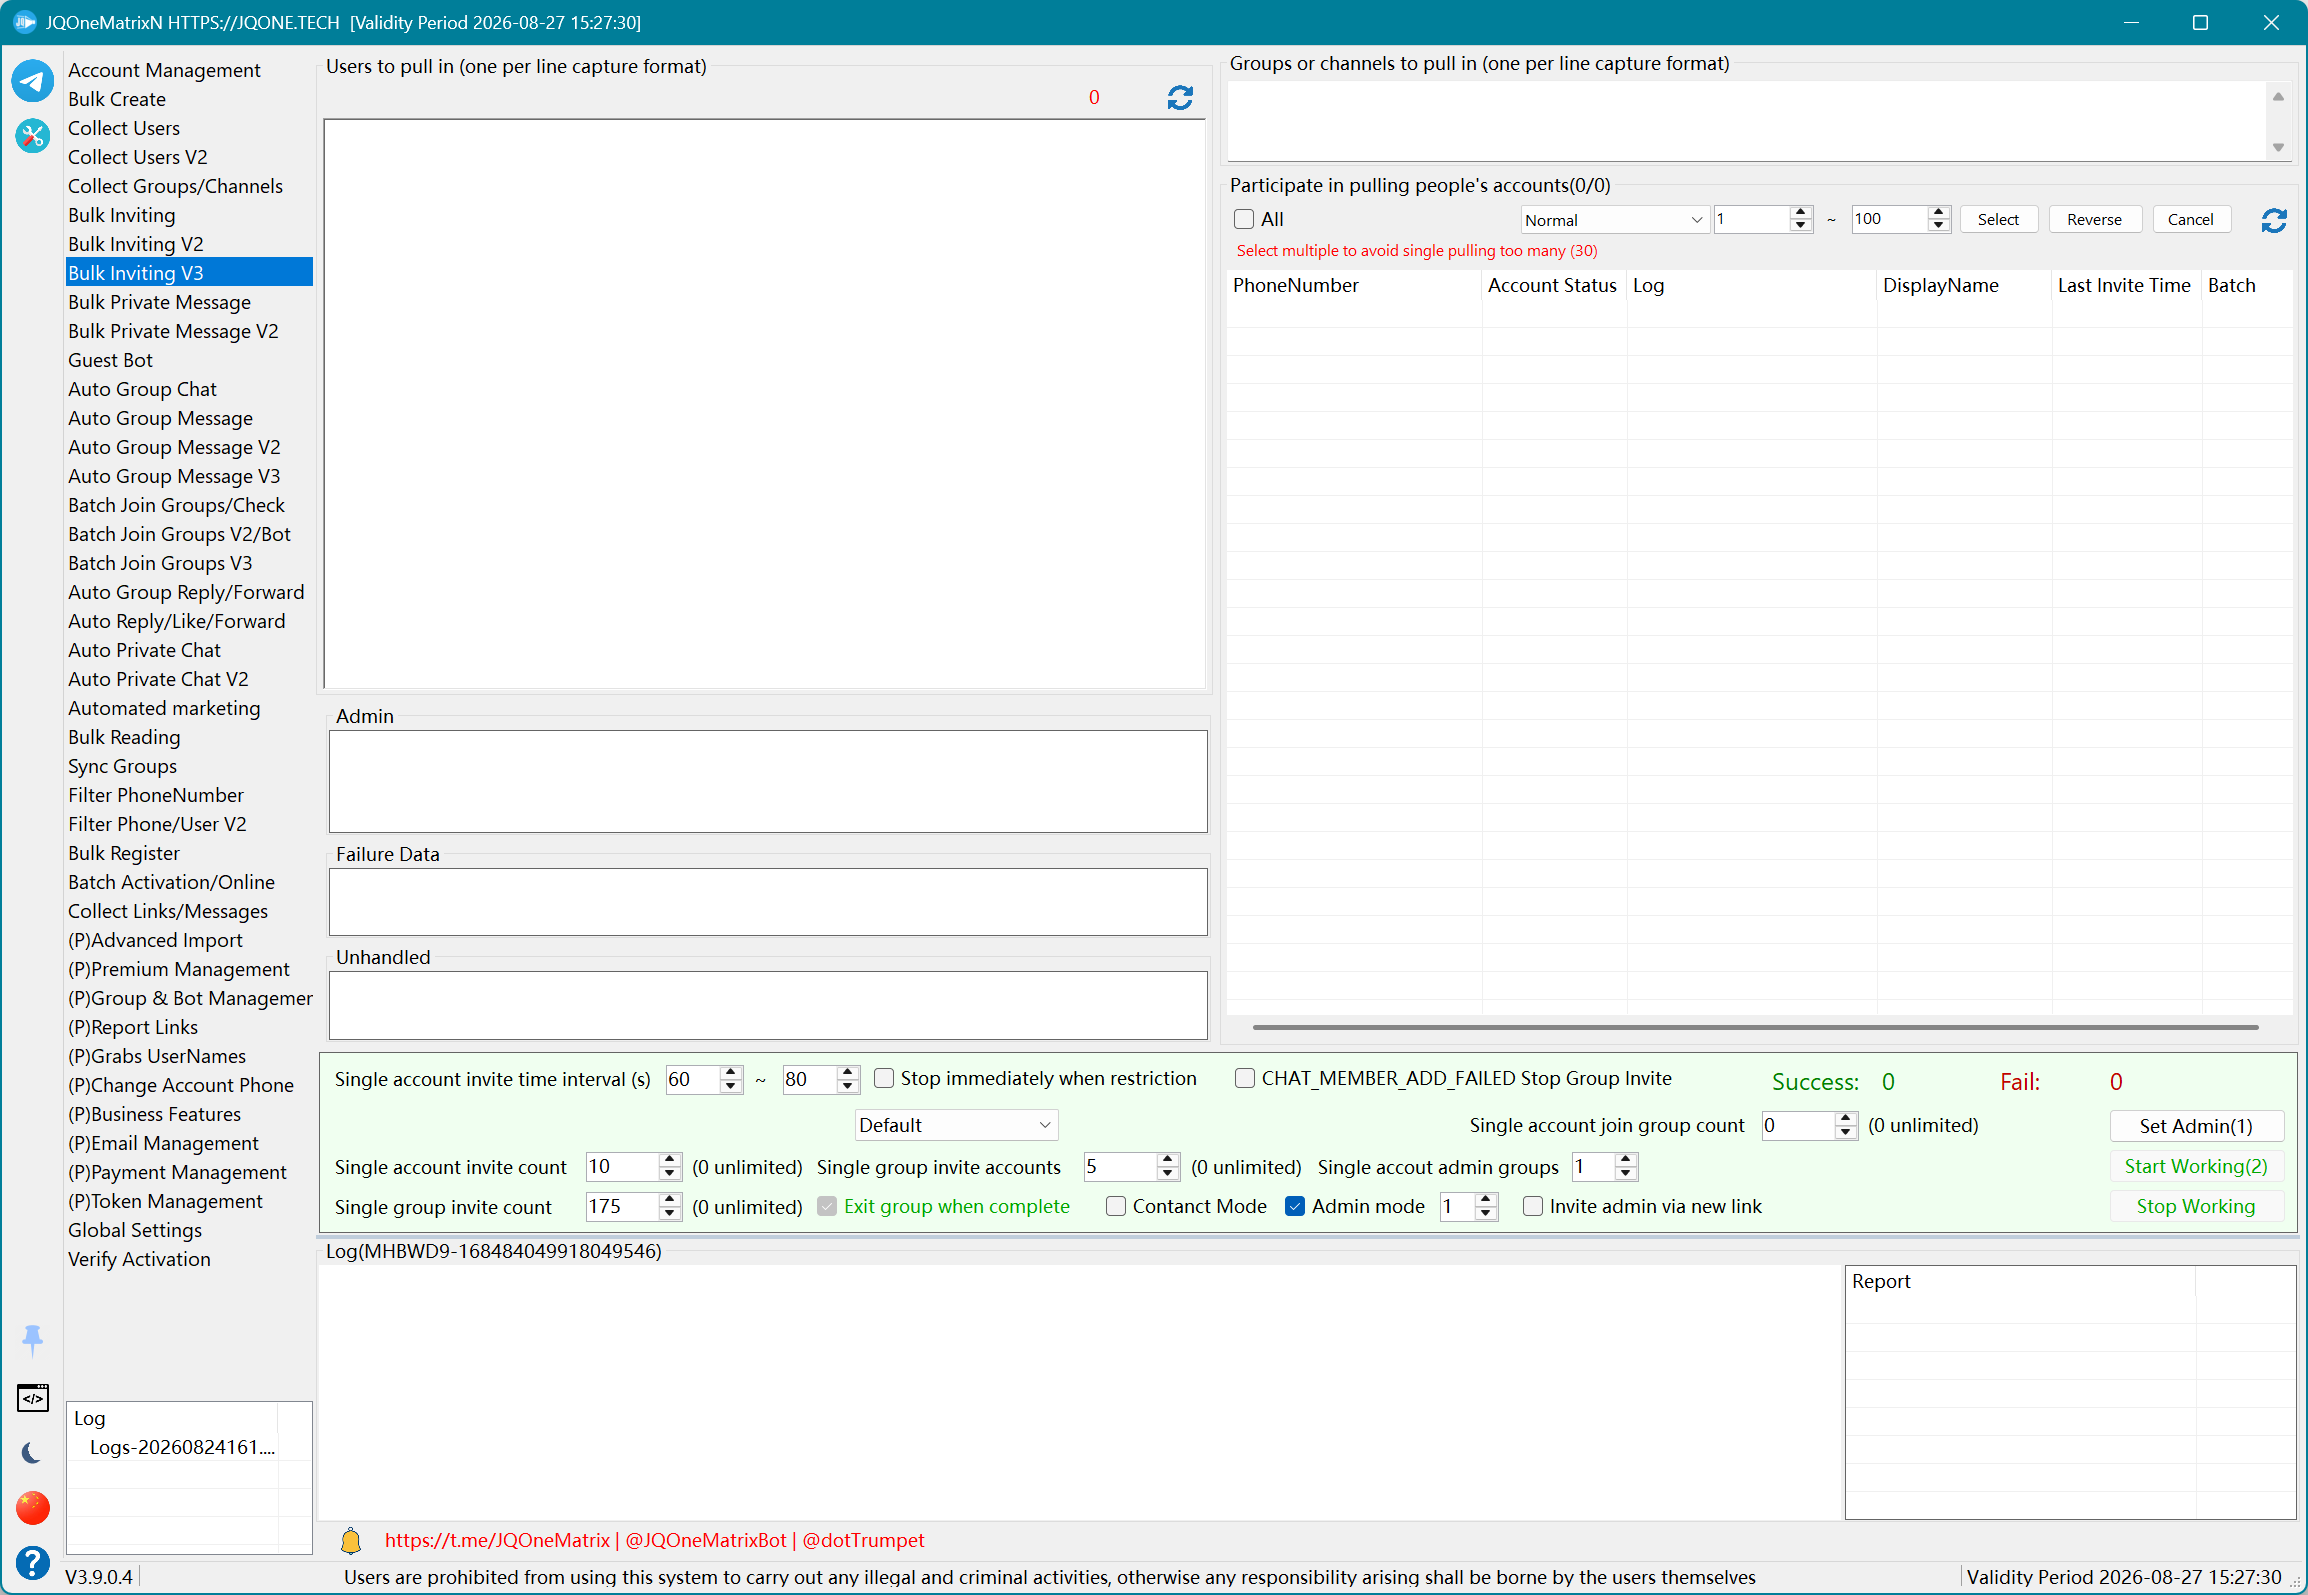
Bulk Private Message
Message imported users or collect from a group first; supports text, media, forwarding, fake-message options, and pin-related actions.
Steps
- Select sender accounts. Import recipients directly, or enter source groups and configure collection to obtain recipients.
- Choose a new message or forwarding. For a new message, set Default, Markdown/HTML, text, and media. For forwarding, enter message links, forwarding type, remove-author, and join-target options.
- Enable one-line-per-message, voice first, delete after sending, Telegram updates, web preview, silent, background, or scheduled delay as needed.
- Set run count, per-account/per-user limits, minimum/maximum intervals, and stop-on-restriction. For fake messages, use {random} in the content and enable its option.
- Select Start and review Successful, Failed, and Unprocessed. Use the separate Pin, Unpin, or Pin Then Unpin controls rather than mixing those actions with message sending.
Additional information
- Validate messages, media, forwarding, and pinning with 1–3 accounts and a small recipient set before increasing the scope.
- When multiple accounts all fail, check content, links, usernames, @ mentions, target data, and proxies instead of only changing accounts.
- Avoid using an identical message structure indefinitely. Historical guidance suggests revising content after roughly 500 sends, but this is not a current fixed Telegram limit.
- When a report is generated, its path appears at the end of the log and it can also be found under DataN\TelegramN_Reports.
Note: Test with a small number of accounts and records first. Available controls and results depend on the license, account state, target permissions, and Telegram response.
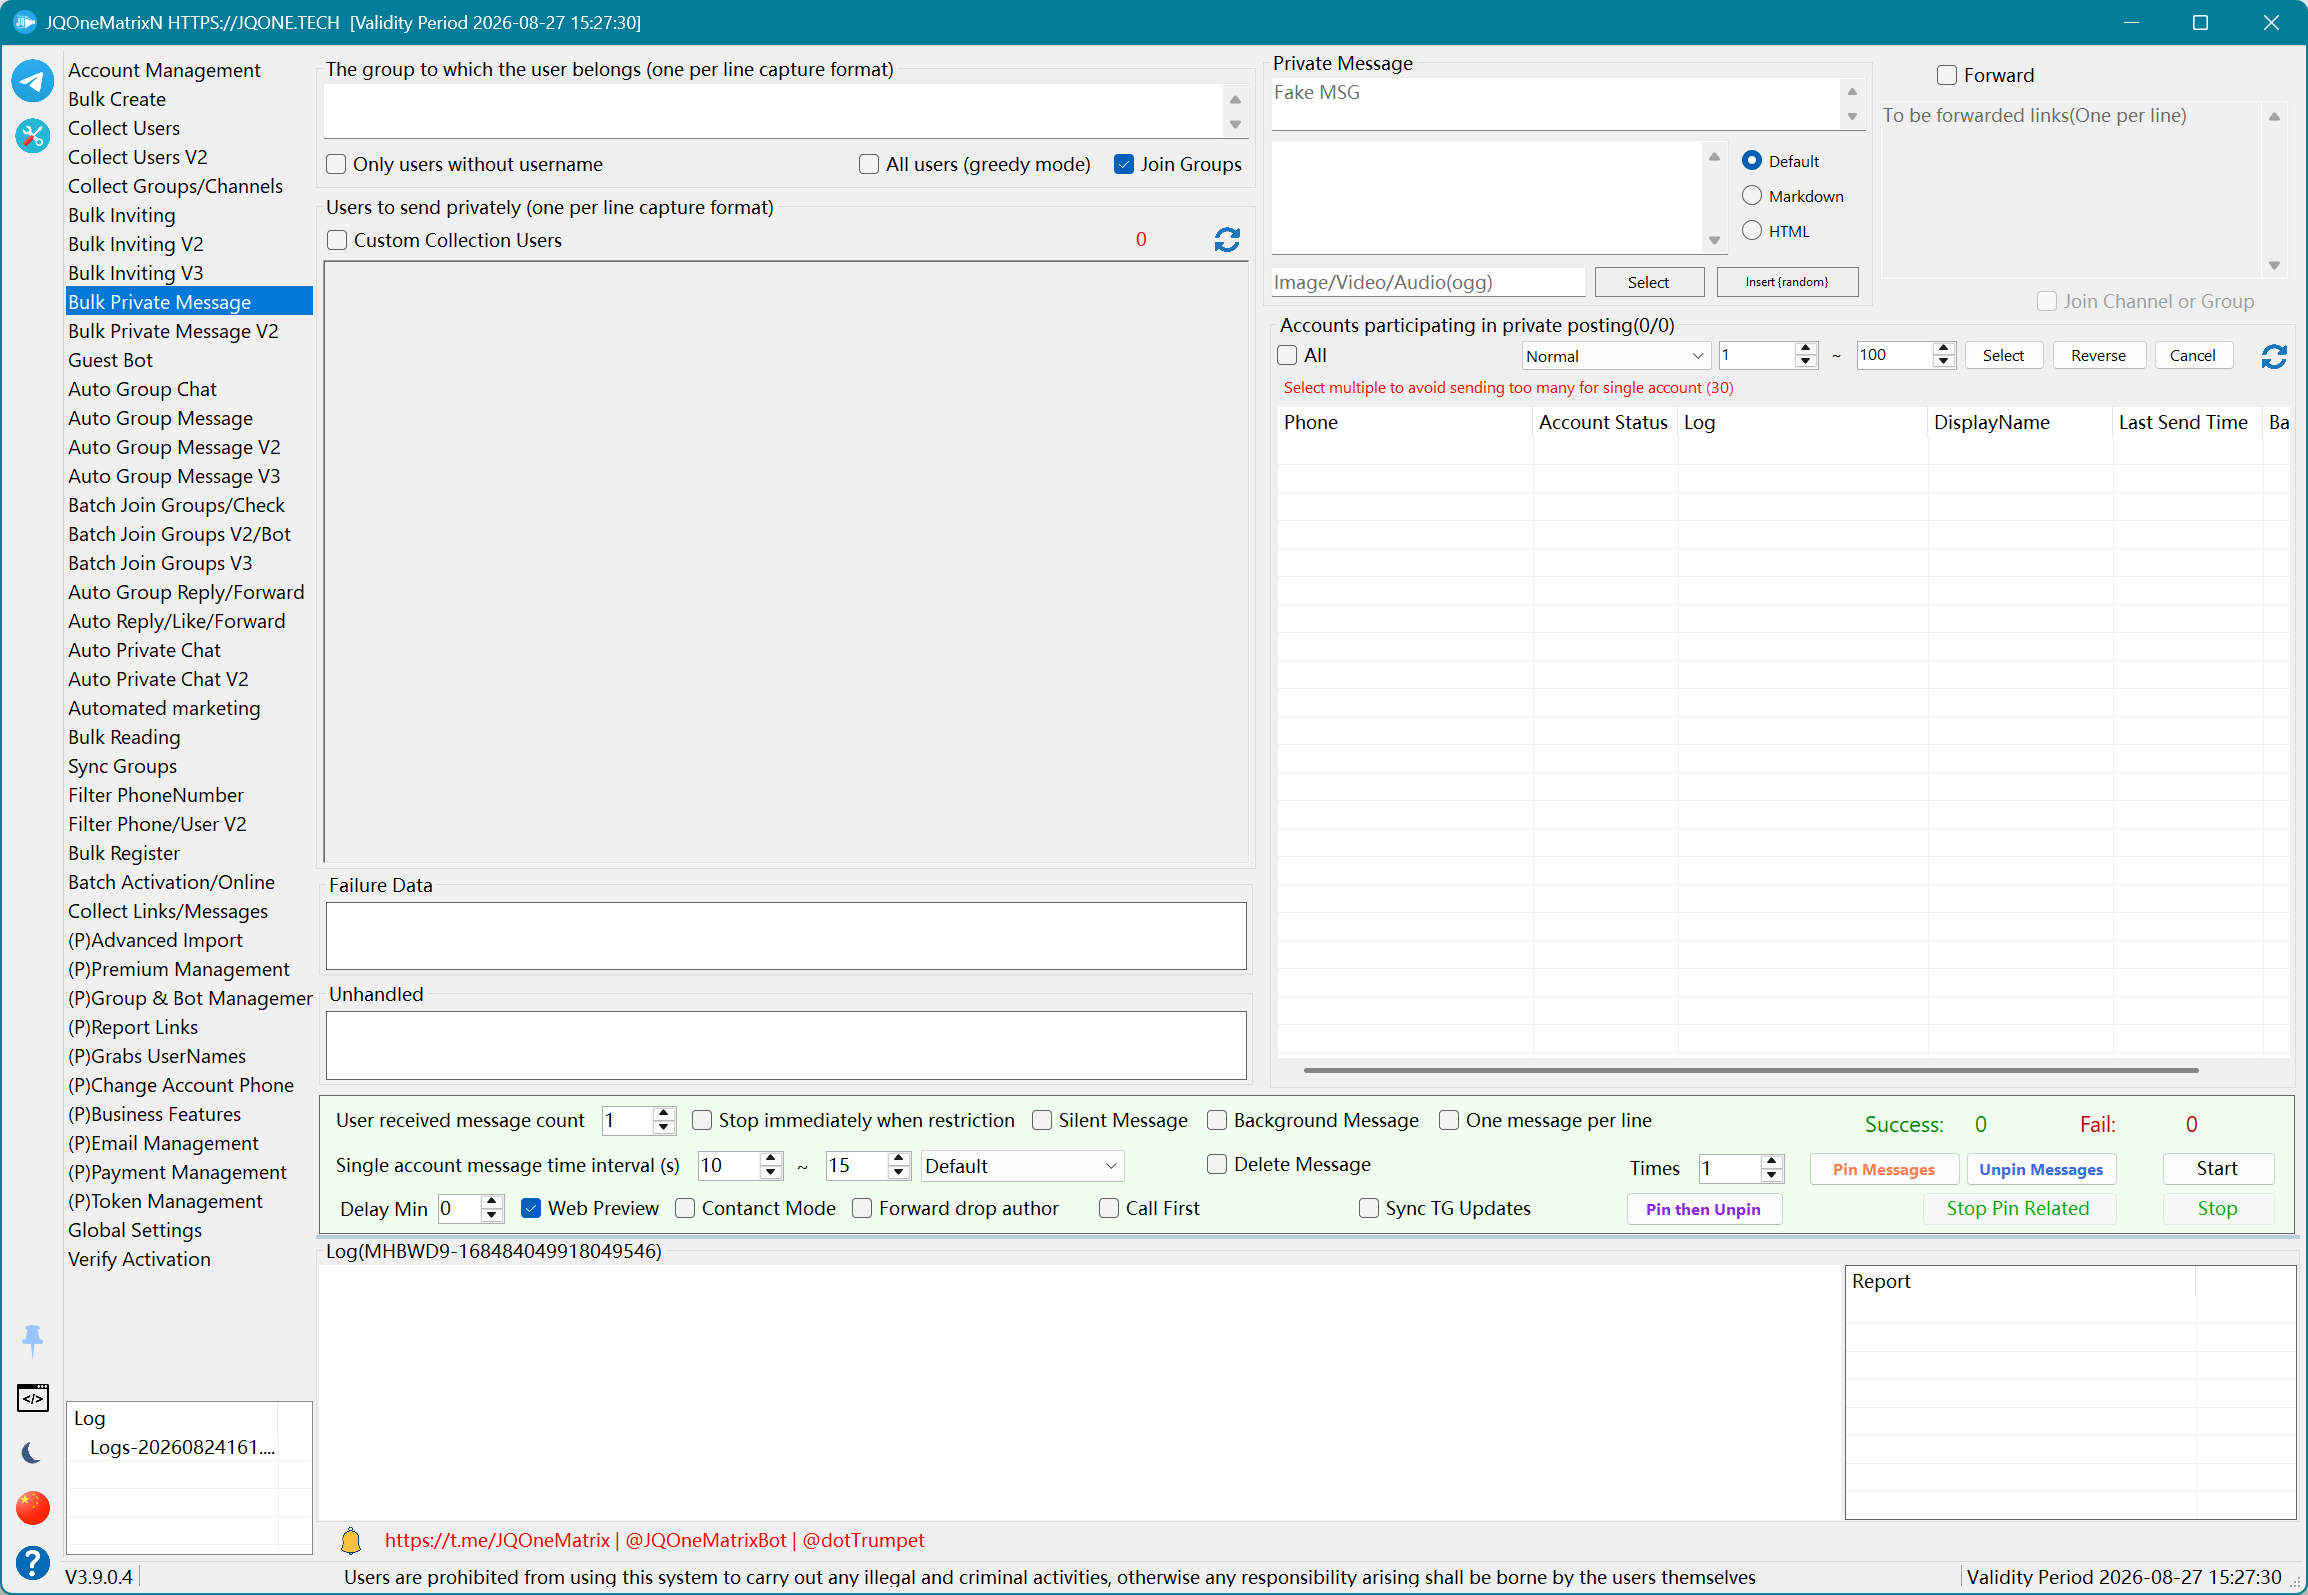
Bulk Private Message V2
Send or forward messages to users or contacts in bulk, with phone visibility and pinning options.
Steps
- Select sender accounts and import users. For contacts only, enable Contacts Only and Bidirectional Contacts.
- Choose contact mode and decide between a new message and forwarding, then enter text, media, or forwarding links for that mode.
- Configure Default, Markdown or HTML, fake messages, one-line-per-message, web preview, silent, background, scheduled delay, and Telegram updates as needed.
- Choose either Show Phone or Hide Phone, not both, then set threads, the per-account limit, and sending interval.
- Select Start and review Successful, Failed, and Unprocessed. Use the dedicated controls for Pin, Unpin, and combined pinning, or select Cancel to stop.
Additional information
- Disable Immediately on Account Restriction disables an account as soon as a restriction is detected.
- Default uses both the feature parameters and global Peer Flood/Flood Wait limits.
- When no-wait modes are available, the mode without ! follows feature wait parameters, while the mode with ! still observes global limits.
- Use only the modes shown in the current drop-down list; do not rely on a legacy mode that is no longer displayed.
Note: Test with a small number of accounts and records first. Available controls and results depend on the license, account state, target permissions, and Telegram response.
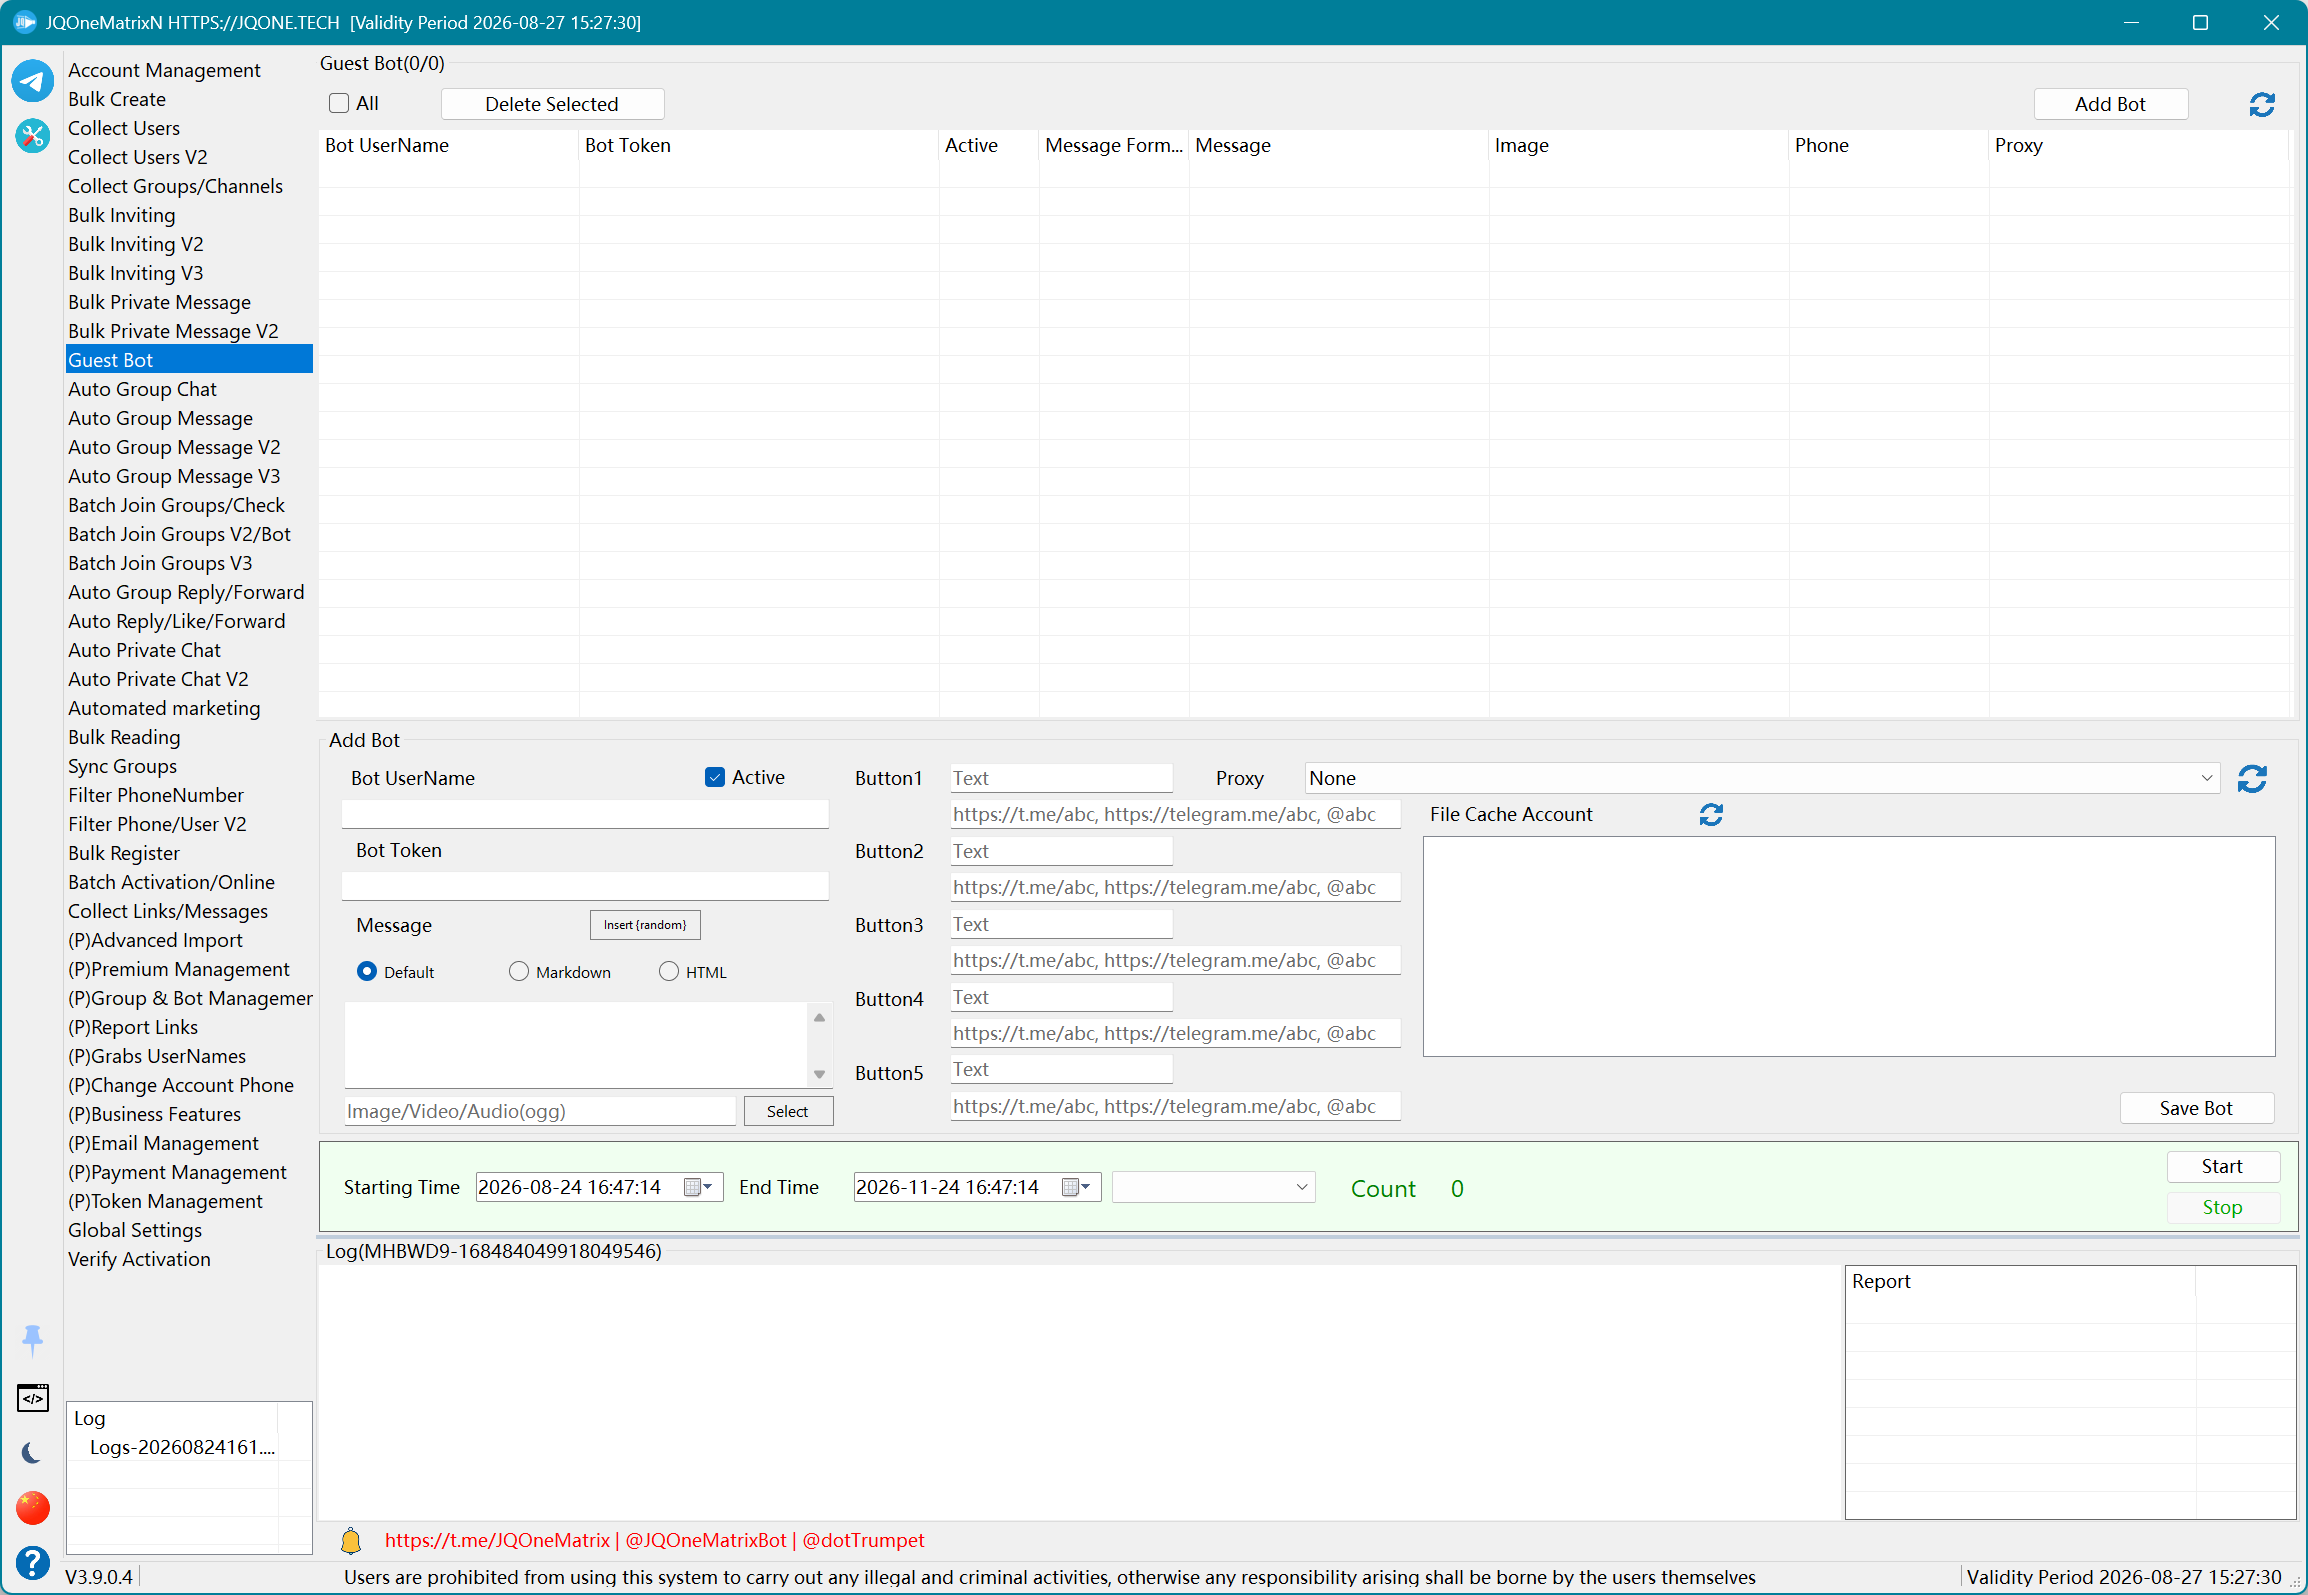
Guest Bot
Handle visitor messages with a Bot token, proxy, reply template, media, and link buttons.
Steps
- Select Add Bot, enter the Bot username, Bot Token, and proxy, then enable Active.
- Choose Default, Markdown, or HTML and enter the visitor reply. Select a cache account first when attaching media or a file.
- For buttons, enter up to five button-text and link pairs.
- Select Save Bot, then select the Active Bots to run from the list.
- Set start/end times and the no-wait type, then select Begin. Review logs and success count, or select End to finish.
Note: Test with a small number of accounts and records first. Available controls and results depend on the license, account state, target permissions, and Telegram response.
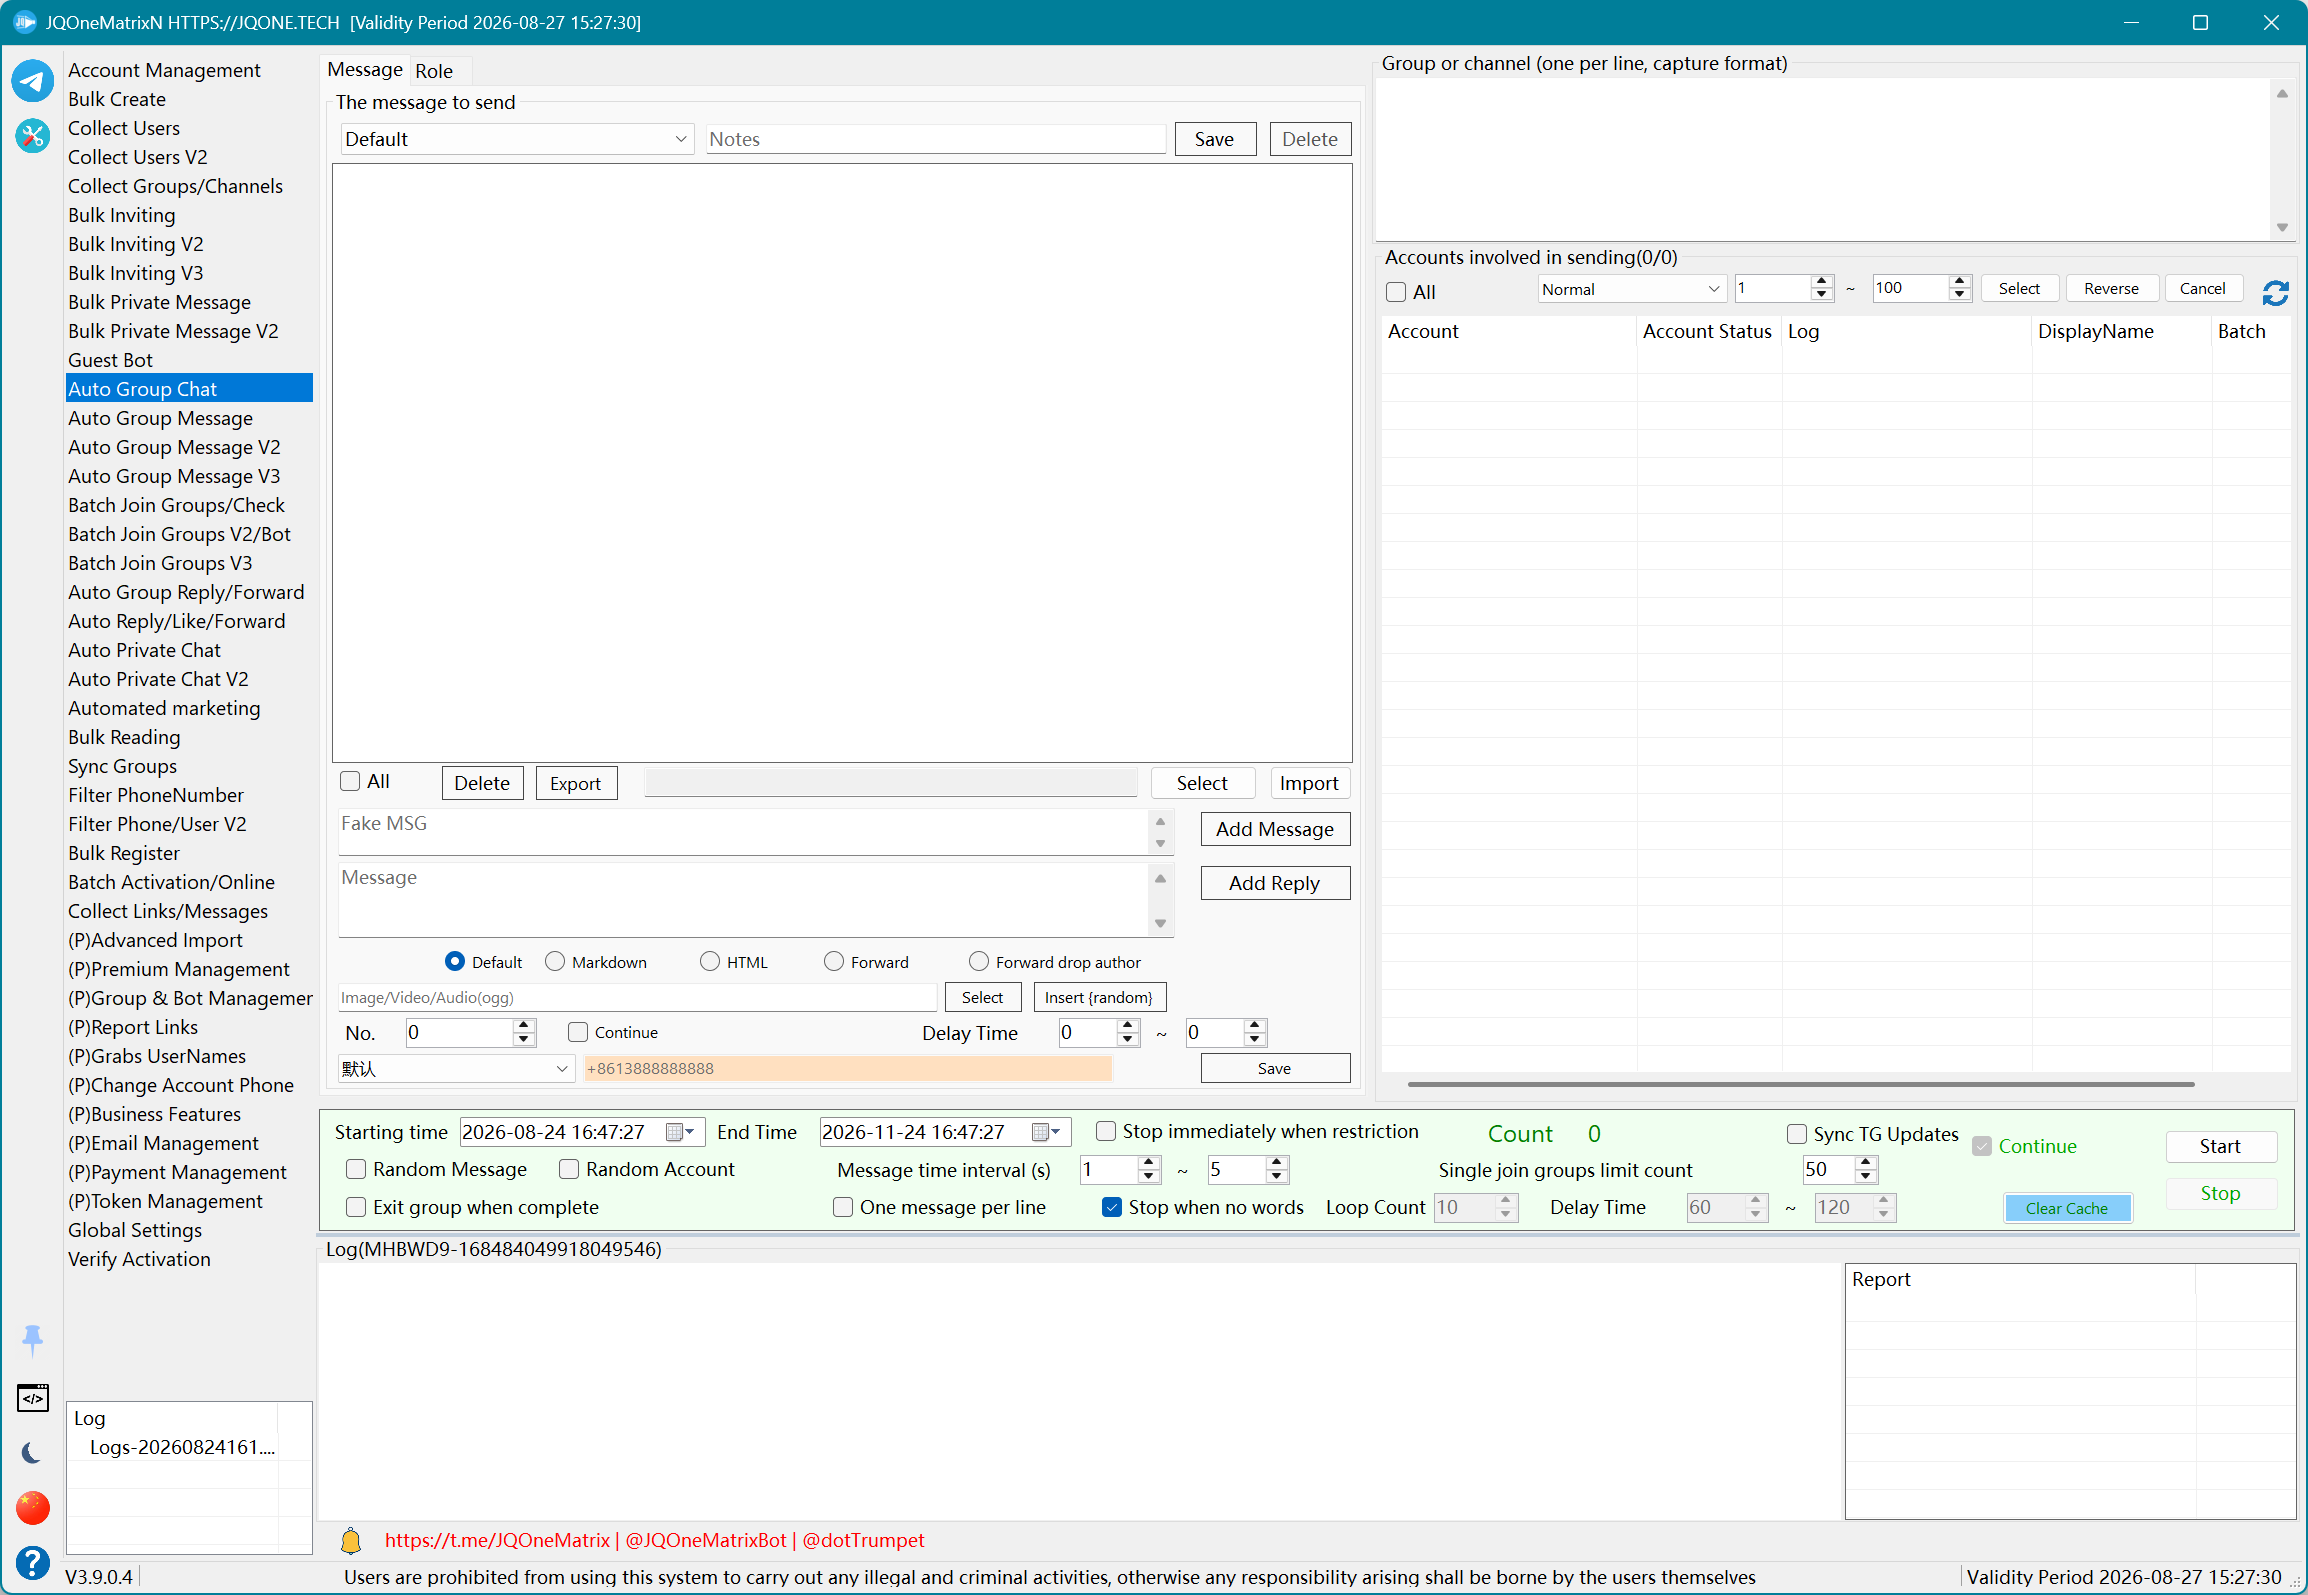
Auto Group Chat
Simulate multi-account group conversations with roles, scripts, and replies for group activity or scripted promotion.
Steps
- Download the sample for the current language. On Messages, select Import, choose the TXT template, and confirm that roles and the reply tree appear.
- On Roles, edit role name, profile, avatar, and account assignment. Role IDs must remain aligned with RoleType in messages.
- On Messages, use Add Message and Add Reply to adjust the script tree. You can also export the current category, edit the exported JSON structure, and import it again.
- For each entry, choose Default, Markdown, or HTML and configure media, forwarding, remove-author, or {random} fake-message behavior.
- Enter targets and configure time, intervals, loops, random role/message, joining, and restriction-stop rules. Select Start, review progress, or select Stop to finish.
Additional information
- This feature is mainly for multi-role scripted group conversations and can also send group content in script order.
- The import file is JSON text containing Messages and Roles. Import the sample first, verify role, message, and reply hierarchy, and then replace its content.
- Role IDs, message IDs, RoleType, and ReplyTo must remain consistent. Replace media paths with files available on the current computer.
Download Chinese auto-group-chat template · Download English auto-group-chat template
Note: Test with a small number of accounts and records first. Available controls and results depend on the license, account state, target permissions, and Telegram response.
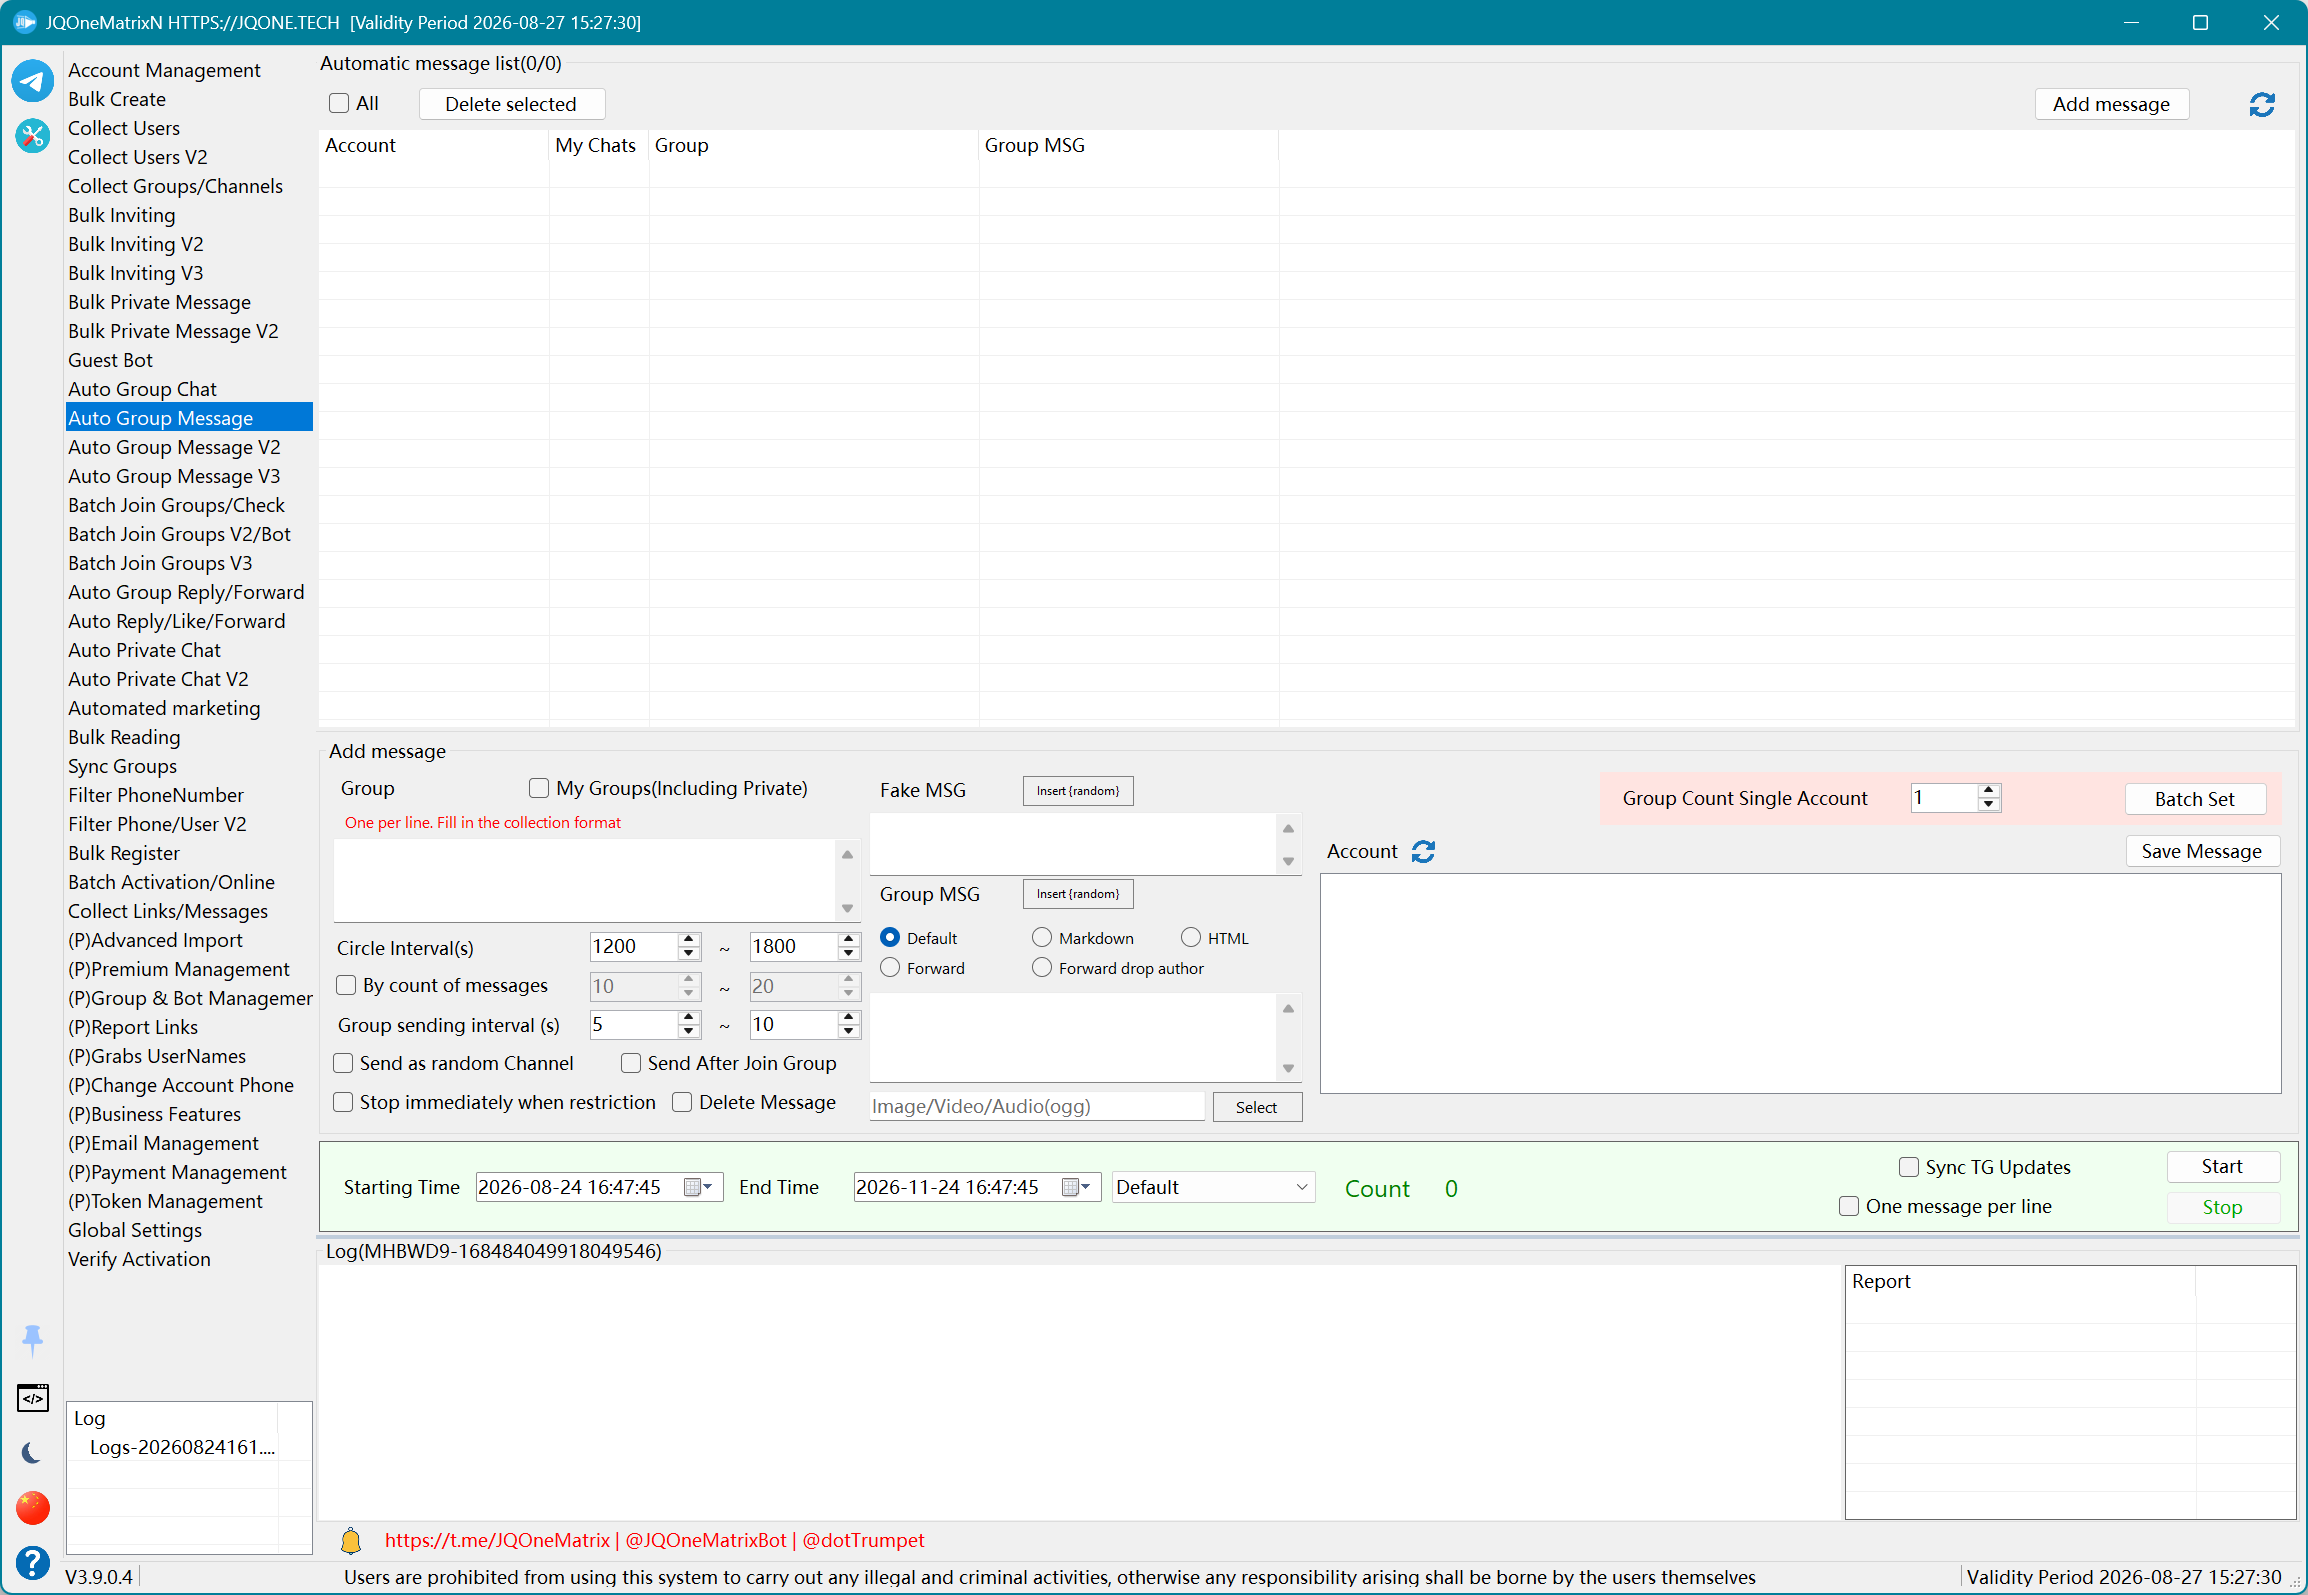
Auto Group Message
Send messages to multiple groups by time interval or message-count interval, with optional fake-message settings.
Steps
- Select Add Group Message and choose the sender account for the task.
- Enter target groups, or use My Groups and decide whether private groups are included.
- Choose a new message or forwarding. Configure Default, Markdown/HTML, text, media, {random} fake messages, one-line-per-message, random channel identity, and delete-after-send as needed.
- Set groups per account and group-send interval, then choose looping by time interval or message-count interval. Enable send-immediately-after-join when required.
- Save and select the tasks to run, set start/end times, and select Begin. For batch changes, select tasks before Batch Settings; select Cancel to stop.
Additional information
- V1 is suitable for saving tasks per account, especially slower single-account, single-group sending.
- Maintain the random-character dataset before using {random}. For send failures, check format, media, links, target permissions, account state, and proxy in order.
Note: Test with a small number of accounts and records first. Available controls and results depend on the license, account state, target permissions, and Telegram response.
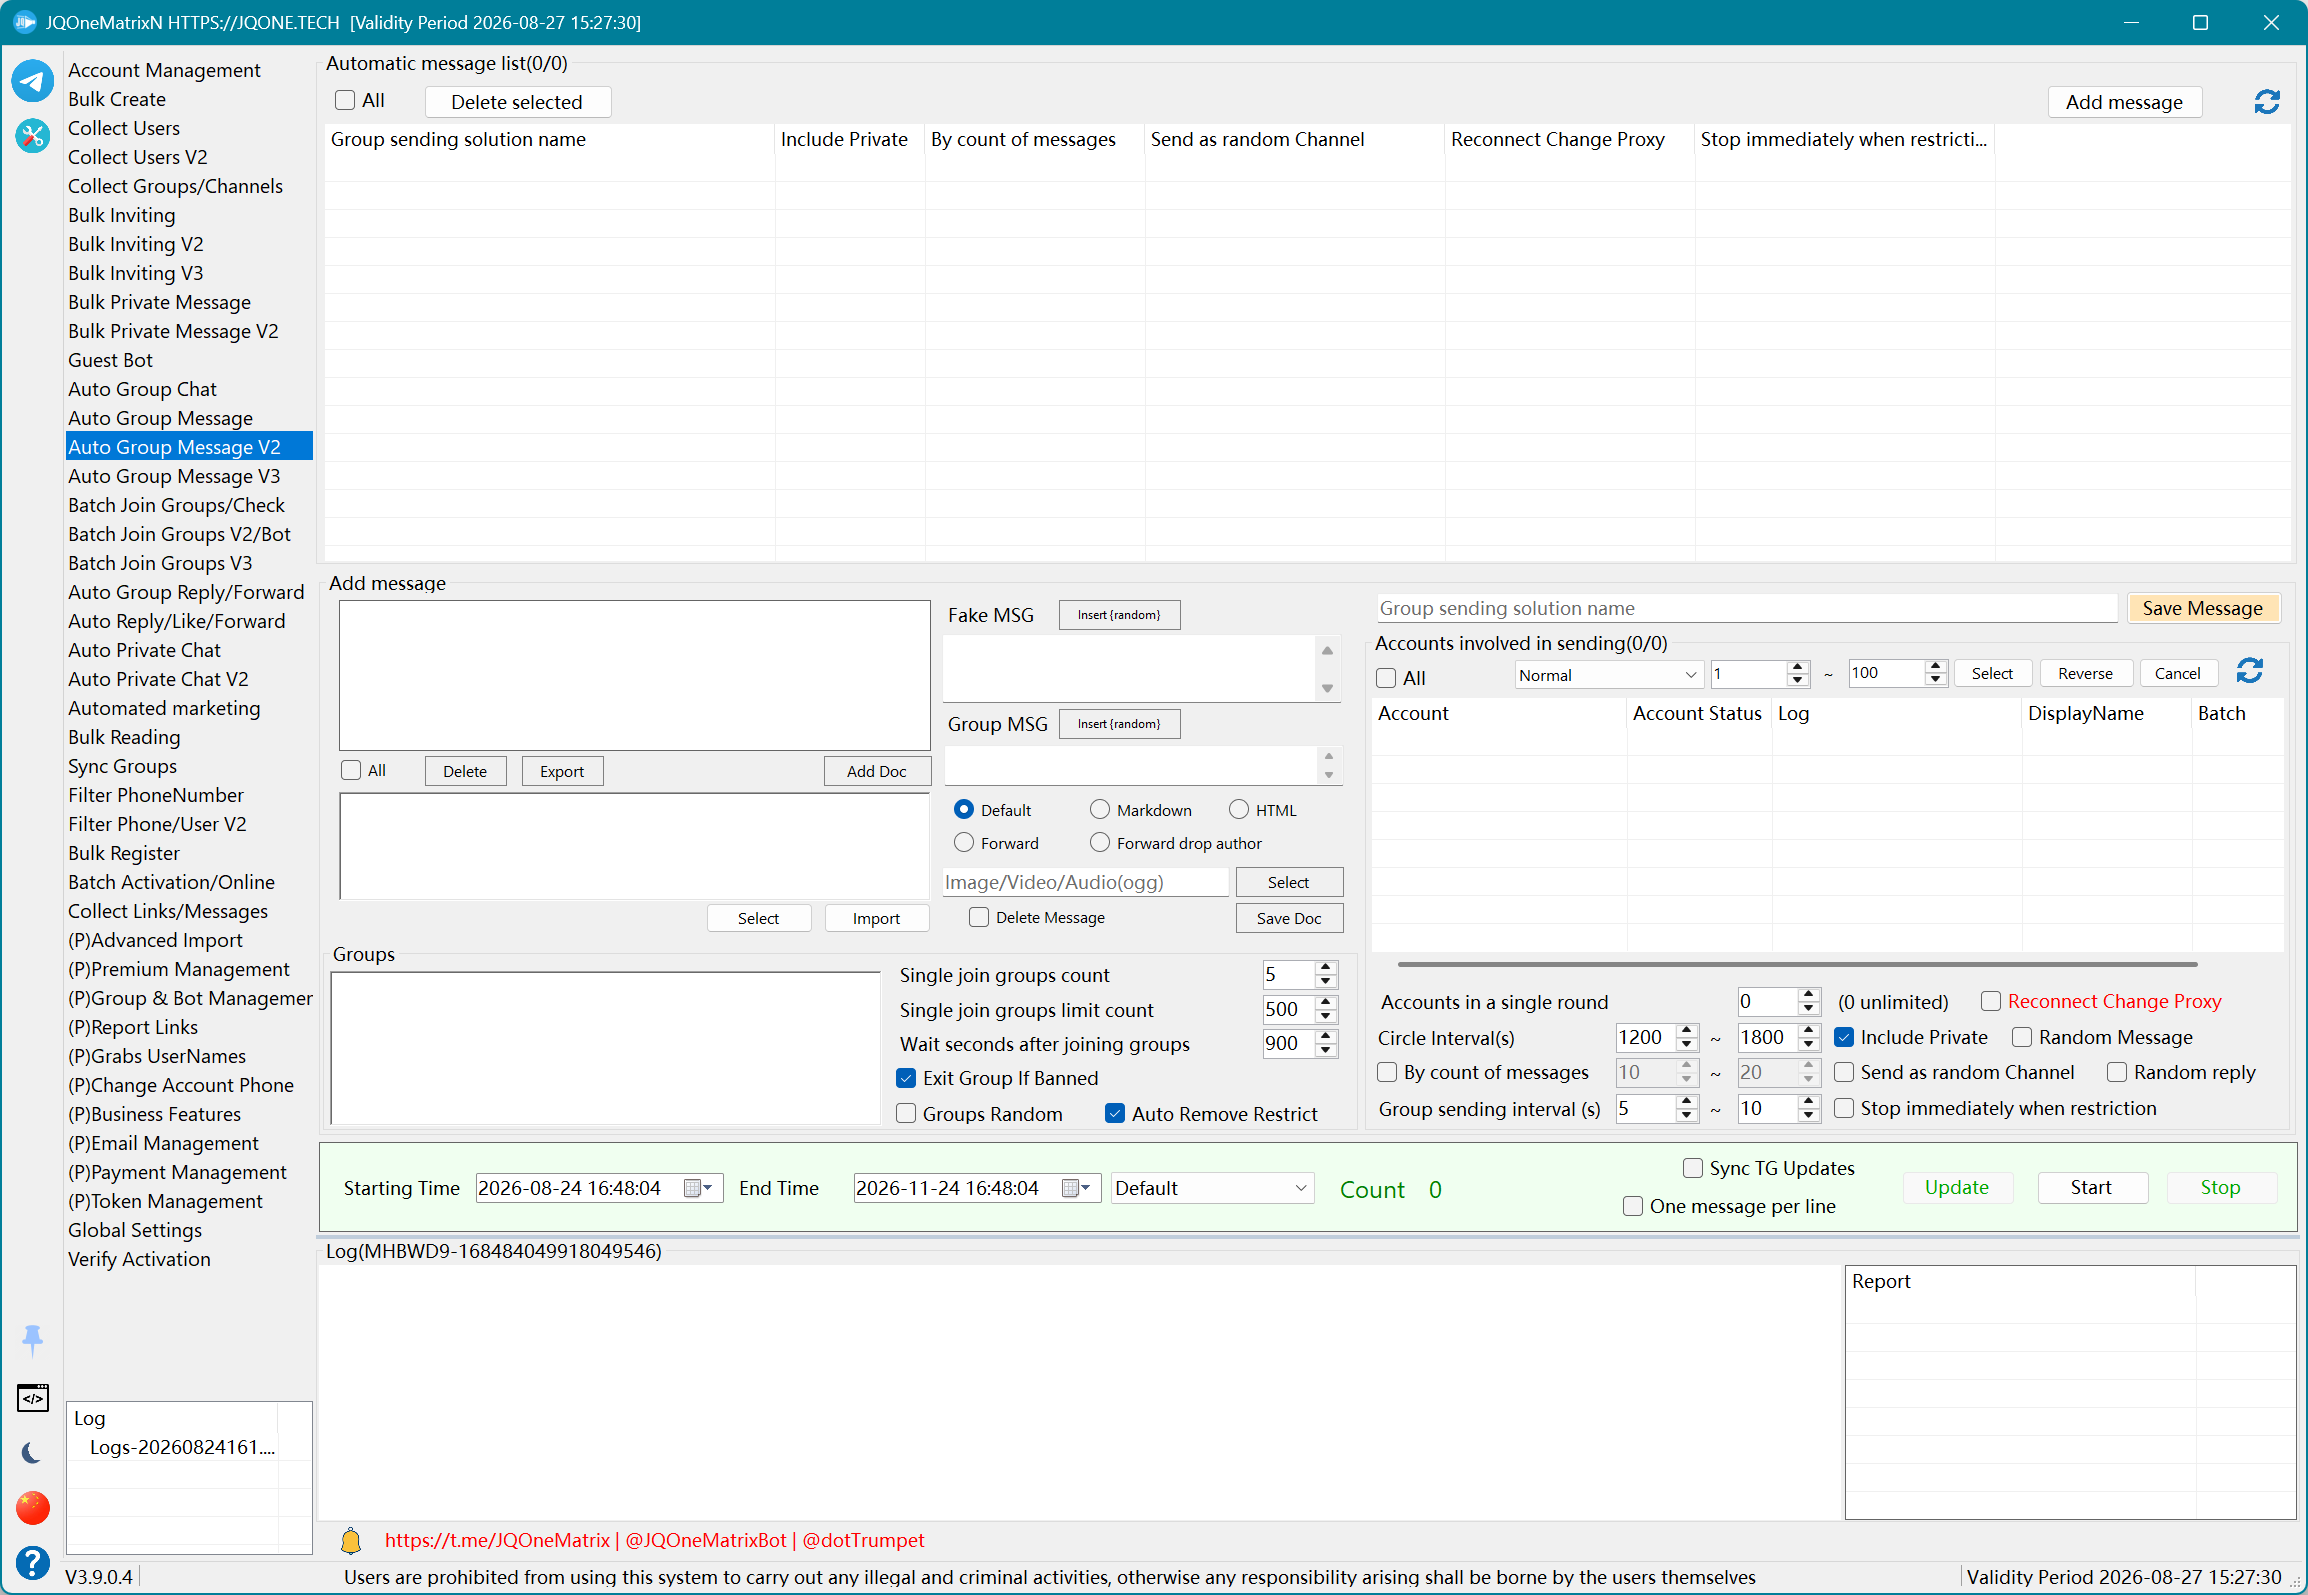
Auto Group Message V2
Organize repeated group sending with schemes, account pools, group lists, and message documents, including join and account-switch controls.
Steps
- Create or select a scheme name, add a group-send task, and prepare the group list.
- Configure private-group inclusion, random groups, join limits, joins per run, wait-after-join, and exit from restricted groups.
- Select the account pool and accounts per round. Enable switch-proxy-on-reconnect, automatic unrestriction, and stop-on-restriction when required.
- Build or import message documents and configure Default, Markdown/HTML, media, forwarding, fake messages, random replies, and random message selection.
- Save and select the schemes to run, set send interval, looping, and start/end times, then select Begin. Select Cancel to stop.
Additional information
- When accounts must join many target groups, joining first and then sending here usually produces a clearer workflow.
- Joining and sending in one run is still available, but configure wait-after-join and monitor restricted groups and account switching.
Note: Test with a small number of accounts and records first. Available controls and results depend on the license, account state, target permissions, and Telegram response.
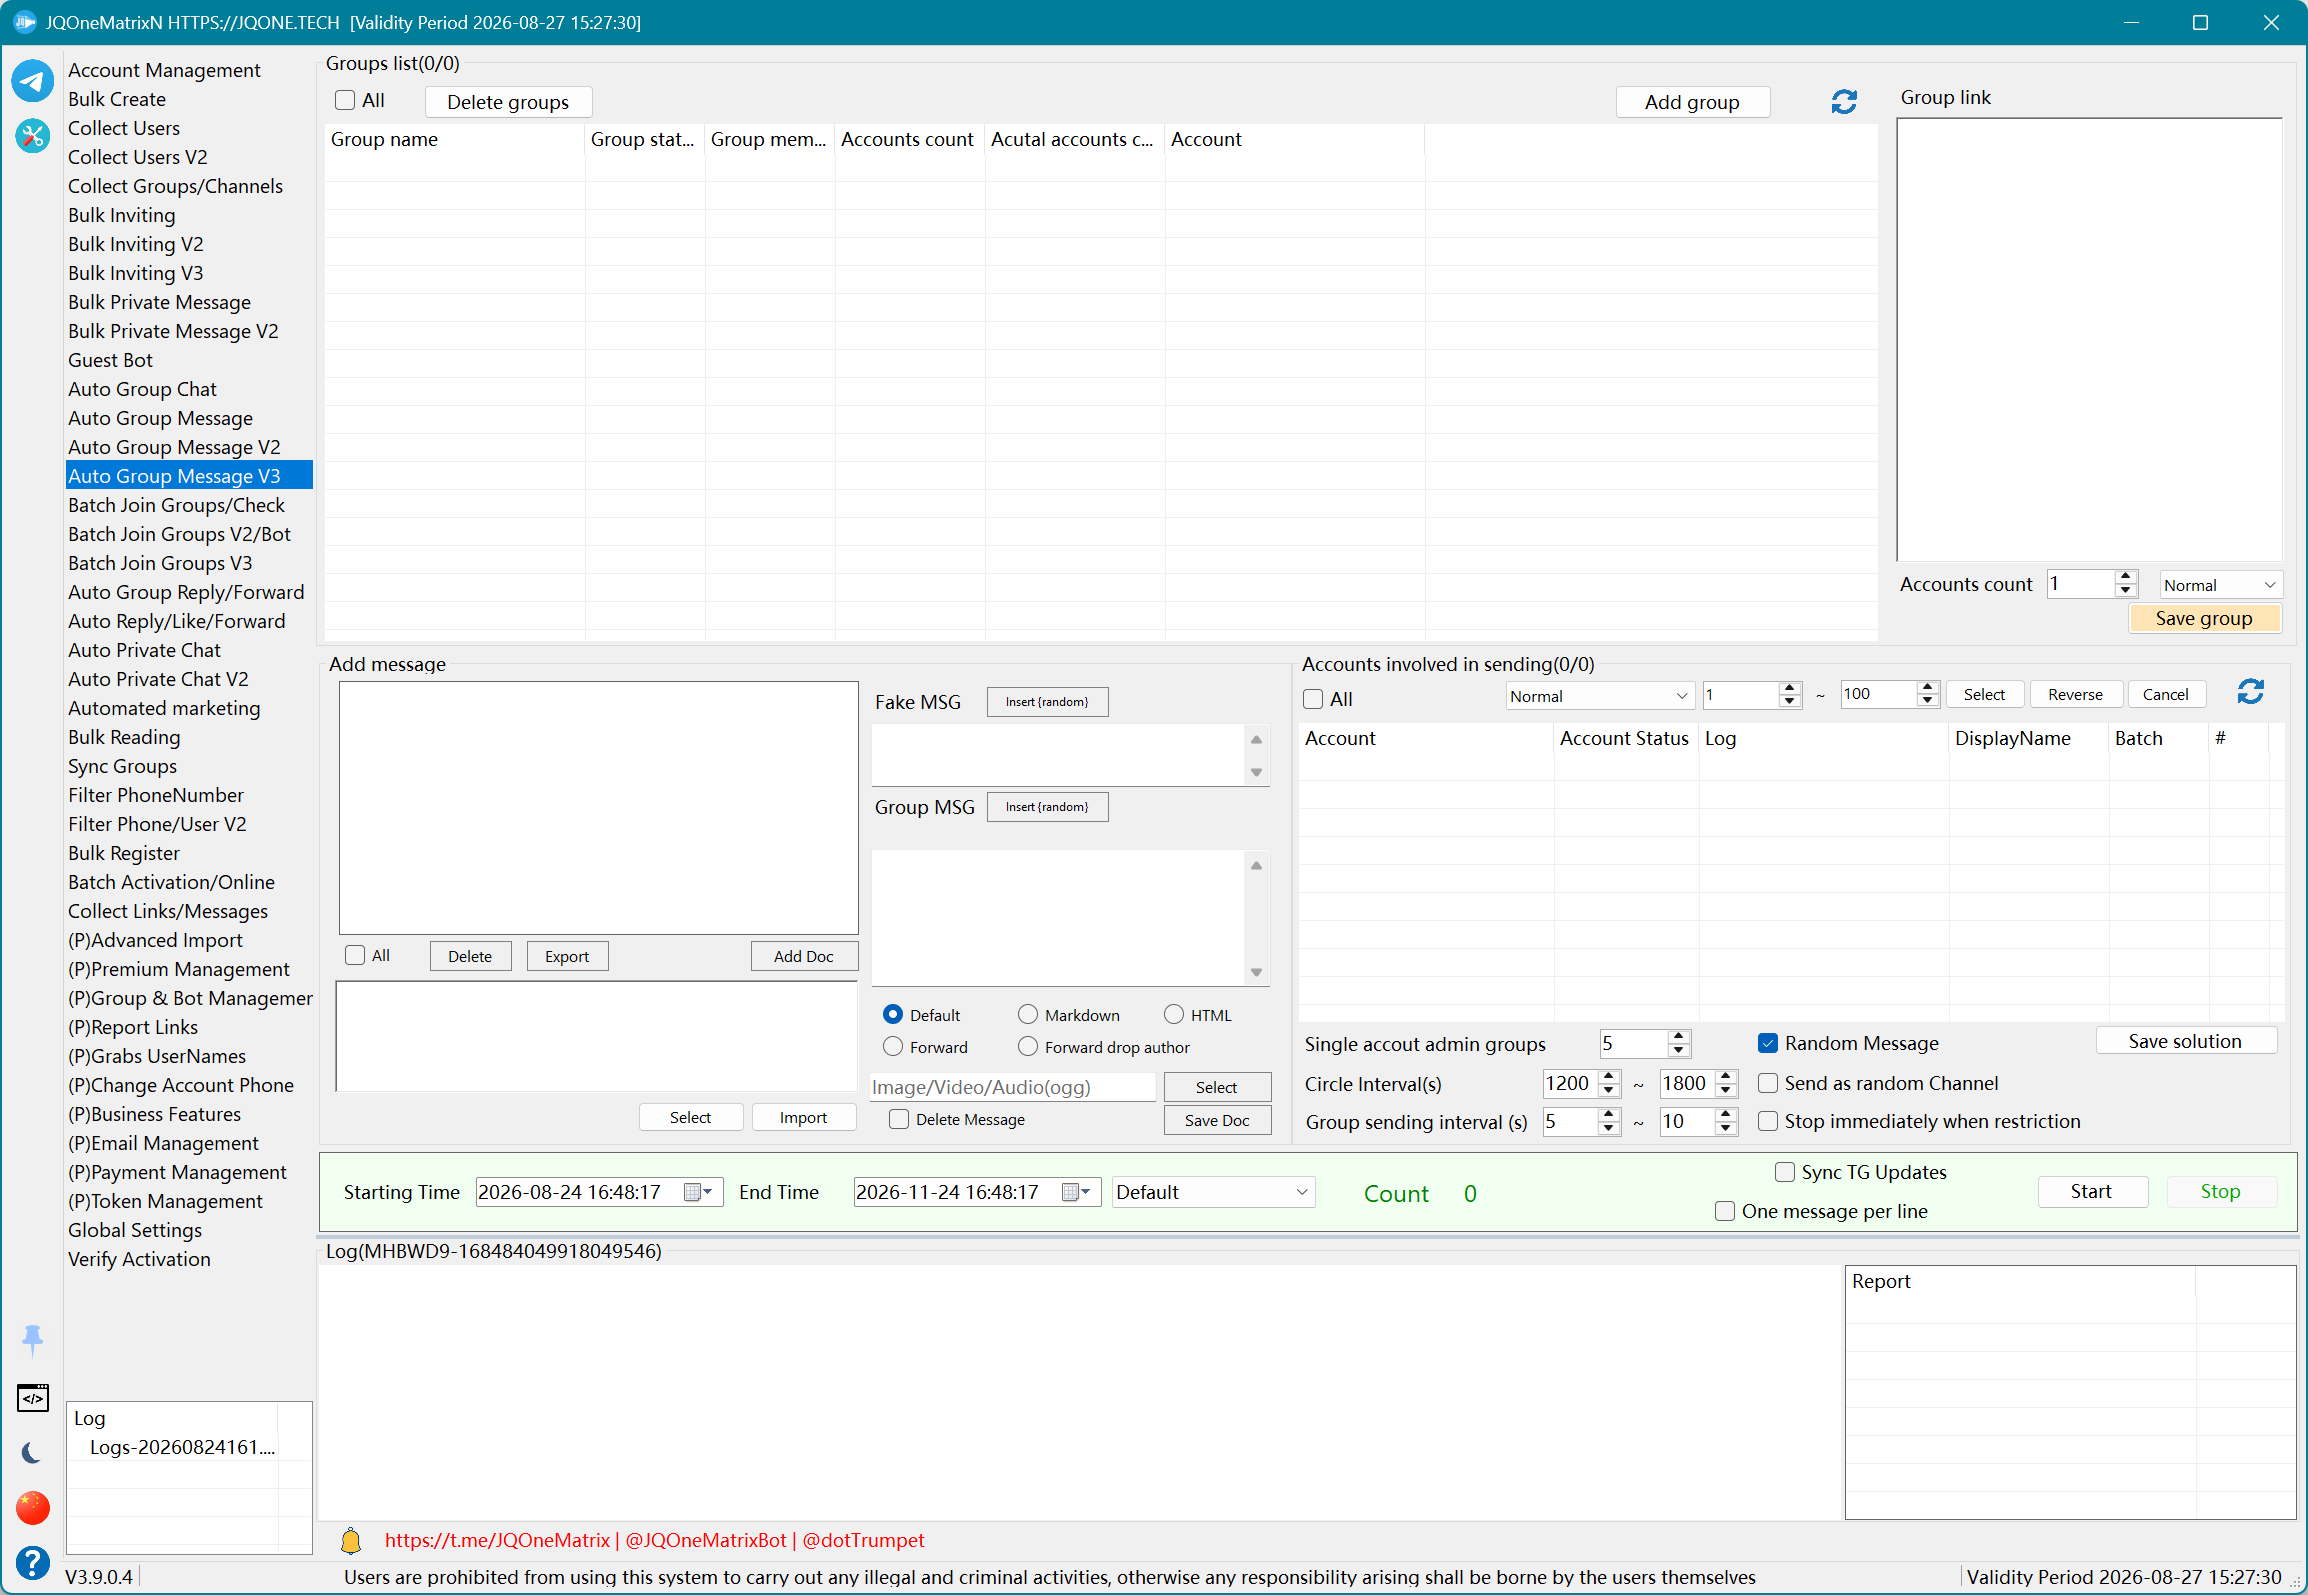
Auto Group Message V3
Maintain sender counts and join status per group, then send with a message-document library.
Steps
- Add each group link to the group list, enter the required sender-account count, and save the group.
- Select participating accounts and set joins per account. Confirm group status, member count, actual joined count, and account list in the group row.
- Build the message-document library by importing, exporting, or saving messages. Each message can use Default, Markdown/HTML, media, forwarding, and fake-message options.
- Configure random messages, send interval, looping, send-as-channel, one-line-per-message, Telegram updates, and stop-on-restriction.
- Save the scheme, select groups to run, set start/end times, and select Begin. Review status in each group row or select Cancel to stop.
Additional information
- V3 maintains account counts and status per group and is suitable for ongoing account activity, group activity, or appended send tasks.
- If Add Group and message-document controls remain enabled while running, more data can be appended. Stop the affected group before deleting or changing a group that is being processed.
Note: Test with a small number of accounts and records first. Available controls and results depend on the license, account state, target permissions, and Telegram response.
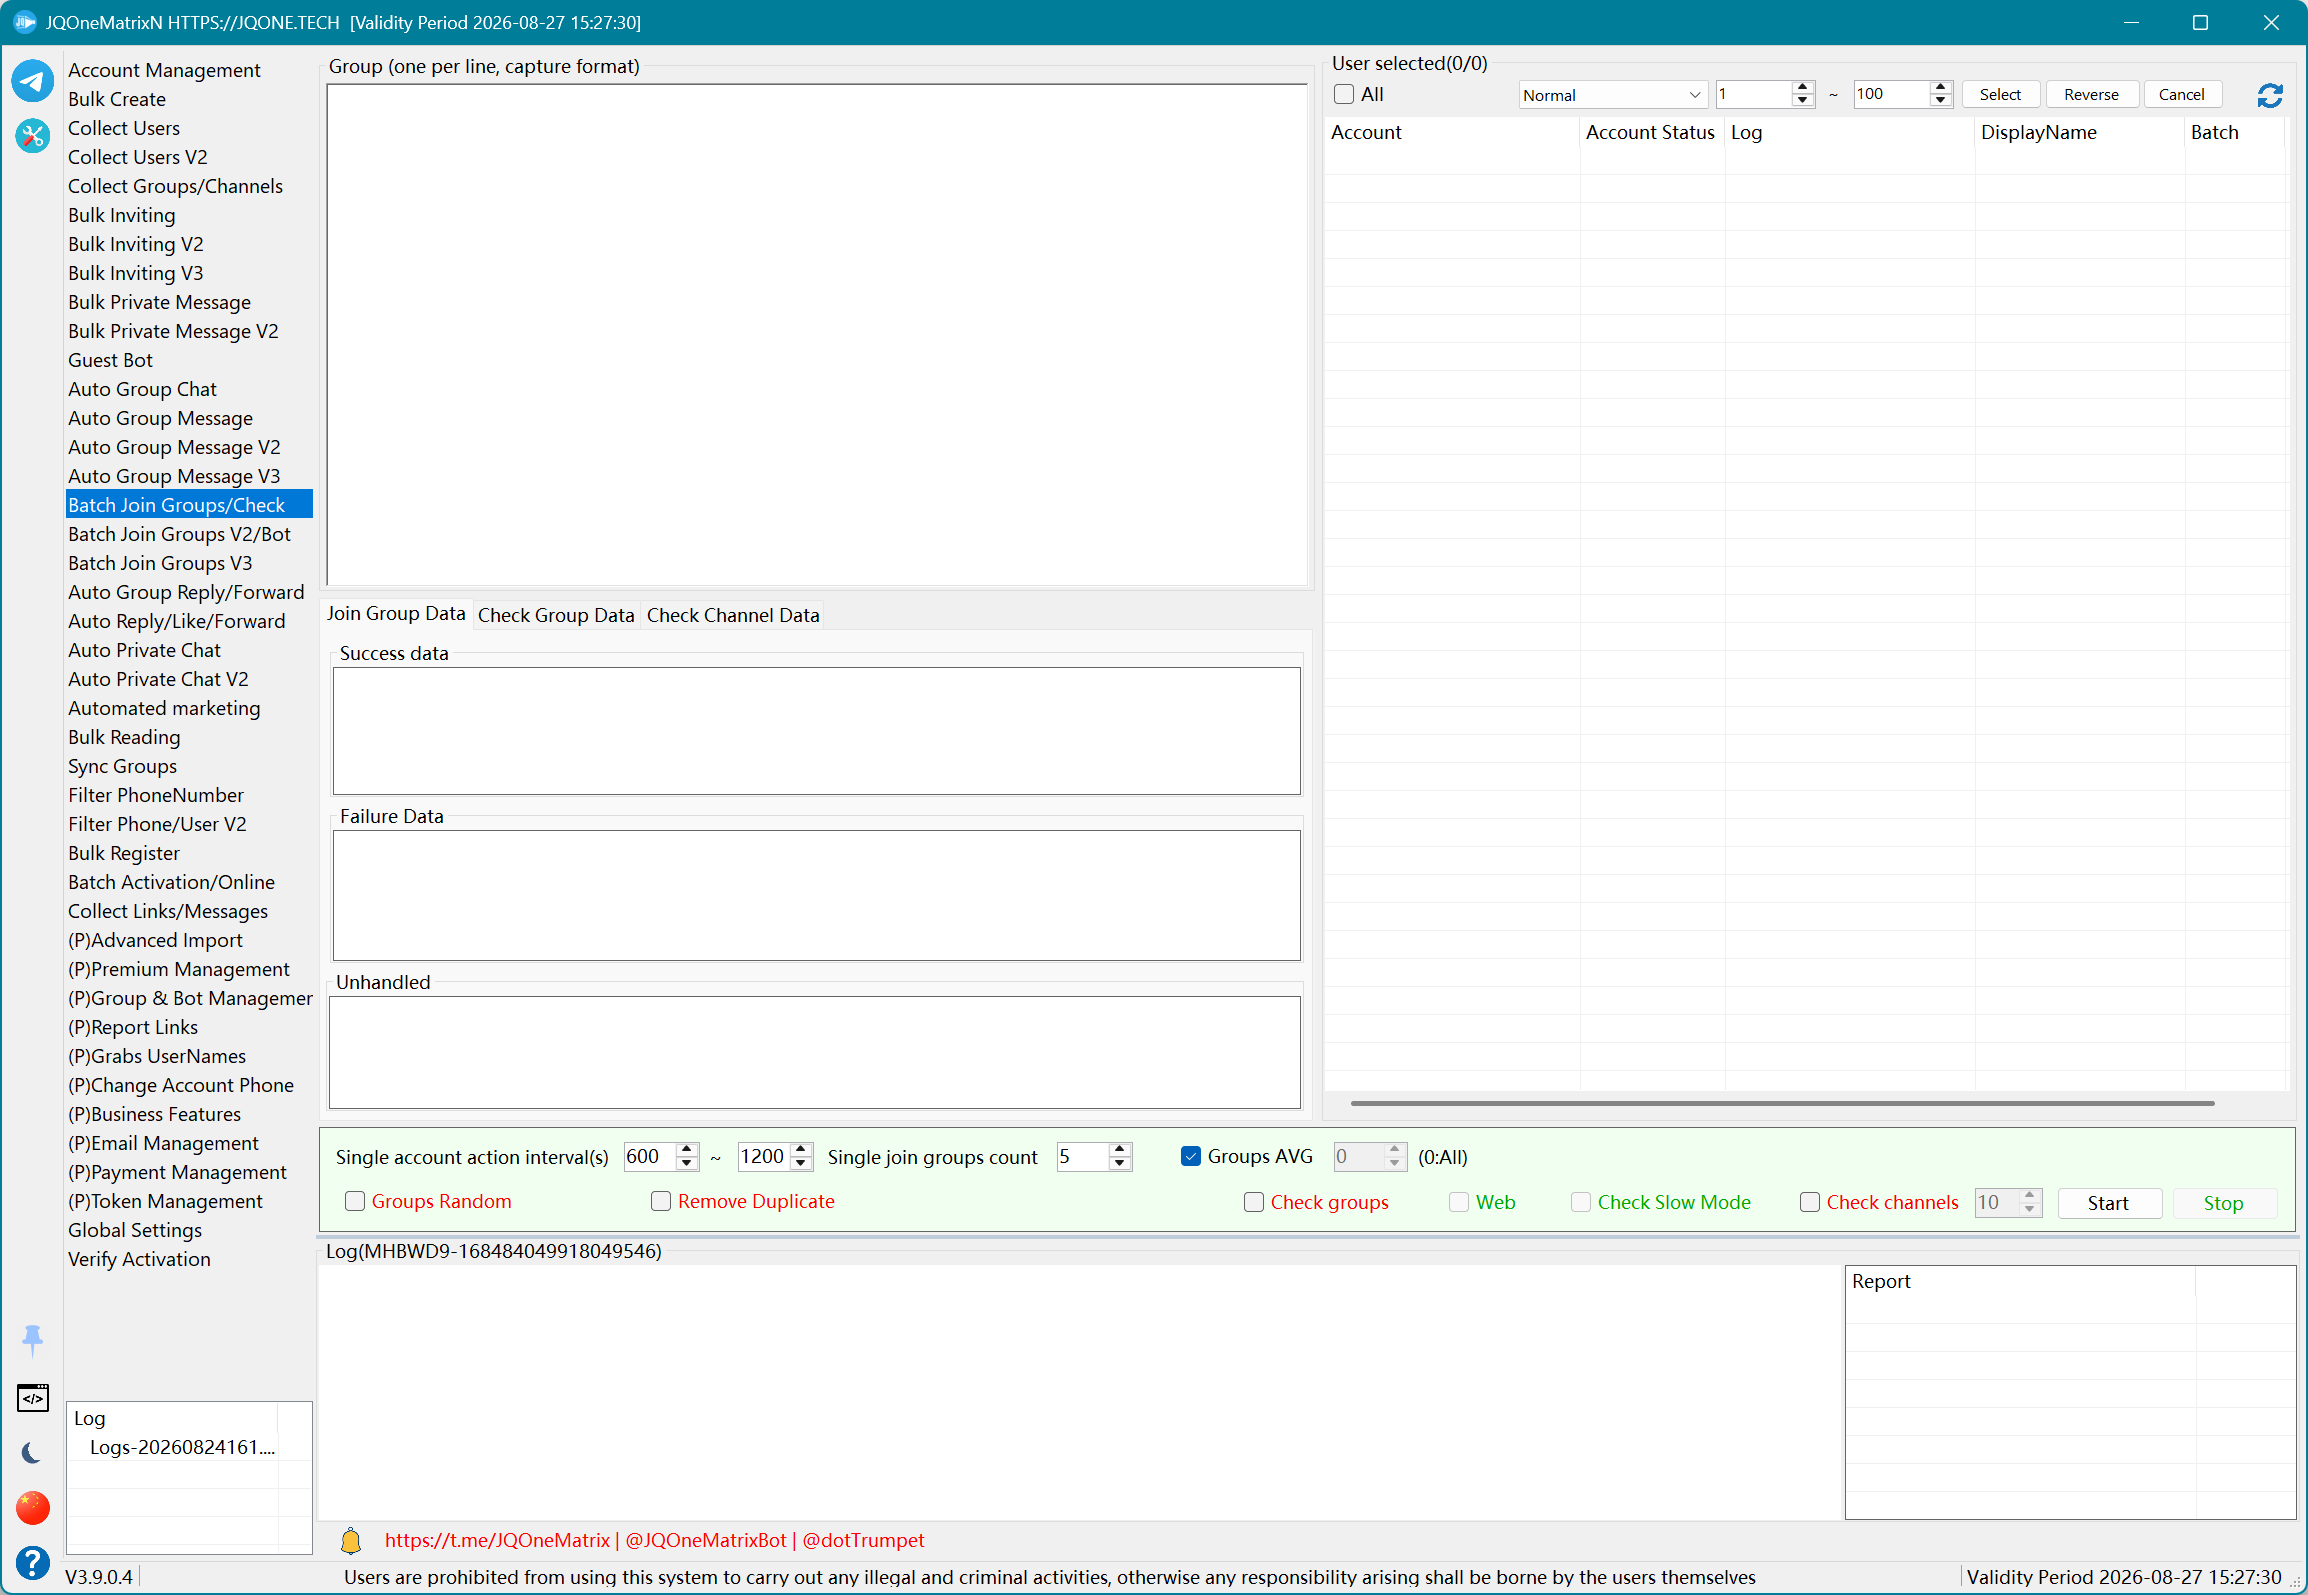
Batch Join Groups/Check
Join groups in bulk or switch to check mode to validate links.
Steps
- Select worker accounts and paste group or channel links.
- Choose Joining or Group Check. In check mode, enable Channel Check, Web Check, and Slowmode Check as required.
- Configure deduplication, random groups, or divided groups, then set the per-account count and interval.
- Select Start. For joining, review Successful, Failed, and Unprocessed. For checking, review Active/Valid/Dead Groups and Commentable/Valid/Dead Channels.
- Select Stop when required. Before rerunning, take only the links that still need work from the relevant result tab.
Additional information
- Divide Groups distributes links among selected accounts instead of making every account process every link. When rerunning unprocessed data, avoid reimporting successful links.
Note: Test with a small number of accounts and records first. Available controls and results depend on the license, account state, target permissions, and Telegram response.
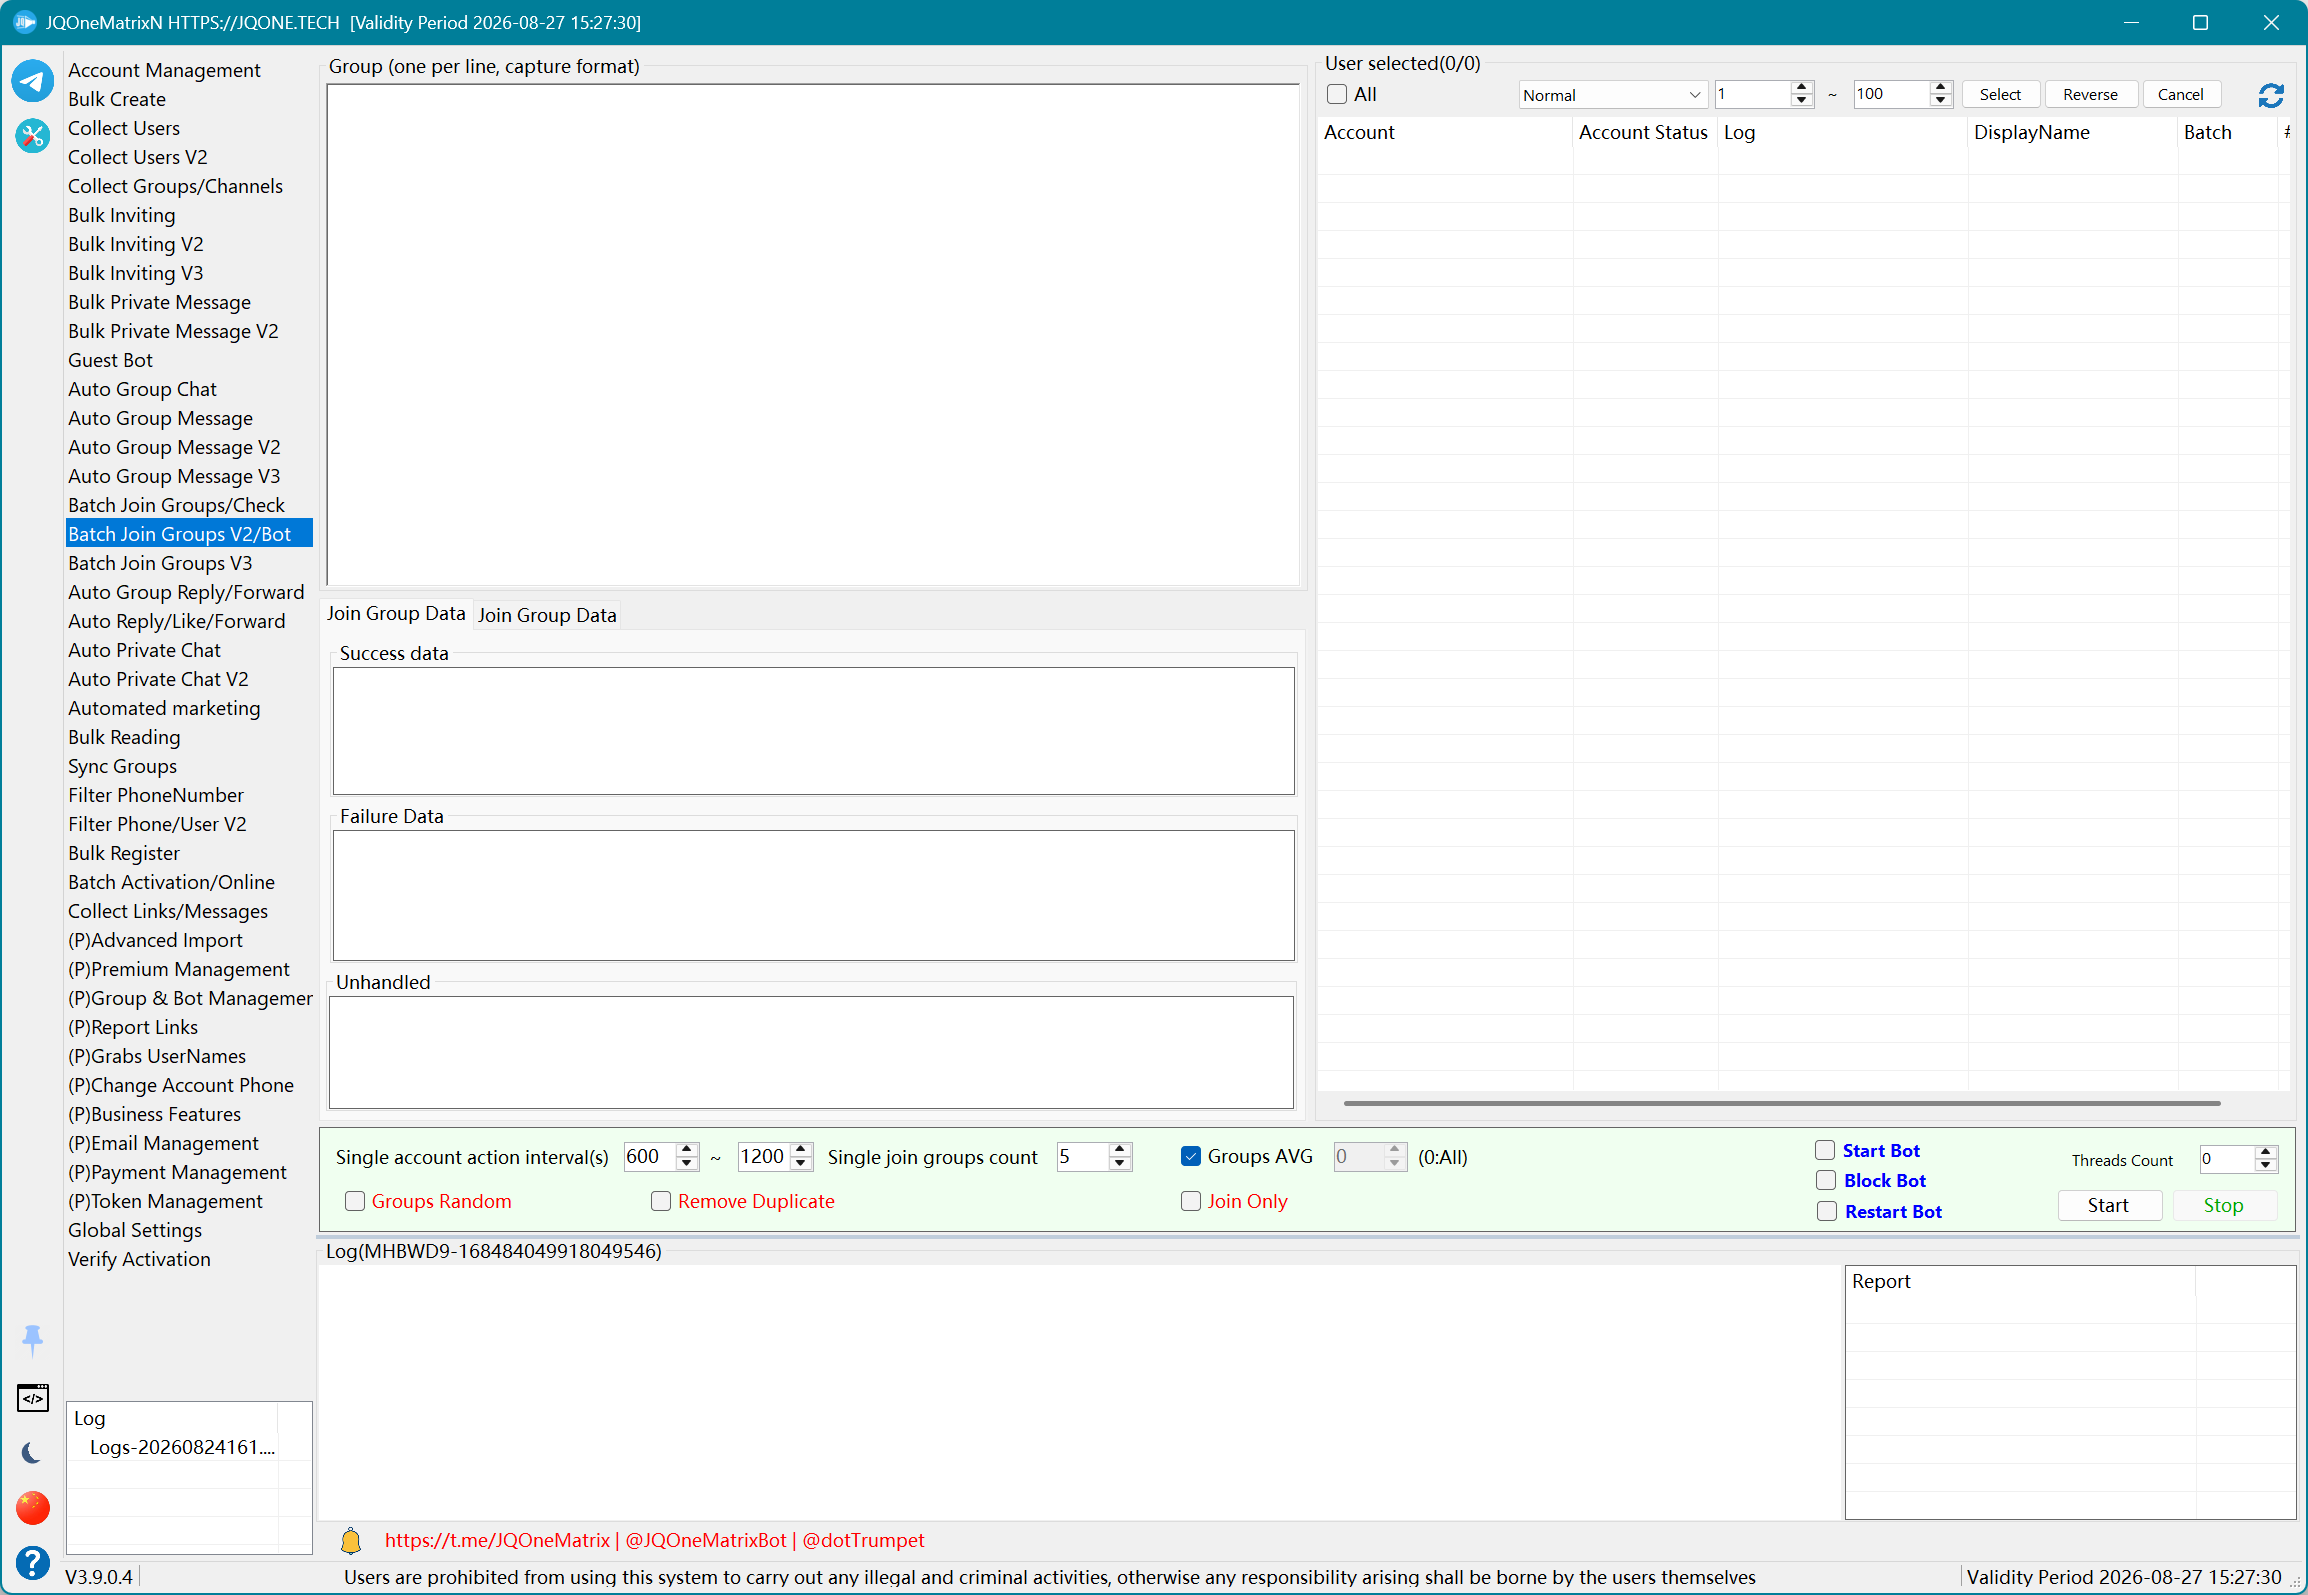
Batch Join Groups V2/Bot
Supports bulk group joining and the Start Bot, Block Bot, and Restart Bot actions.
Steps
- Select worker accounts and paste target group or Bot links.
- Choose Join Only, Start Bot, Block Bot, or Restart Bot. Bot links must match the selected Bot action.
- Configure deduplication, random distribution, or divided groups, then set the per-account count, threads, and interval.
- Select Start and review Successful, Failed, and Unprocessed links. Interpret Bot logs according to the currently selected action.
- Select Stop before changing the action or redistributing links so the same batch does not run different actions simultaneously.
Additional information
- The basic joining workflow is similar to V1, with additional Bot actions.
- A legacy version supported two task areas running two account batches at once. Treat this as available only when both task areas are present in the current interface.
Note: Test with a small number of accounts and records first. Available controls and results depend on the license, account state, target permissions, and Telegram response.
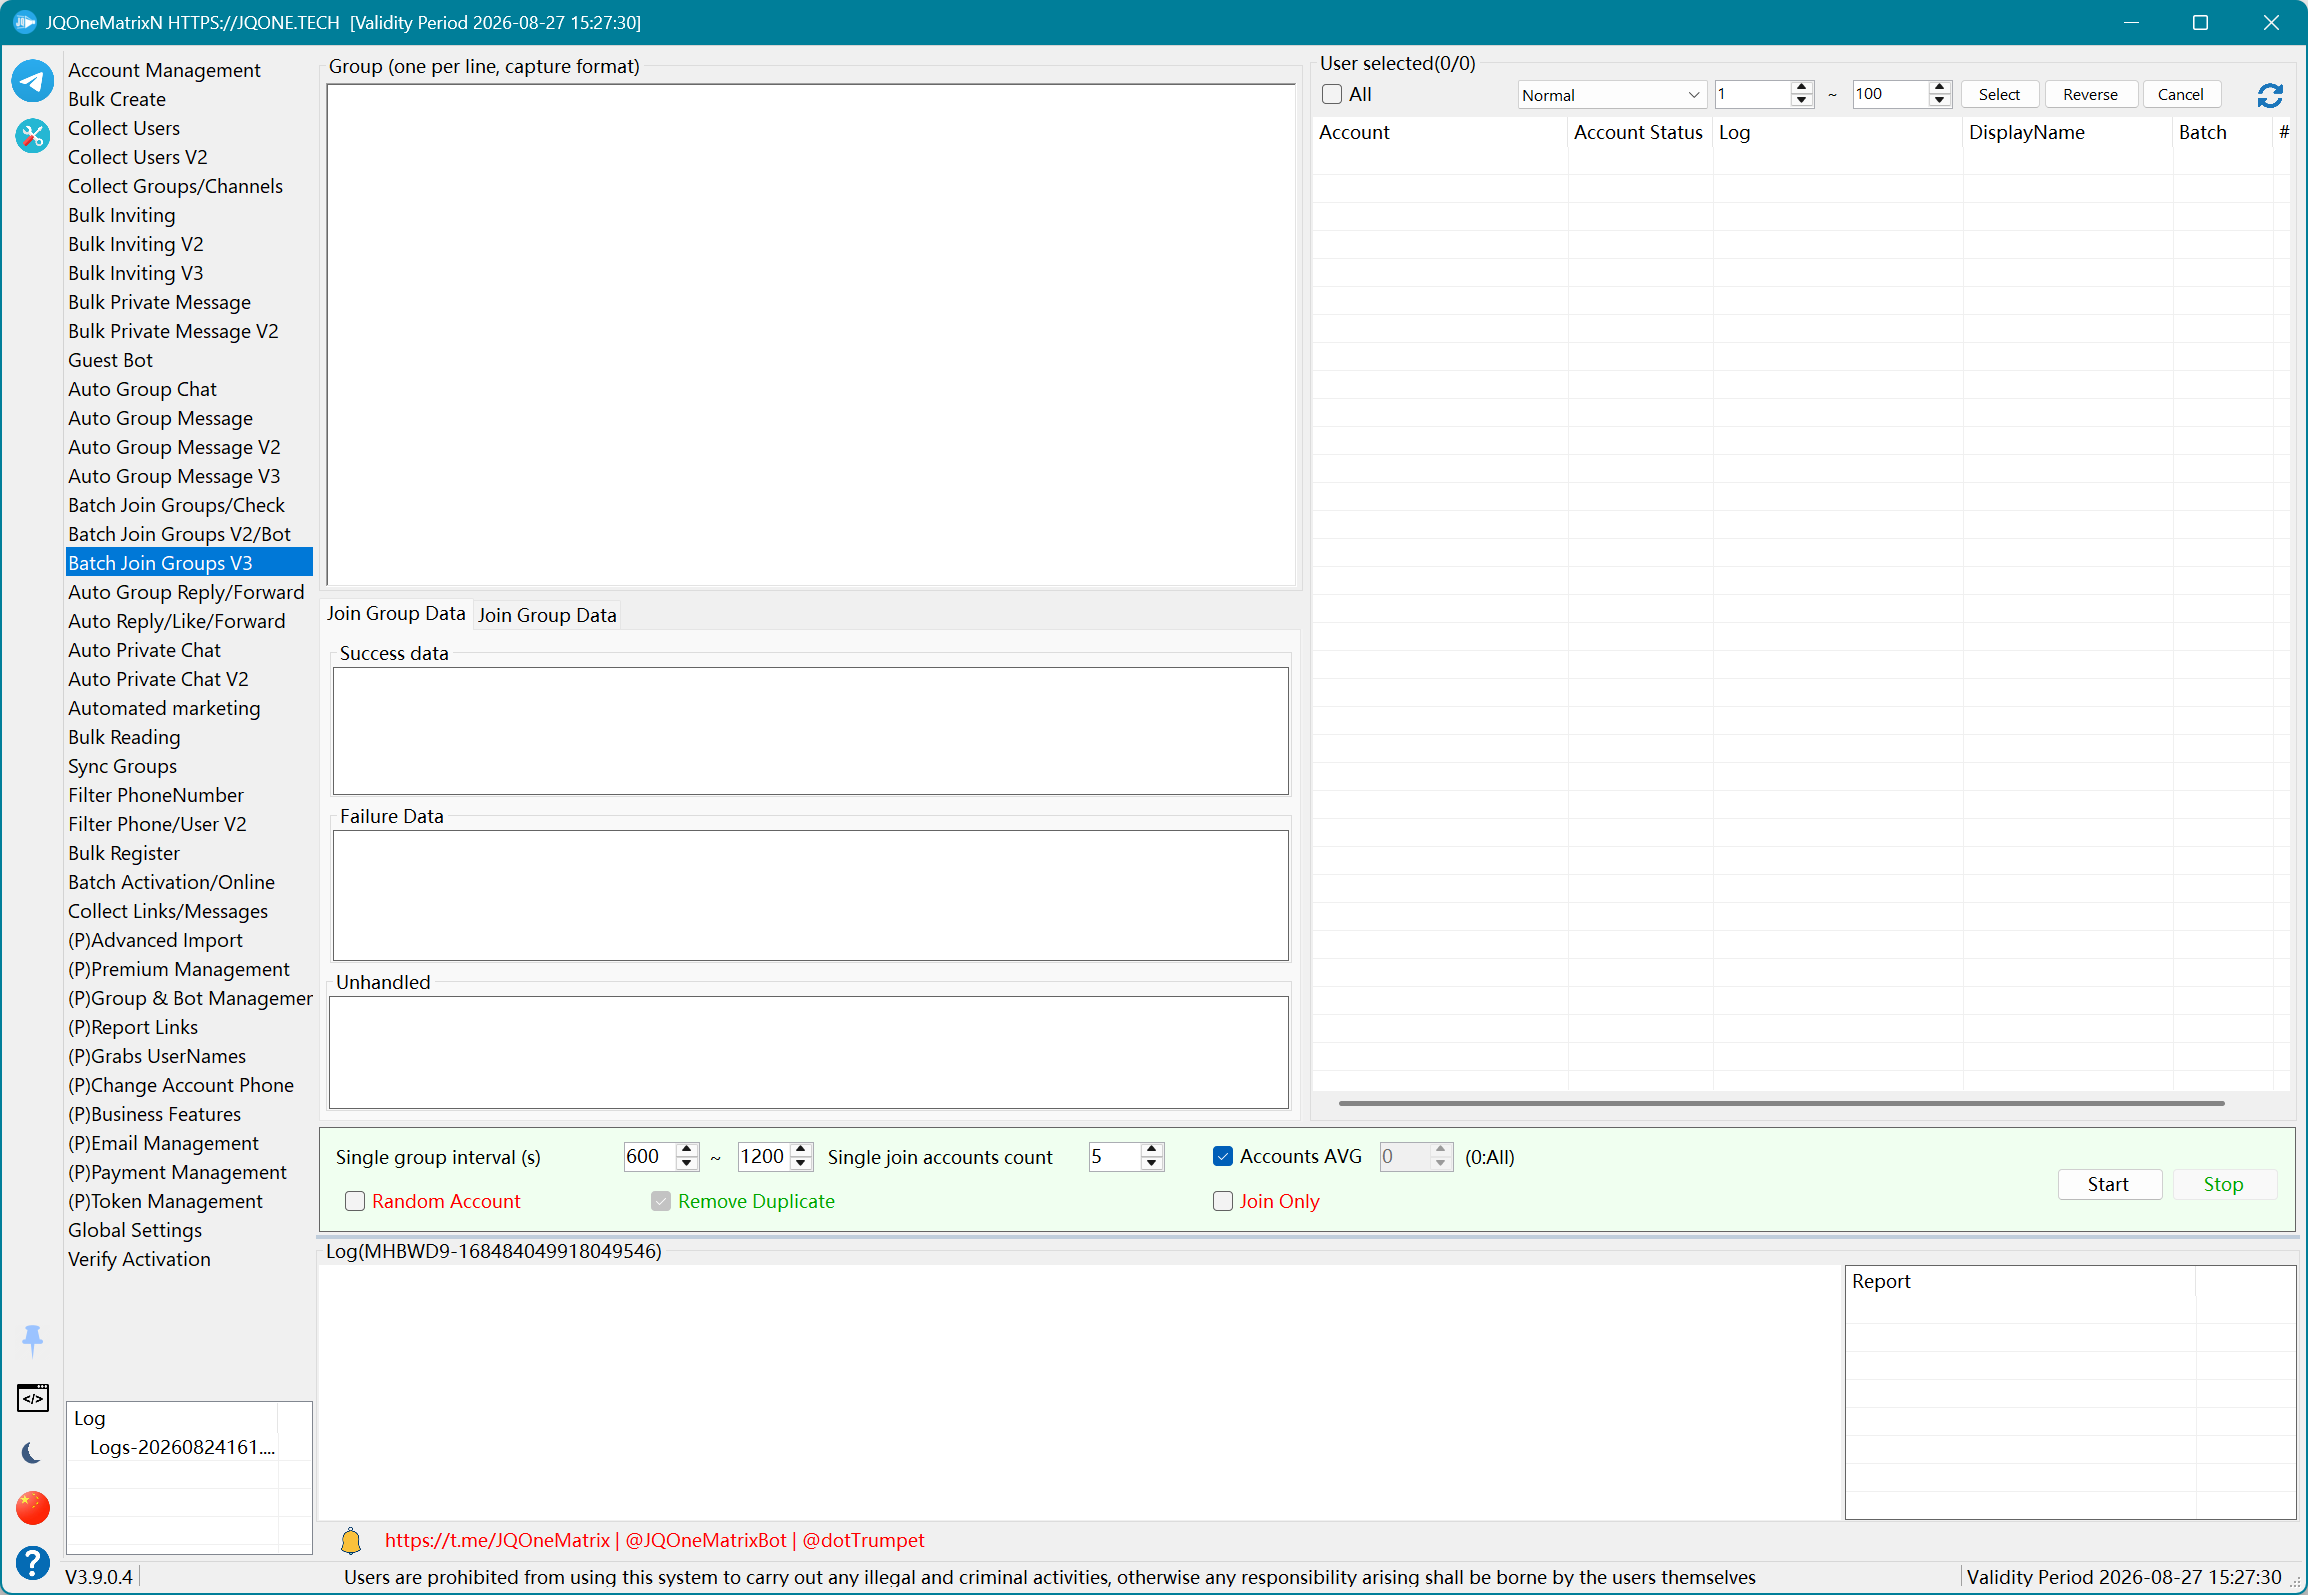
Batch Join Groups V3
Assign participating accounts by group and control how many accounts join each group.
Steps
- Paste the target group list and select the accounts that may participate in those groups.
- Choose Join Only, then choose random accounts or divided accounts.
- Set the number of accounts to add per group and the processing interval between groups.
- Select Start. Accounts are assigned group by group rather than assigning group links per account.
- Review Successful, Failed, and Unprocessed for each group's account completion. Select Stop before changing participating accounts.
Note: Test with a small number of accounts and records first. Available controls and results depend on the license, account state, target permissions, and Telegram response.
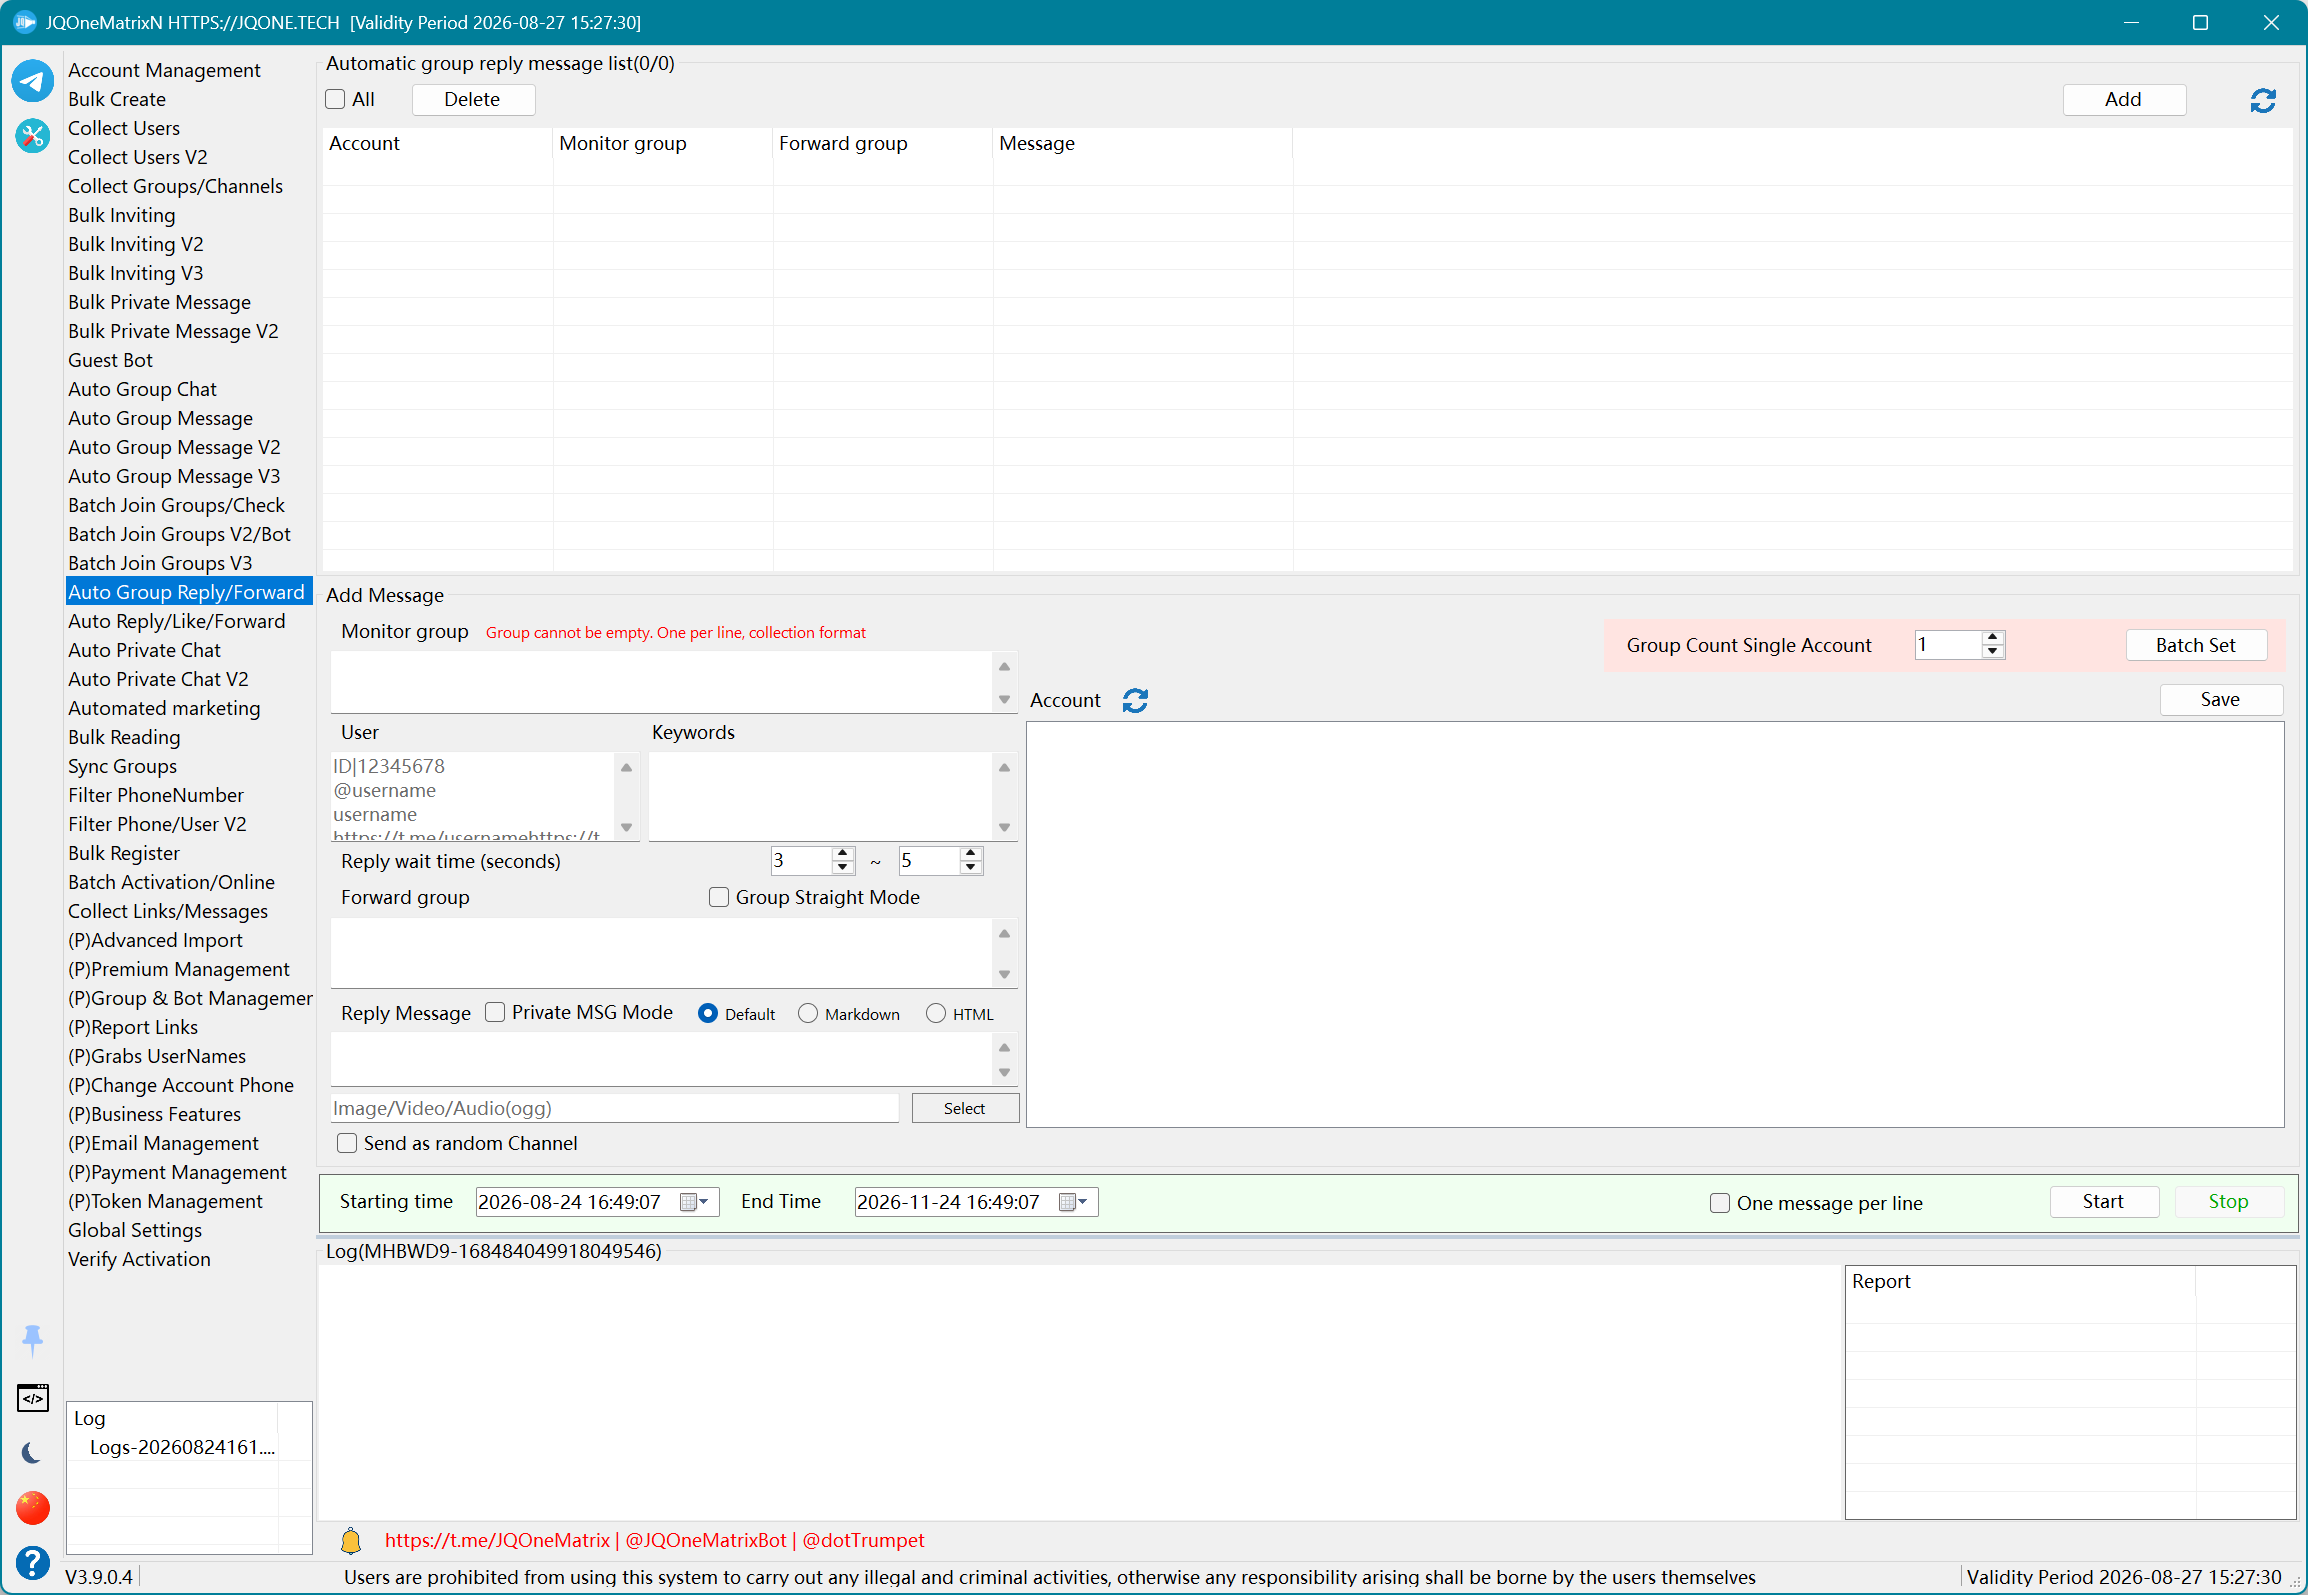
Auto Group Reply/Forward
Monitor messages from selected users or containing keywords, then reply, forward, or send directly to other groups.
Steps
- Select Add Message to create a monitoring task, then choose the monitoring account.
- Enter monitored groups and the users or keywords to match.
- Choose reply, private-message, or direct-send-in-group mode. For forwarding to another group, enter the forwarding group.
- Enter Default, Markdown/HTML content and media, set reply wait, groups per account, and one-line-per-message, then save the task.
- Select tasks, set start/end times, and select Begin. Review matches and sends in the task row, or select Stop to end monitoring.
Additional information
- This feature is a group-message monitor. Monitoring accounts must remain online and Receive Telegram Updates must be enabled in Global Settings.
Note: Test with a small number of accounts and records first. Available controls and results depend on the license, account state, target permissions, and Telegram response.
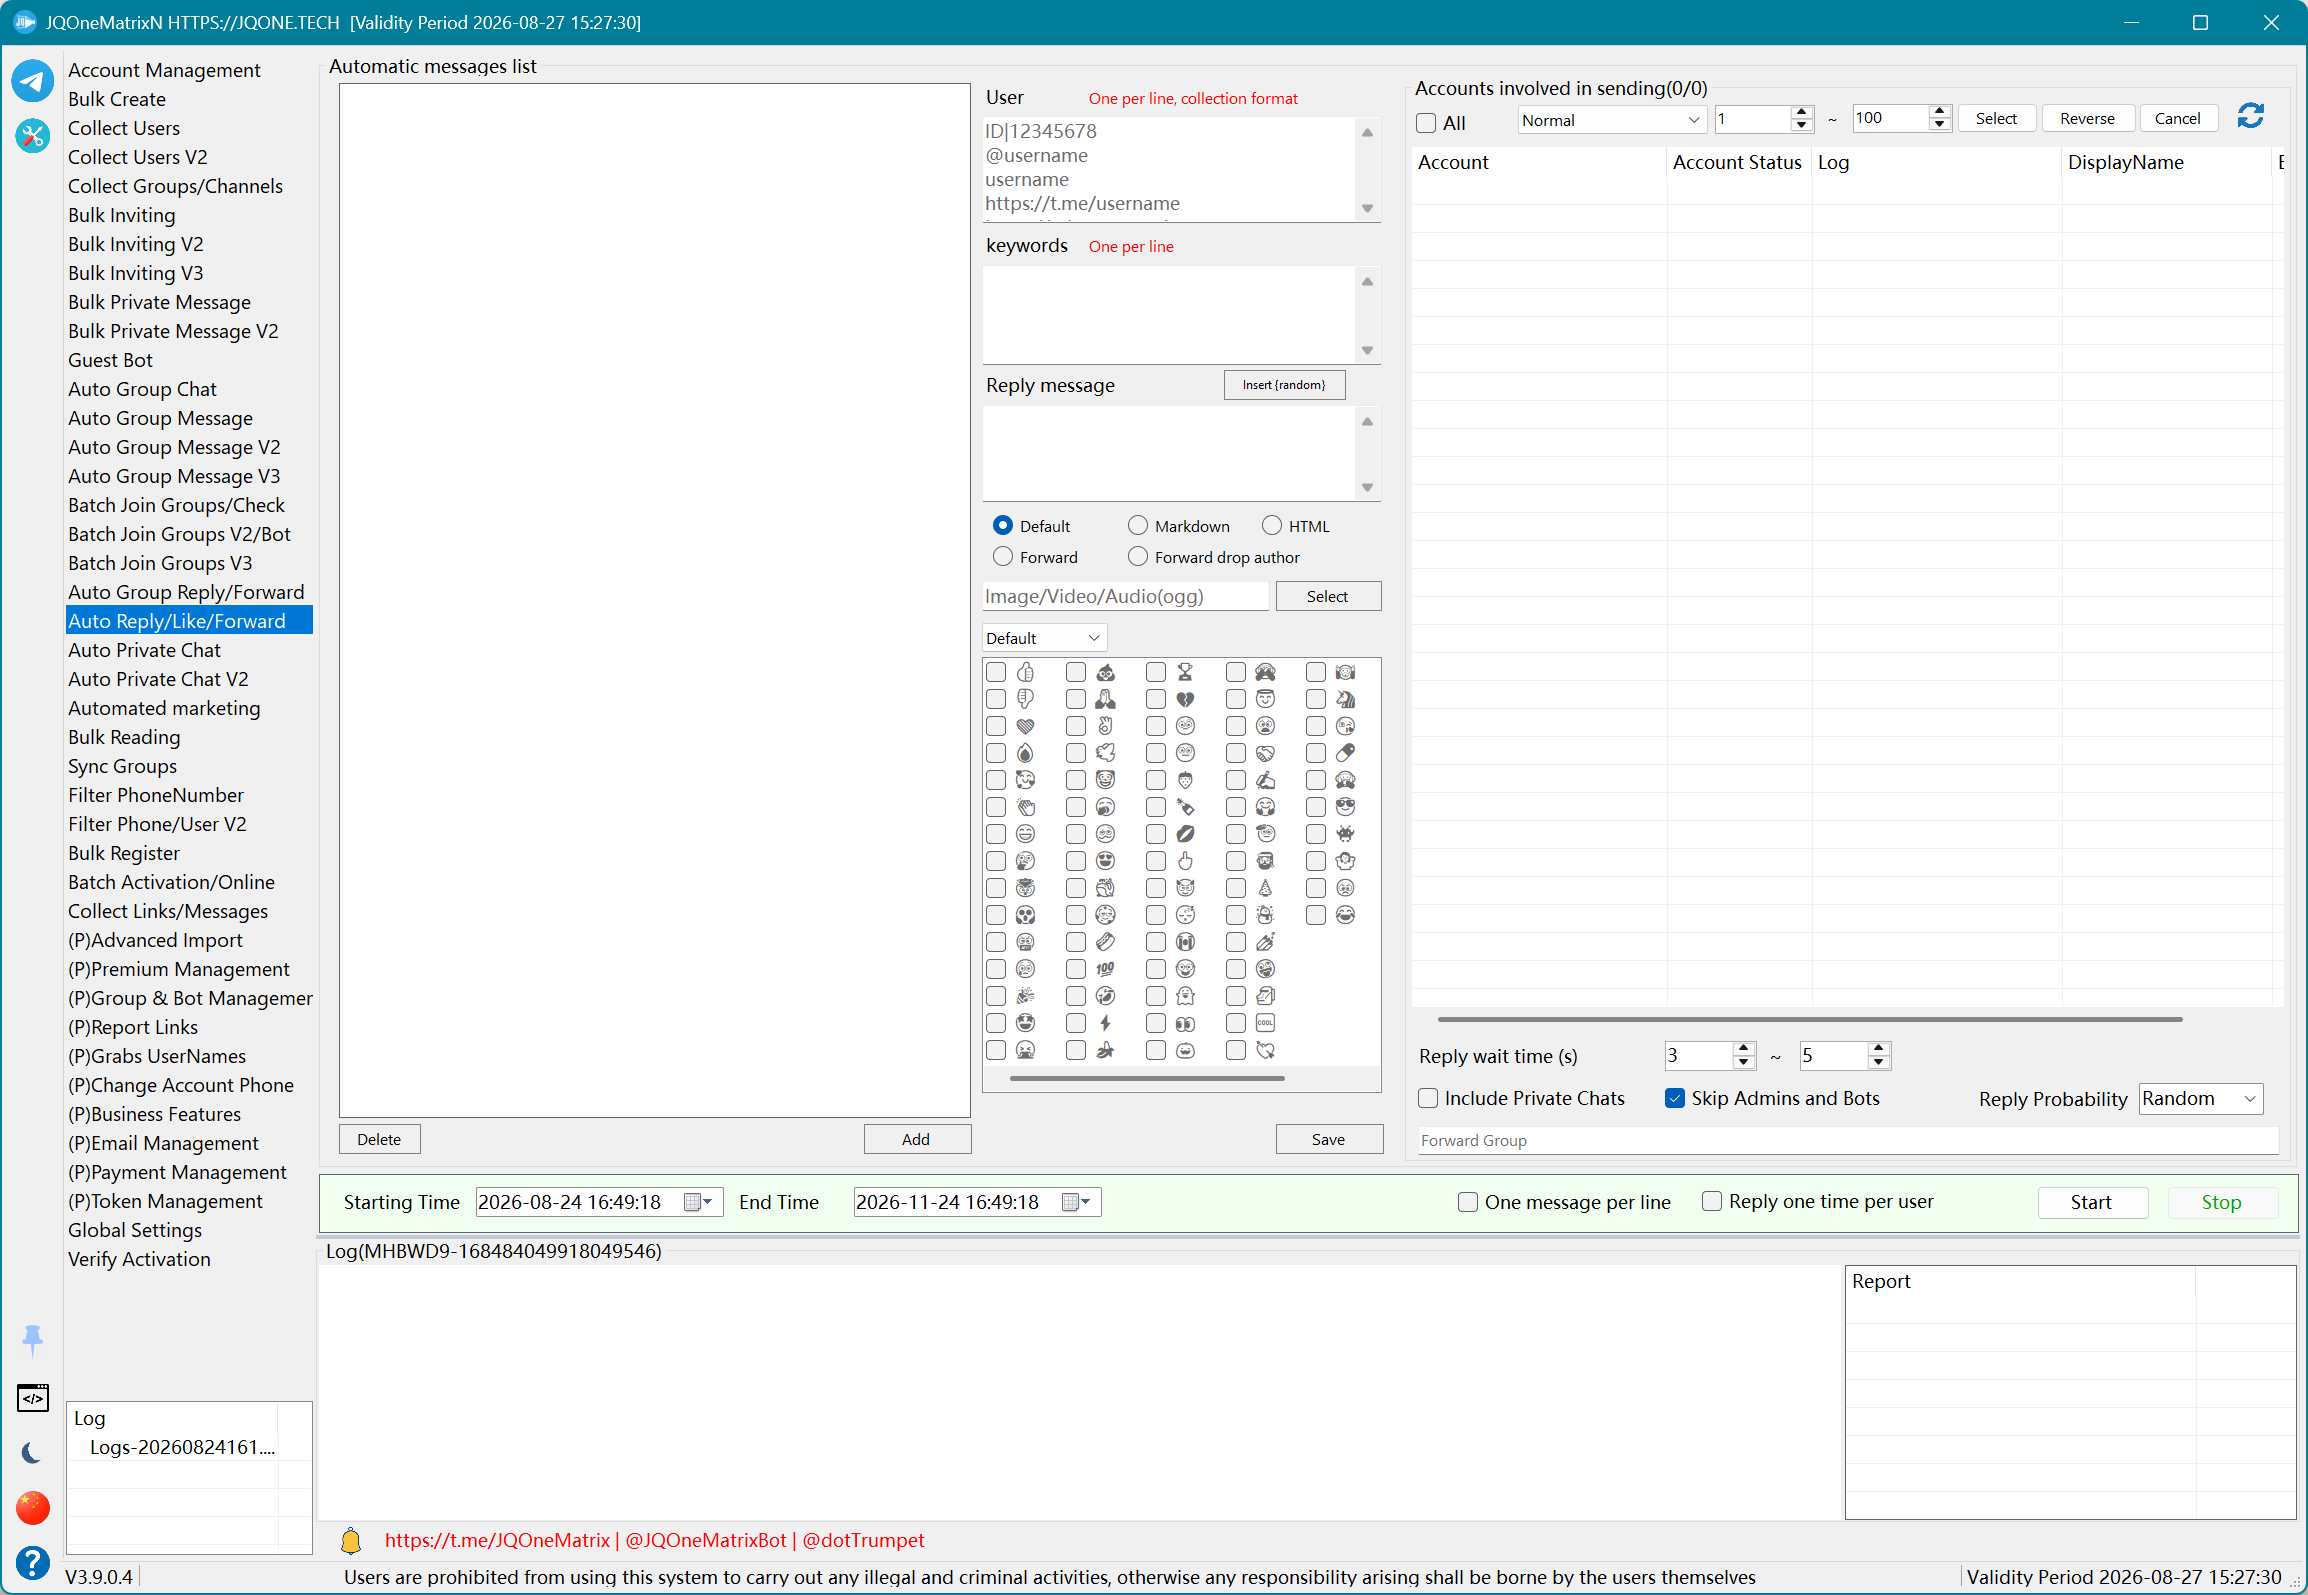
Auto Reply/Like/Forward
Automate interaction with message trees, reply probability, and reactions.
Steps
- Select participating accounts and decide whether private chats are included.
- Add users, keywords, and replies to the message tree so each trigger has a corresponding response.
- Choose Default, Markdown/HTML, media, or forwarding for each reply. Configure remove-author for forwarded messages.
- Select reactions and set reply probability. Enable skip administrators/Bots, reply once per user, wait interval, and one-line-per-message as needed.
- Save the message tree, set start/end times, and select Begin. Review reply and reaction counts, or select Cancel to stop.
Additional information
- Automatic replies and reactions depend on Telegram updates. Confirm that Receive Telegram Updates is enabled before running.
Note: Test with a small number of accounts and records first. Available controls and results depend on the license, account state, target permissions, and Telegram response.
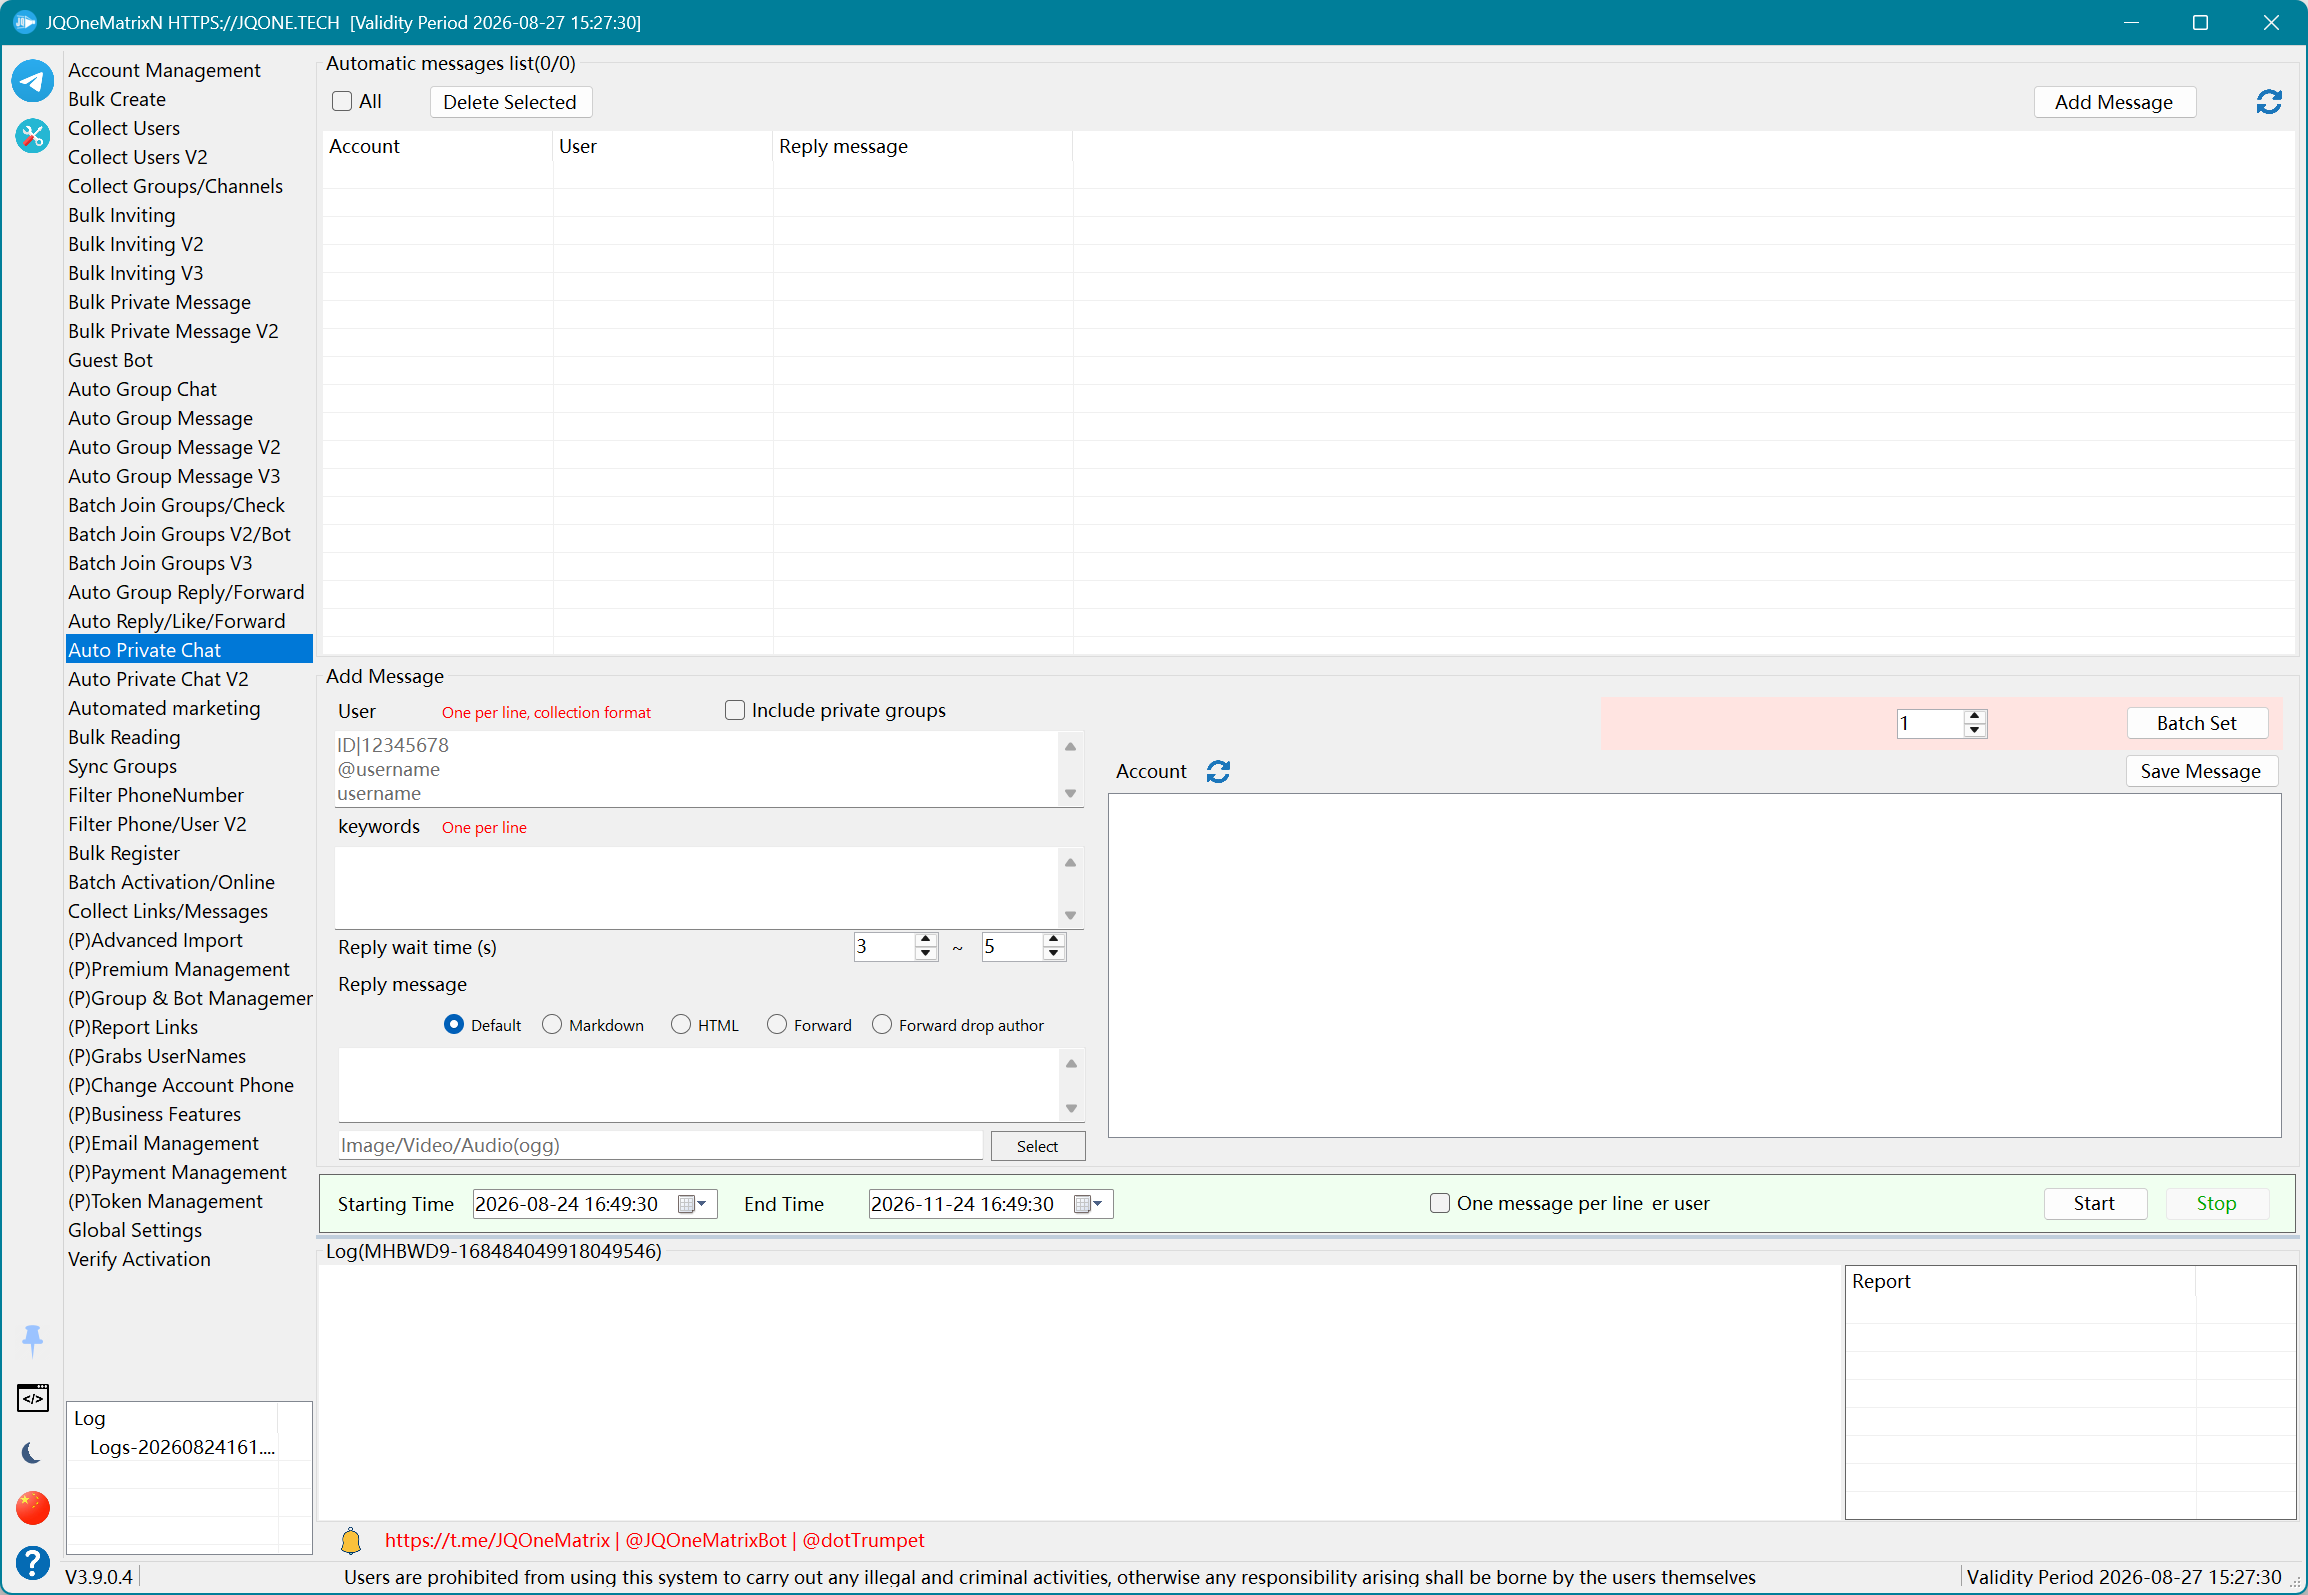
Auto Private Chat
Monitor users who message the account or matching keywords and reply automatically as a customer-service workflow.
Steps
- Select Add Message to create an automatic private-chat task and choose the monitoring account.
- Enter key users and keywords to define which private messages trigger a reply.
- Enter reply content and choose Default, Markdown/HTML, media, or forwarding. Remove the author when required for forwards.
- Include private groups if needed, set reply wait, reply once per user, and one-line-per-message, then save or batch-configure tasks.
- Select tasks, set start/end times, and select Begin. Review matches and replies in the task list, or select Stop to finish.
Additional information
- V1 stores monitoring and reply settings separately for each account and is suitable when accounts need different rules.
Note: Test with a small number of accounts and records first. Available controls and results depend on the license, account state, target permissions, and Telegram response.
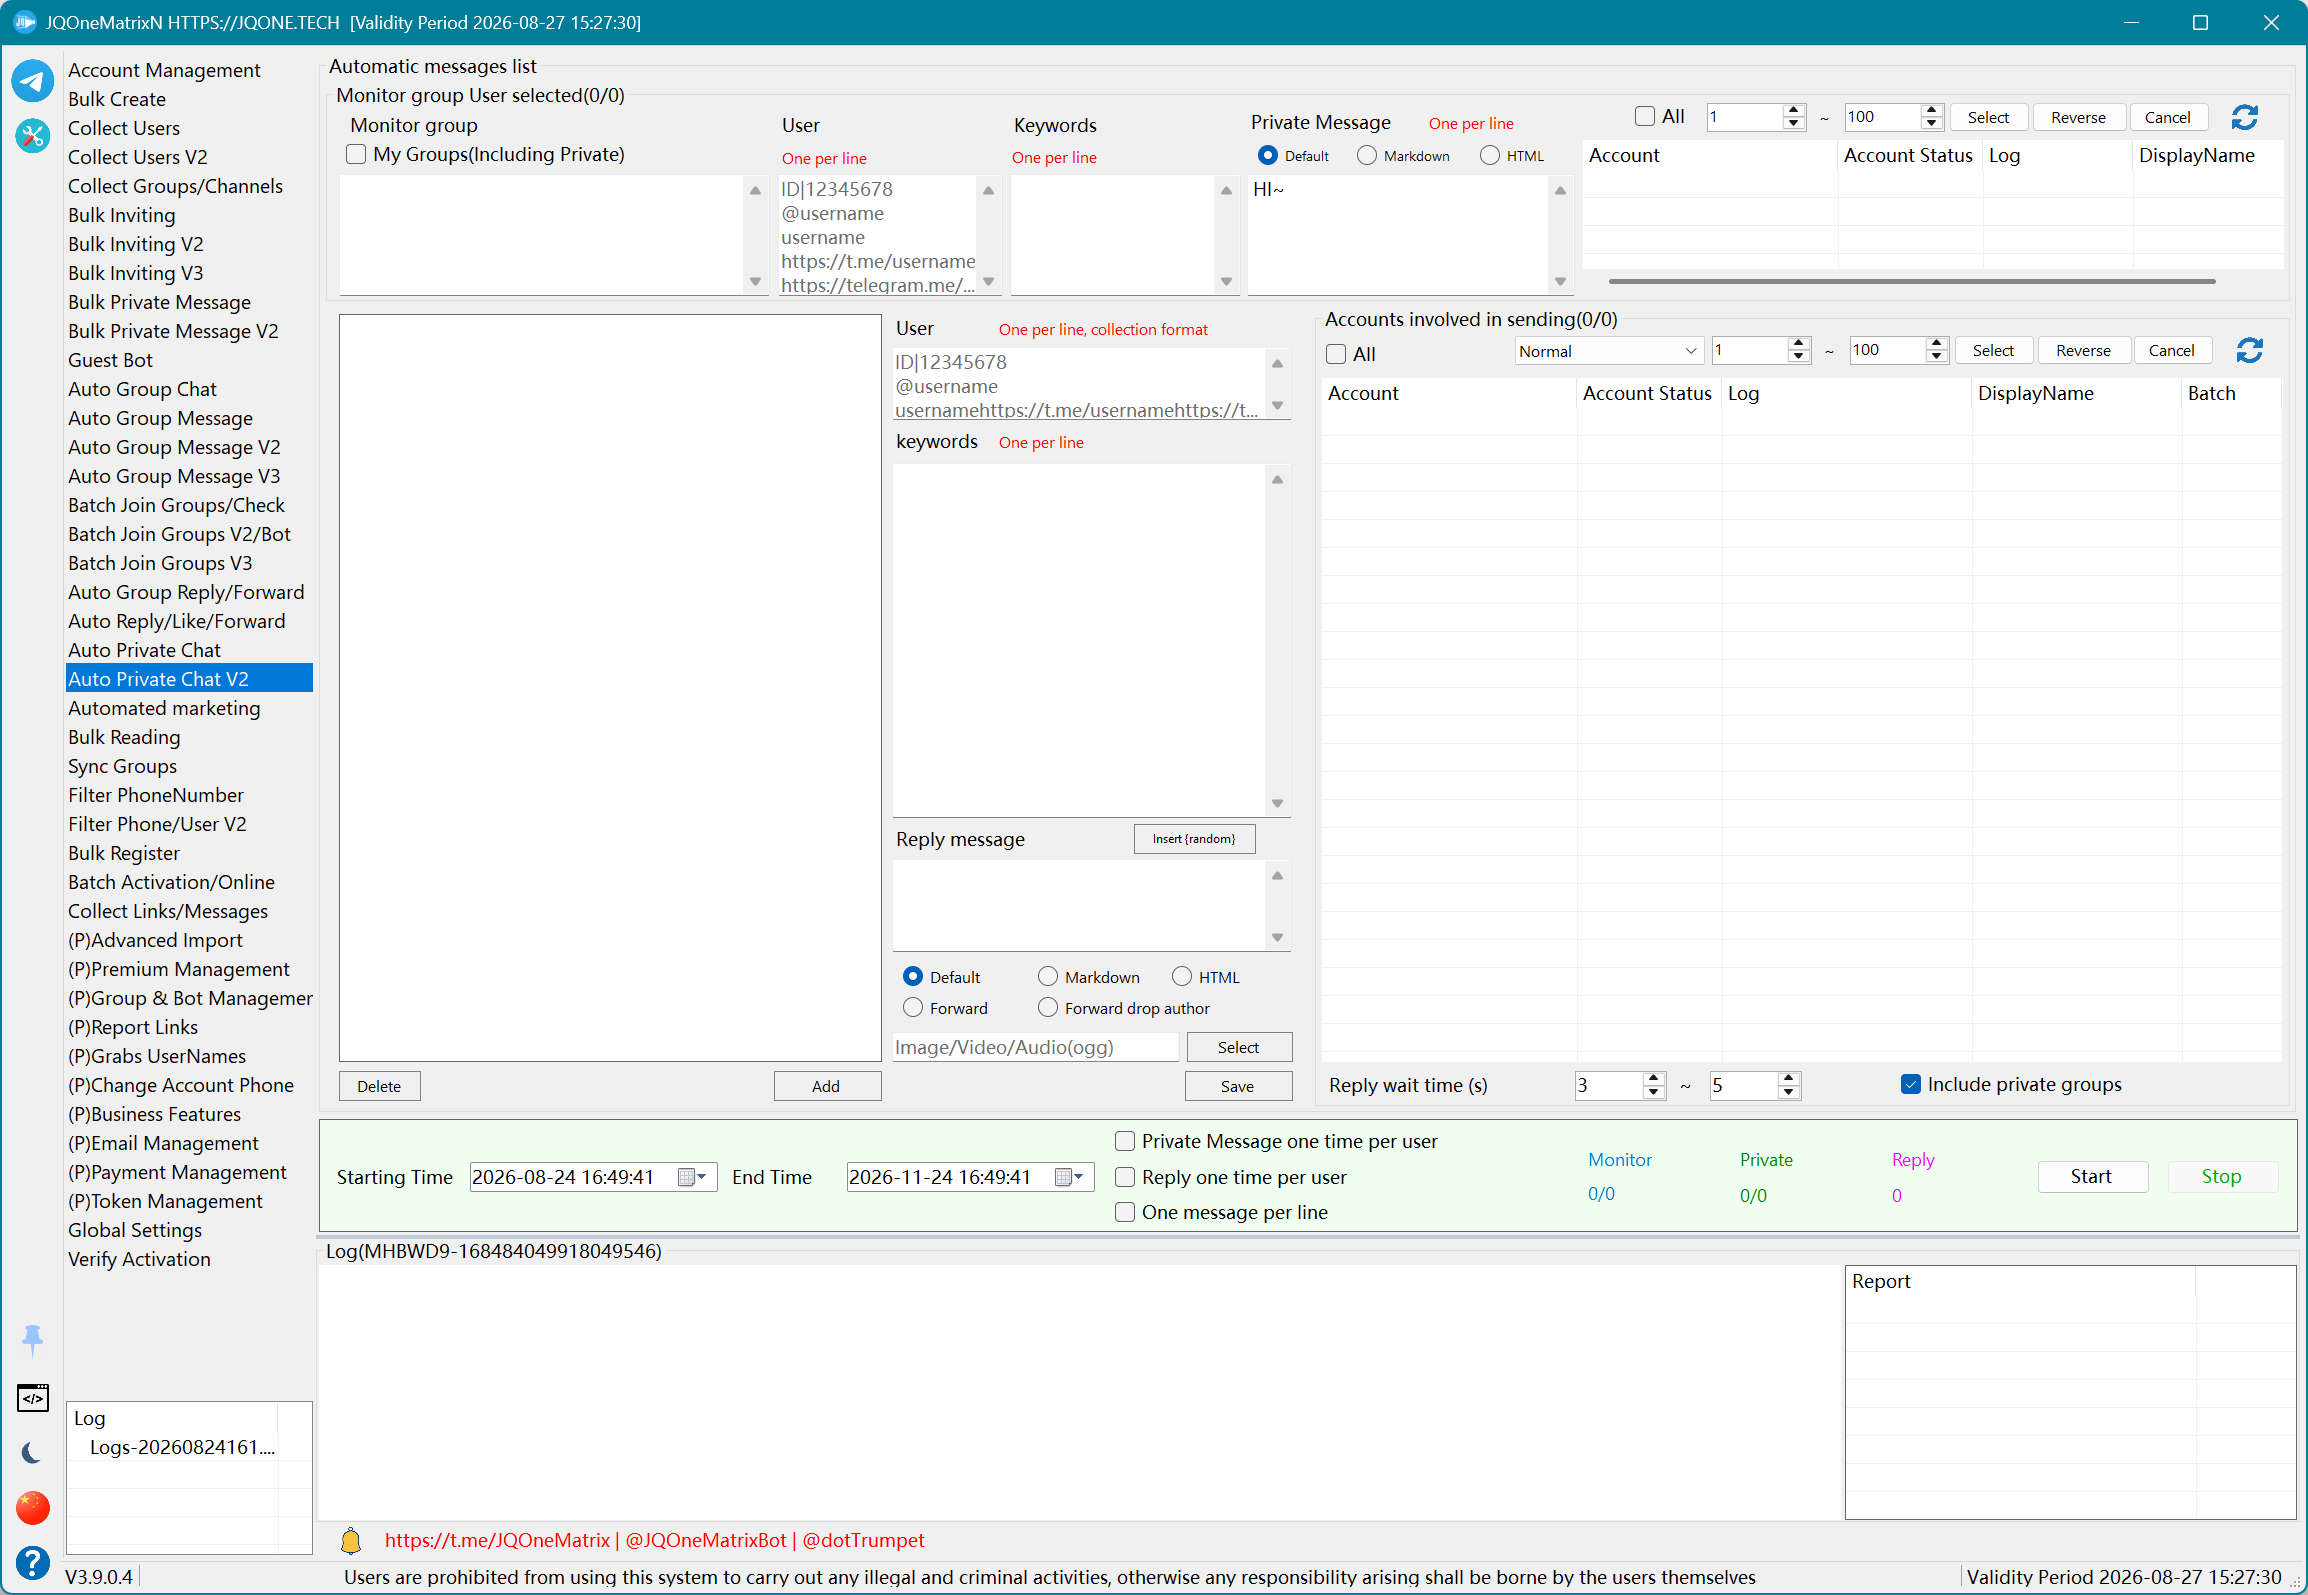
Auto Private Chat V2
Monitor group messages with monitoring accounts, then use participating accounts to send private messages and replies by user or keyword.
Steps
- First select the accounts that will send private messages and replies.
- Enter monitored groups, or use My Groups and decide whether private groups are included, then separately select the monitoring accounts.
- In the message tree, configure the default message, monitored group users and keywords, and the reply format, media, or forwarding content for each trigger.
- Set reply once per user, private-message once per user, reply wait, and private-group options.
- Set start/end times and select Begin. Review monitoring, private-message, and reply counters separately, or select Cancel to stop.
Additional information
- V2 is designed for multiple accounts and messages and separates monitoring accounts from accounts that send private messages and replies.
- Receive Telegram Updates must remain enabled while monitoring.
Note: Test with a small number of accounts and records first. Available controls and results depend on the license, account state, target permissions, and Telegram response.
Automated Marketing
Combine group sending, automatic replies, and private chat into a continuously running marketing task.
Steps
- Select Add Scheme, enter a scheme name, and choose participating accounts.
- On Auto Group Send, enter groups and messages, then configure format, media/forwarding, fake messages, send interval, looping, message count, private groups, and delete-after-send.
- On Auto Reply, enter monitored users, keywords, and replies; choose reply, private message, direct group send, or forwarding group, and set the wait time.
- On Auto Private Chat, enter users, keywords, and replies, then configure format, media/forwarding, private groups, and reply wait.
- Enable stop-on-restriction and save the scheme. Select schemes, set start/end times, and select Begin, or select Cancel to stop.
Additional information
- This feature combines group sending, replies, and private chat. The current interface has no explicit replace-dead-account setting, so that legacy overview claim is not a current capability.
Note: Test with a small number of accounts and records first. Available controls and results depend on the license, account state, target permissions, and Telegram response.
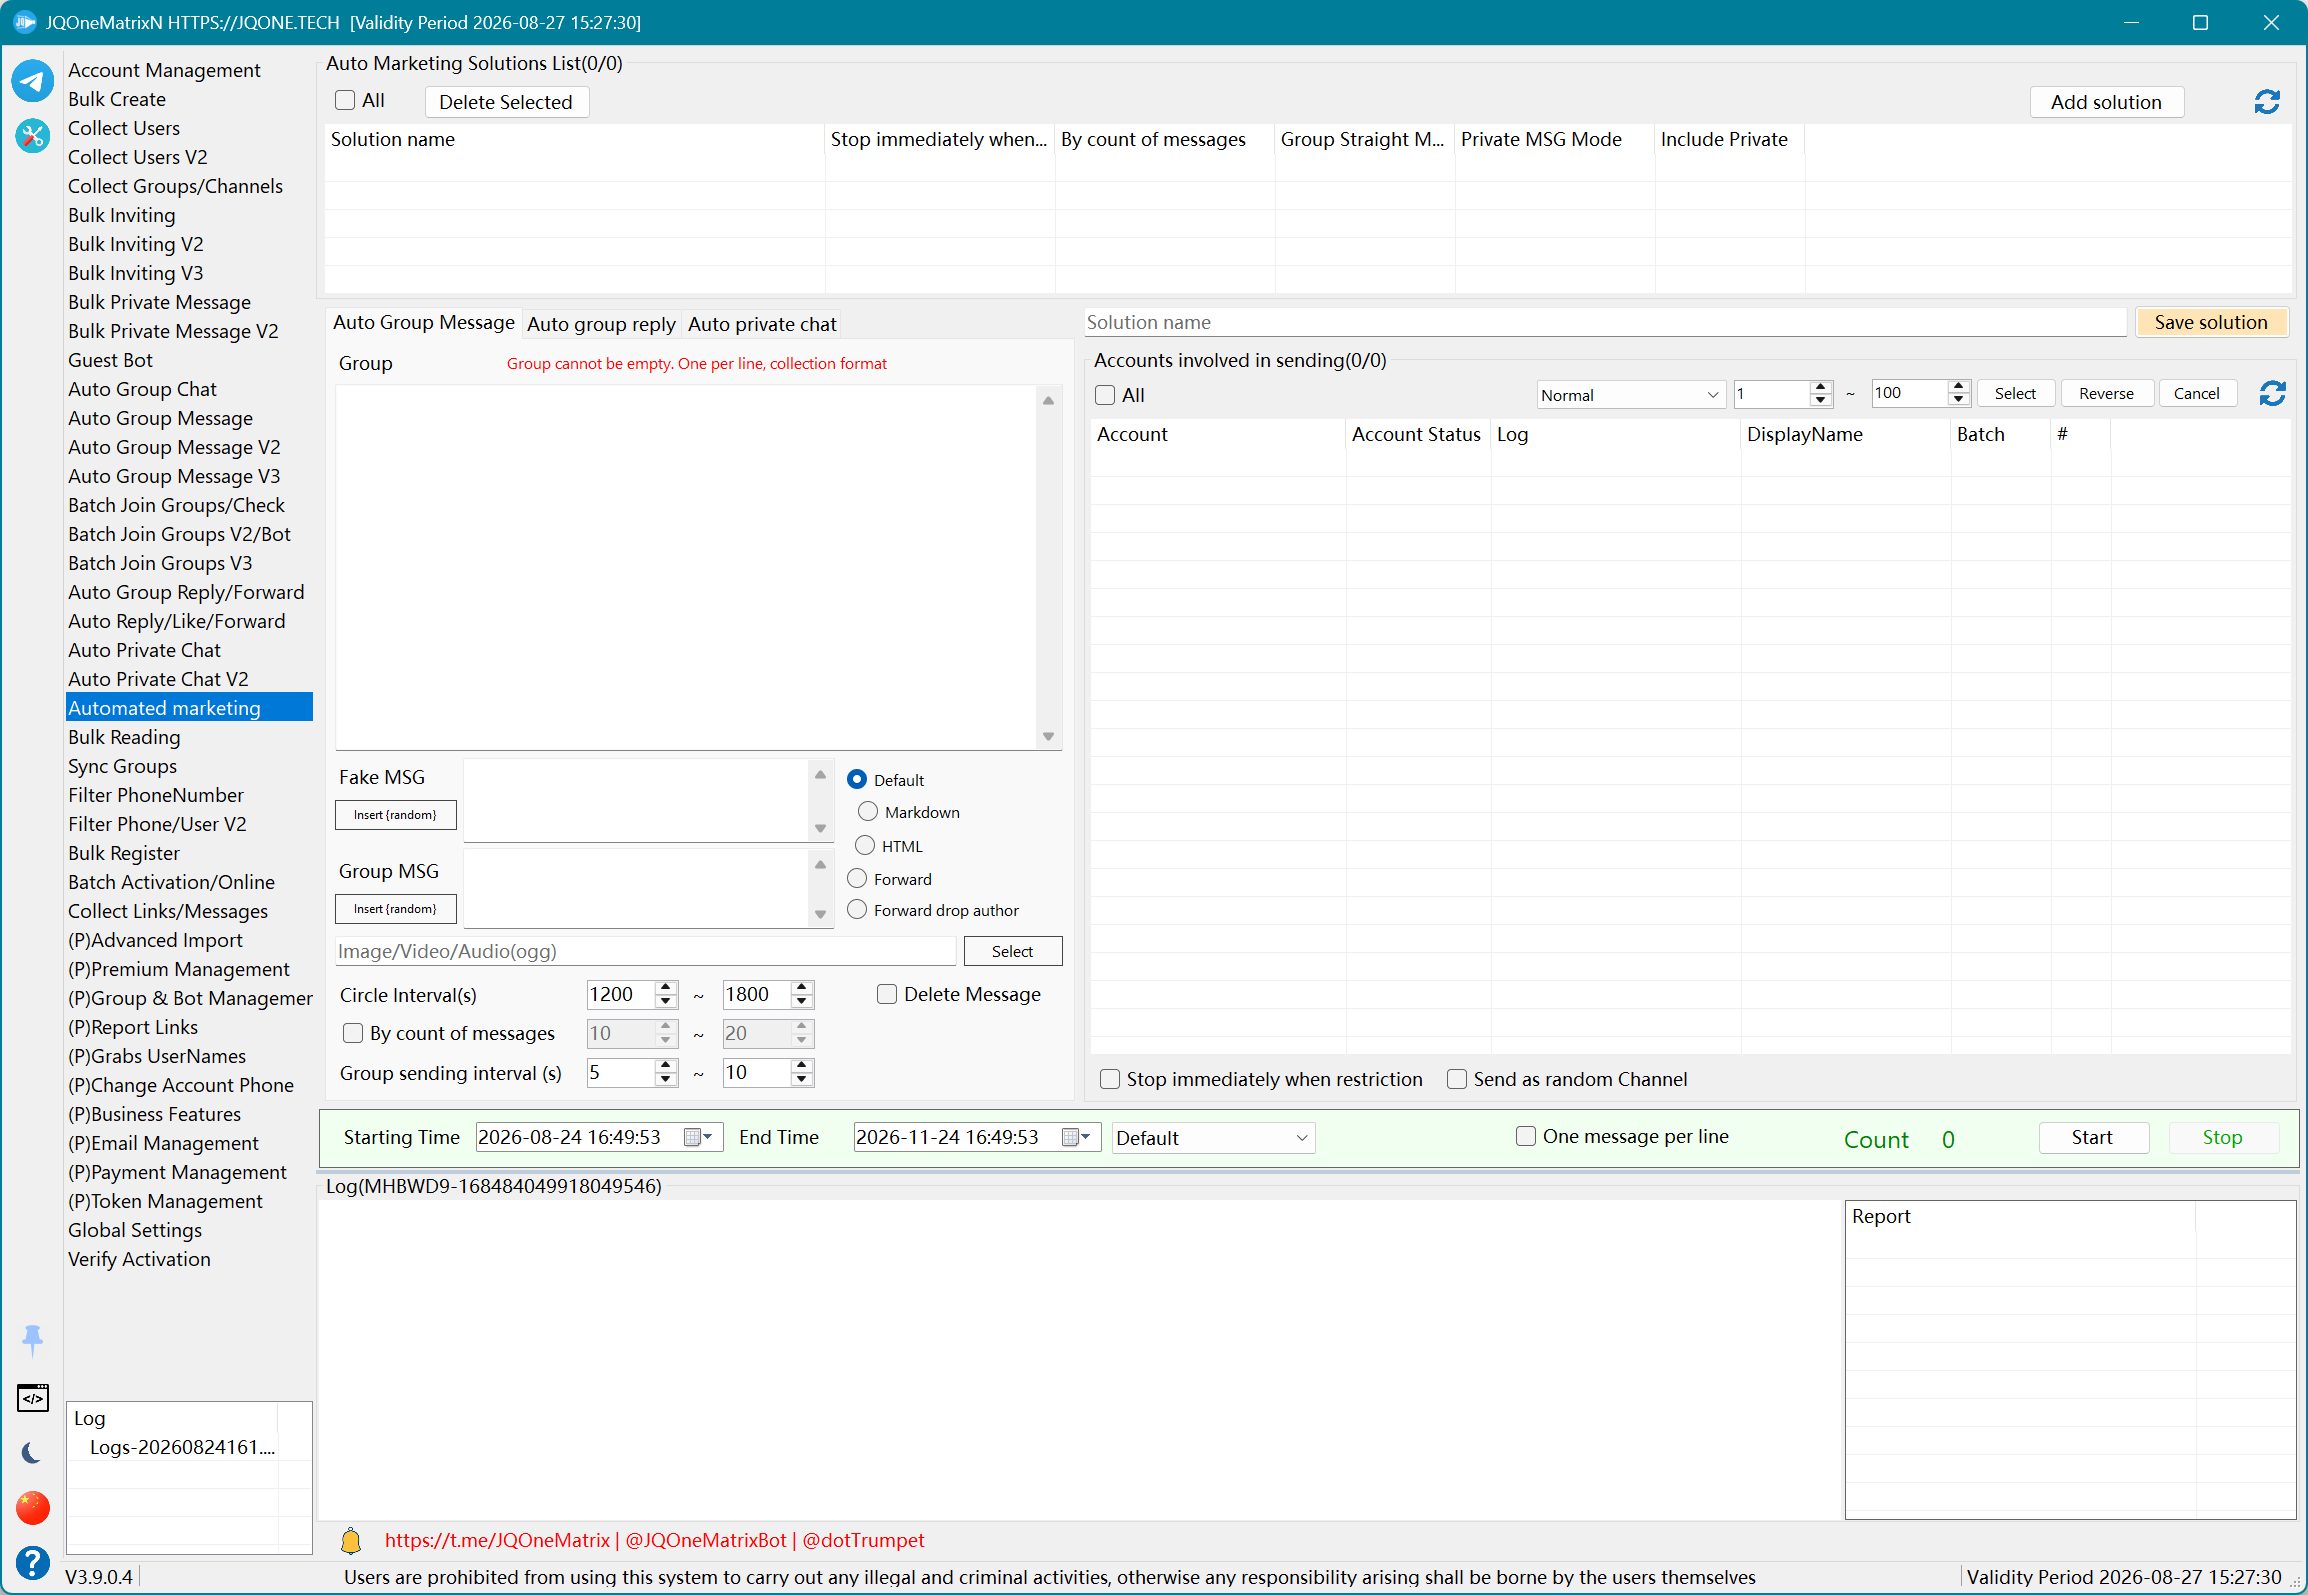
Bulk Reading
Open message links with multiple accounts and optionally submit comments, join groups, or run Boost.
Steps
- Select the accounts used to increase views and paste the message links.
- For comments, enter one comment per line in message order. Enable Join Group when the source must be accessed first.
- Enable Boost or divided groups as required and set the per-account message-opening interval.
- Select Start for a normal reading task and review each link/account result in the page log. Select Stop to interrupt it.
- For continuous external reading service, use the separate Start Service control. Service mode is independent from the one-time Start task.
Additional information
- Reading, commenting, and Boost are separate outcomes. Comments map line by line to message links, and Boost success depends on current account and channel eligibility.
Note: Test with a small number of accounts and records first. Available controls and results depend on the license, account state, target permissions, and Telegram response.
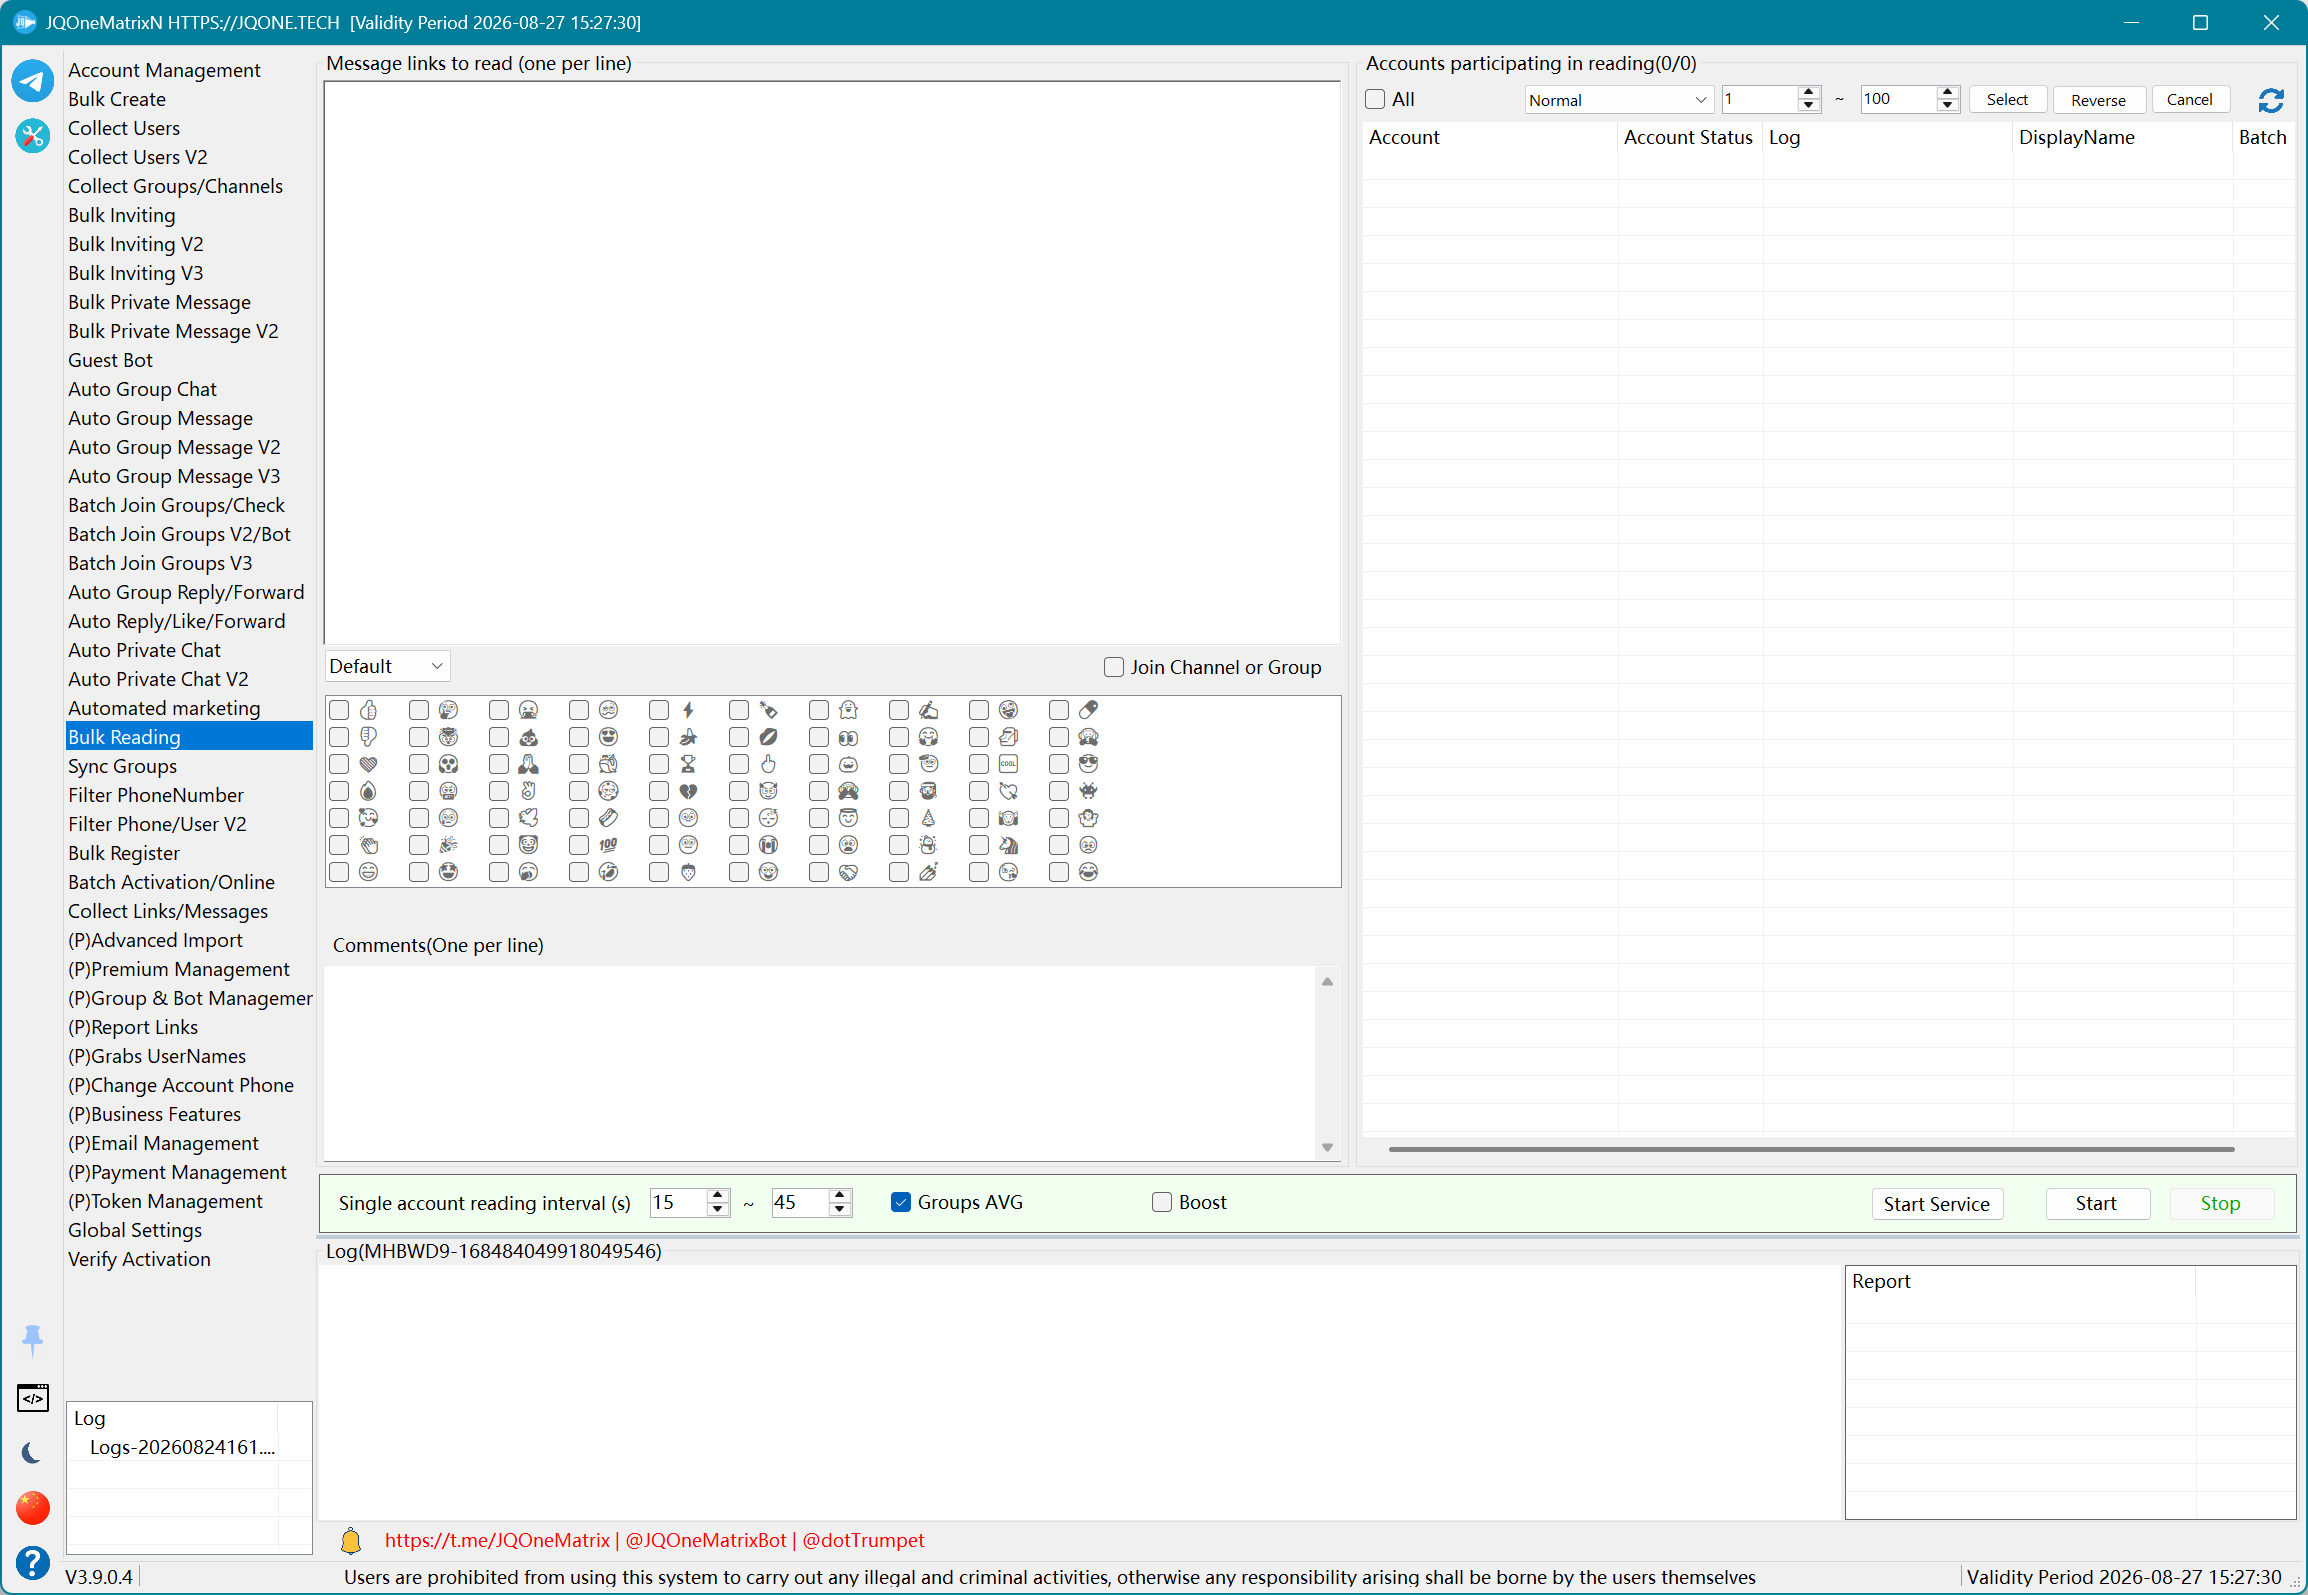
Sync Groups
Download images, videos, or complete content from groups or channels, then forward or send it to other groups with optional added content.
Steps
- Select Add Sync Task, choose the worker account, and enter the source group.
- Enter destination/forwarding groups. To append your own content, also enter the outgoing message and decide whether direct-send mode is used.
- Choose the media scope: all, photos and videos, videos only, or photos only. Select a save folder when downloading.
- Set start date, remove-link-content, Default/Markdown/HTML format, and sync interval in minutes, then save the task.
- Select tasks, set start/end times, and select Begin. Confirm download, send, or forwarding results in the task log, or select Cancel to stop.
Additional information
- This feature is commonly used for channel-content download or cloning. On the first run, use a few messages to verify date range, media scope, save folder, and sender identity in destination groups.
Note: Test with a small number of accounts and records first. Available controls and results depend on the license, account state, target permissions, and Telegram response.
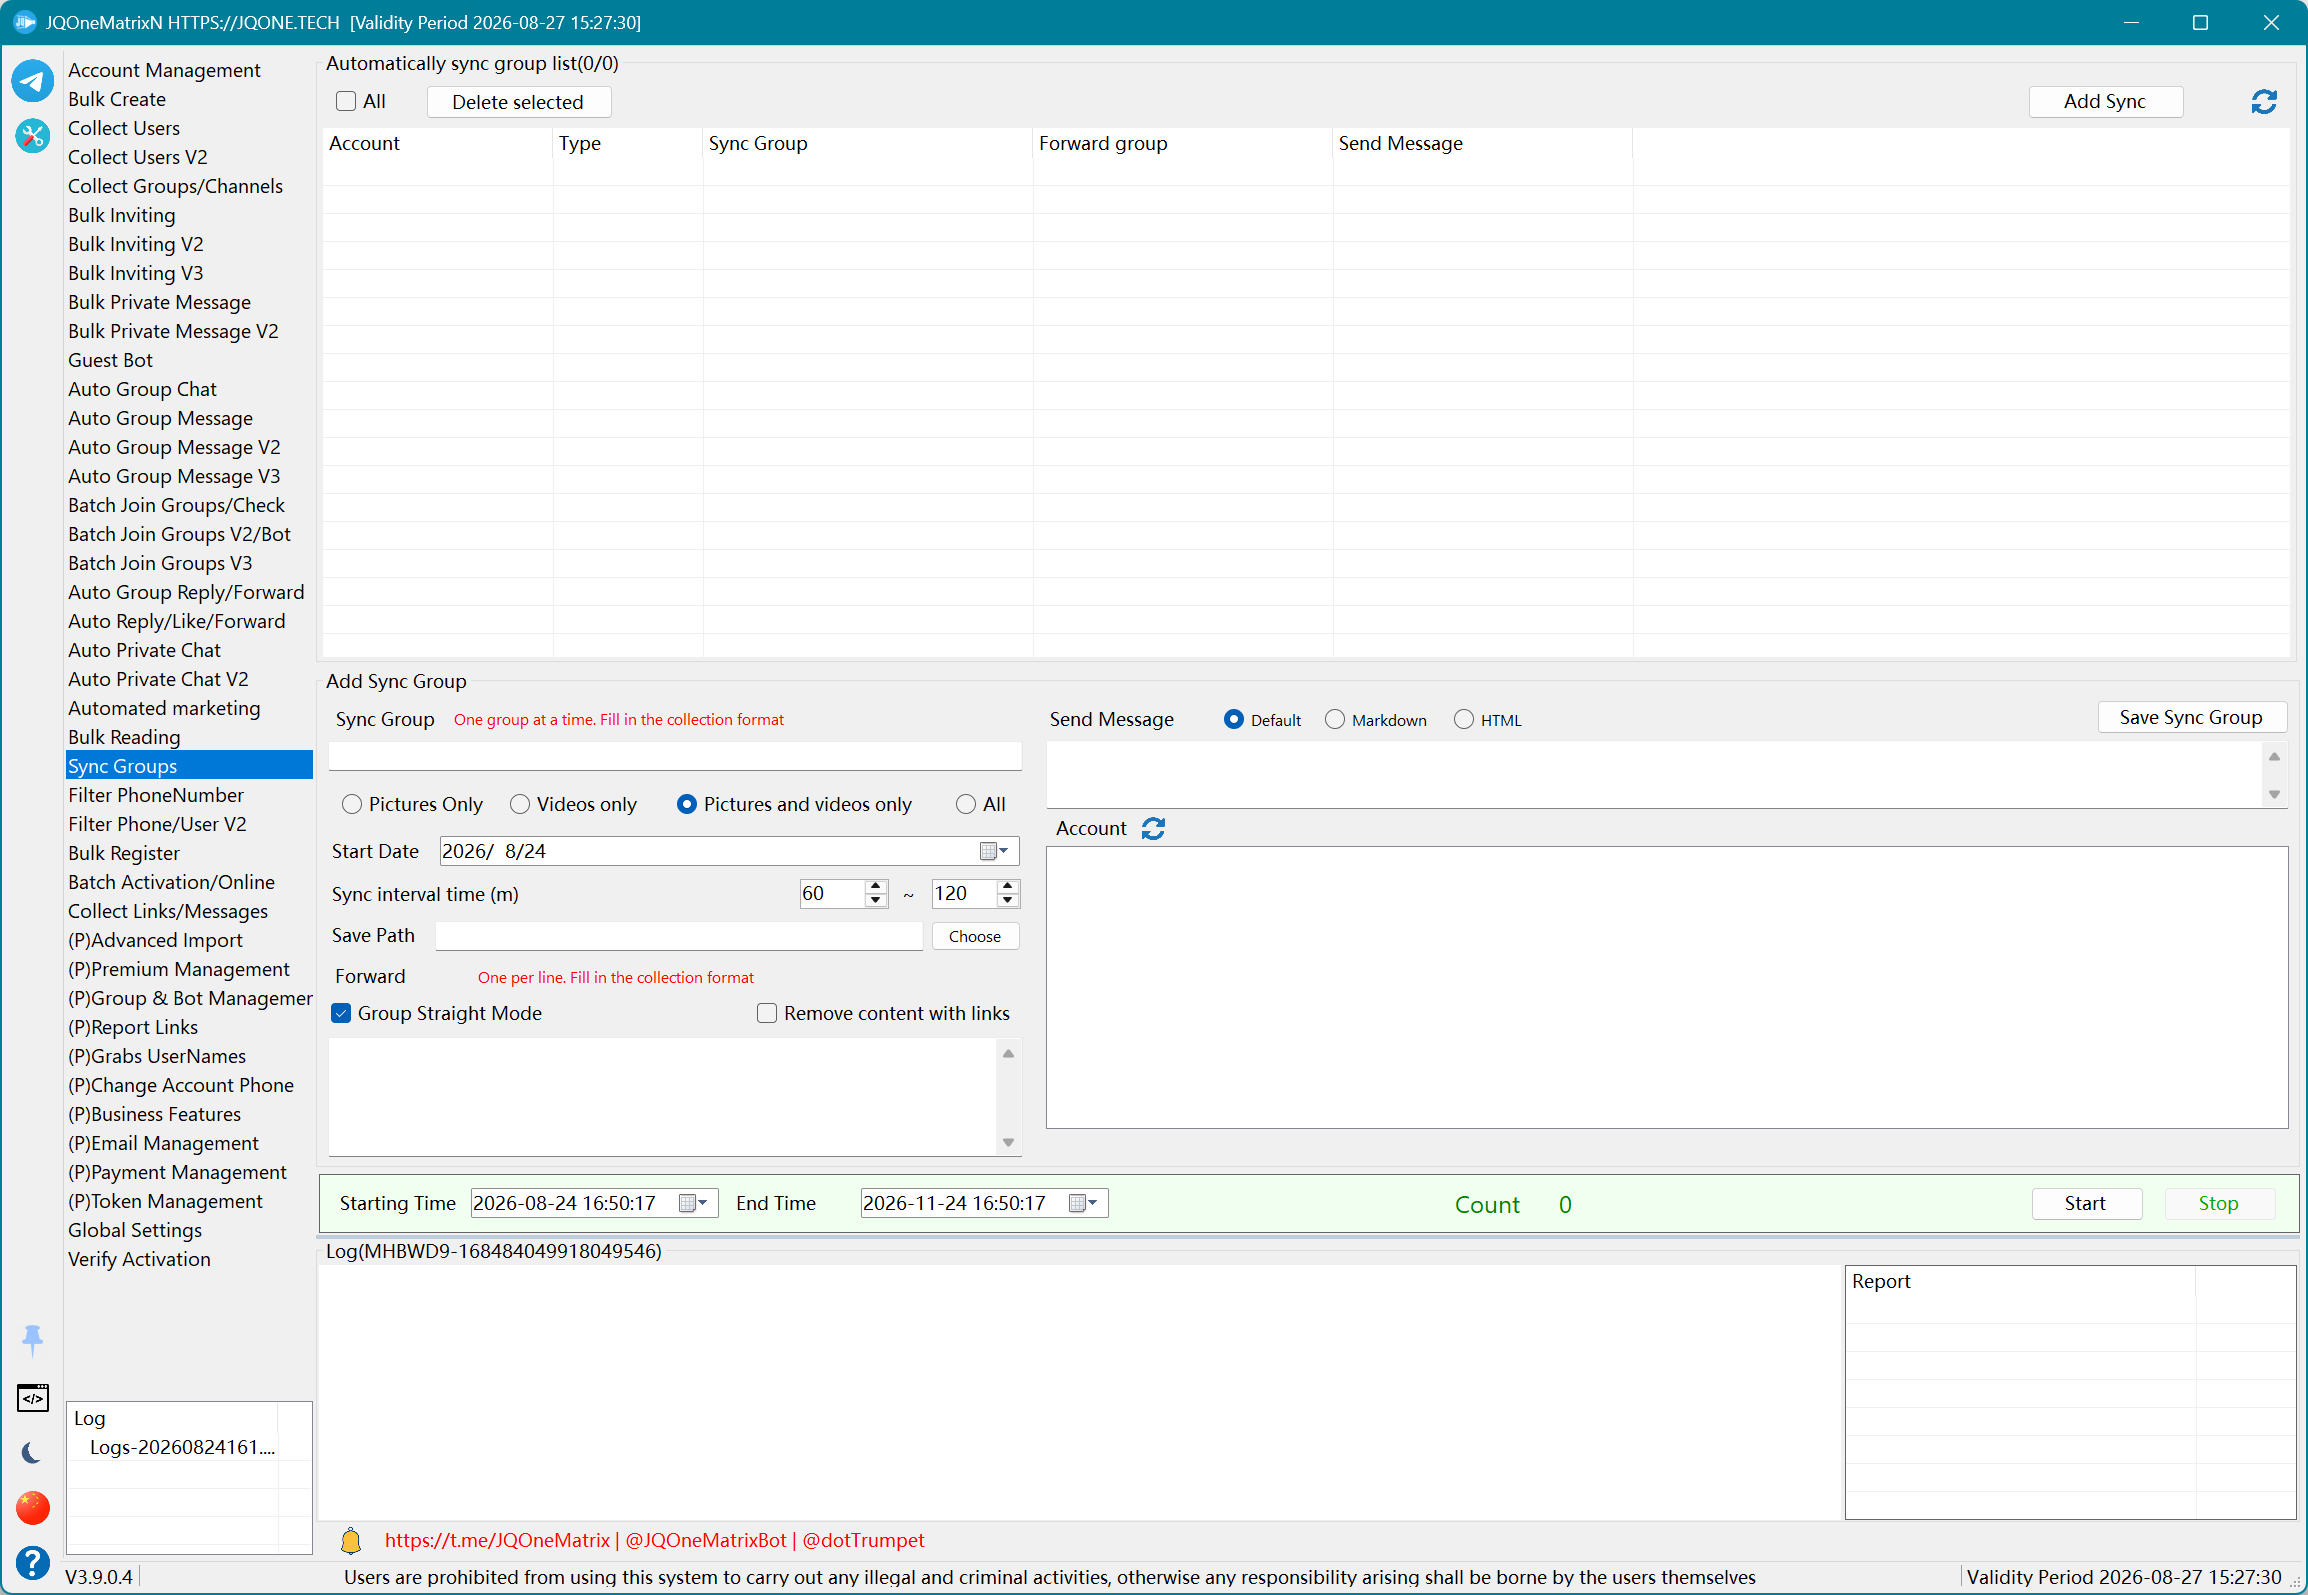
Filter PhoneNumber
Generate numbers by country and range, then check registration, ban, and availability status.
Steps
- Import numbers from TXT, or enter the start/end range to generate numbers for screening.
- Choose country and platform, enter the required provider information, and import the proxy list.
- When required by the provider, enter a Push Token and set its reuse count.
- Set thread count and processing limit, then select Start. Do not replace the number source while running; select Stop to end.
- Retrieve results separately from To Filter, Registered, Banned, Available, and Unprocessed tabs.
Note: Test with a small number of accounts and records first. Available controls and results depend on the license, account state, target permissions, and Telegram response.
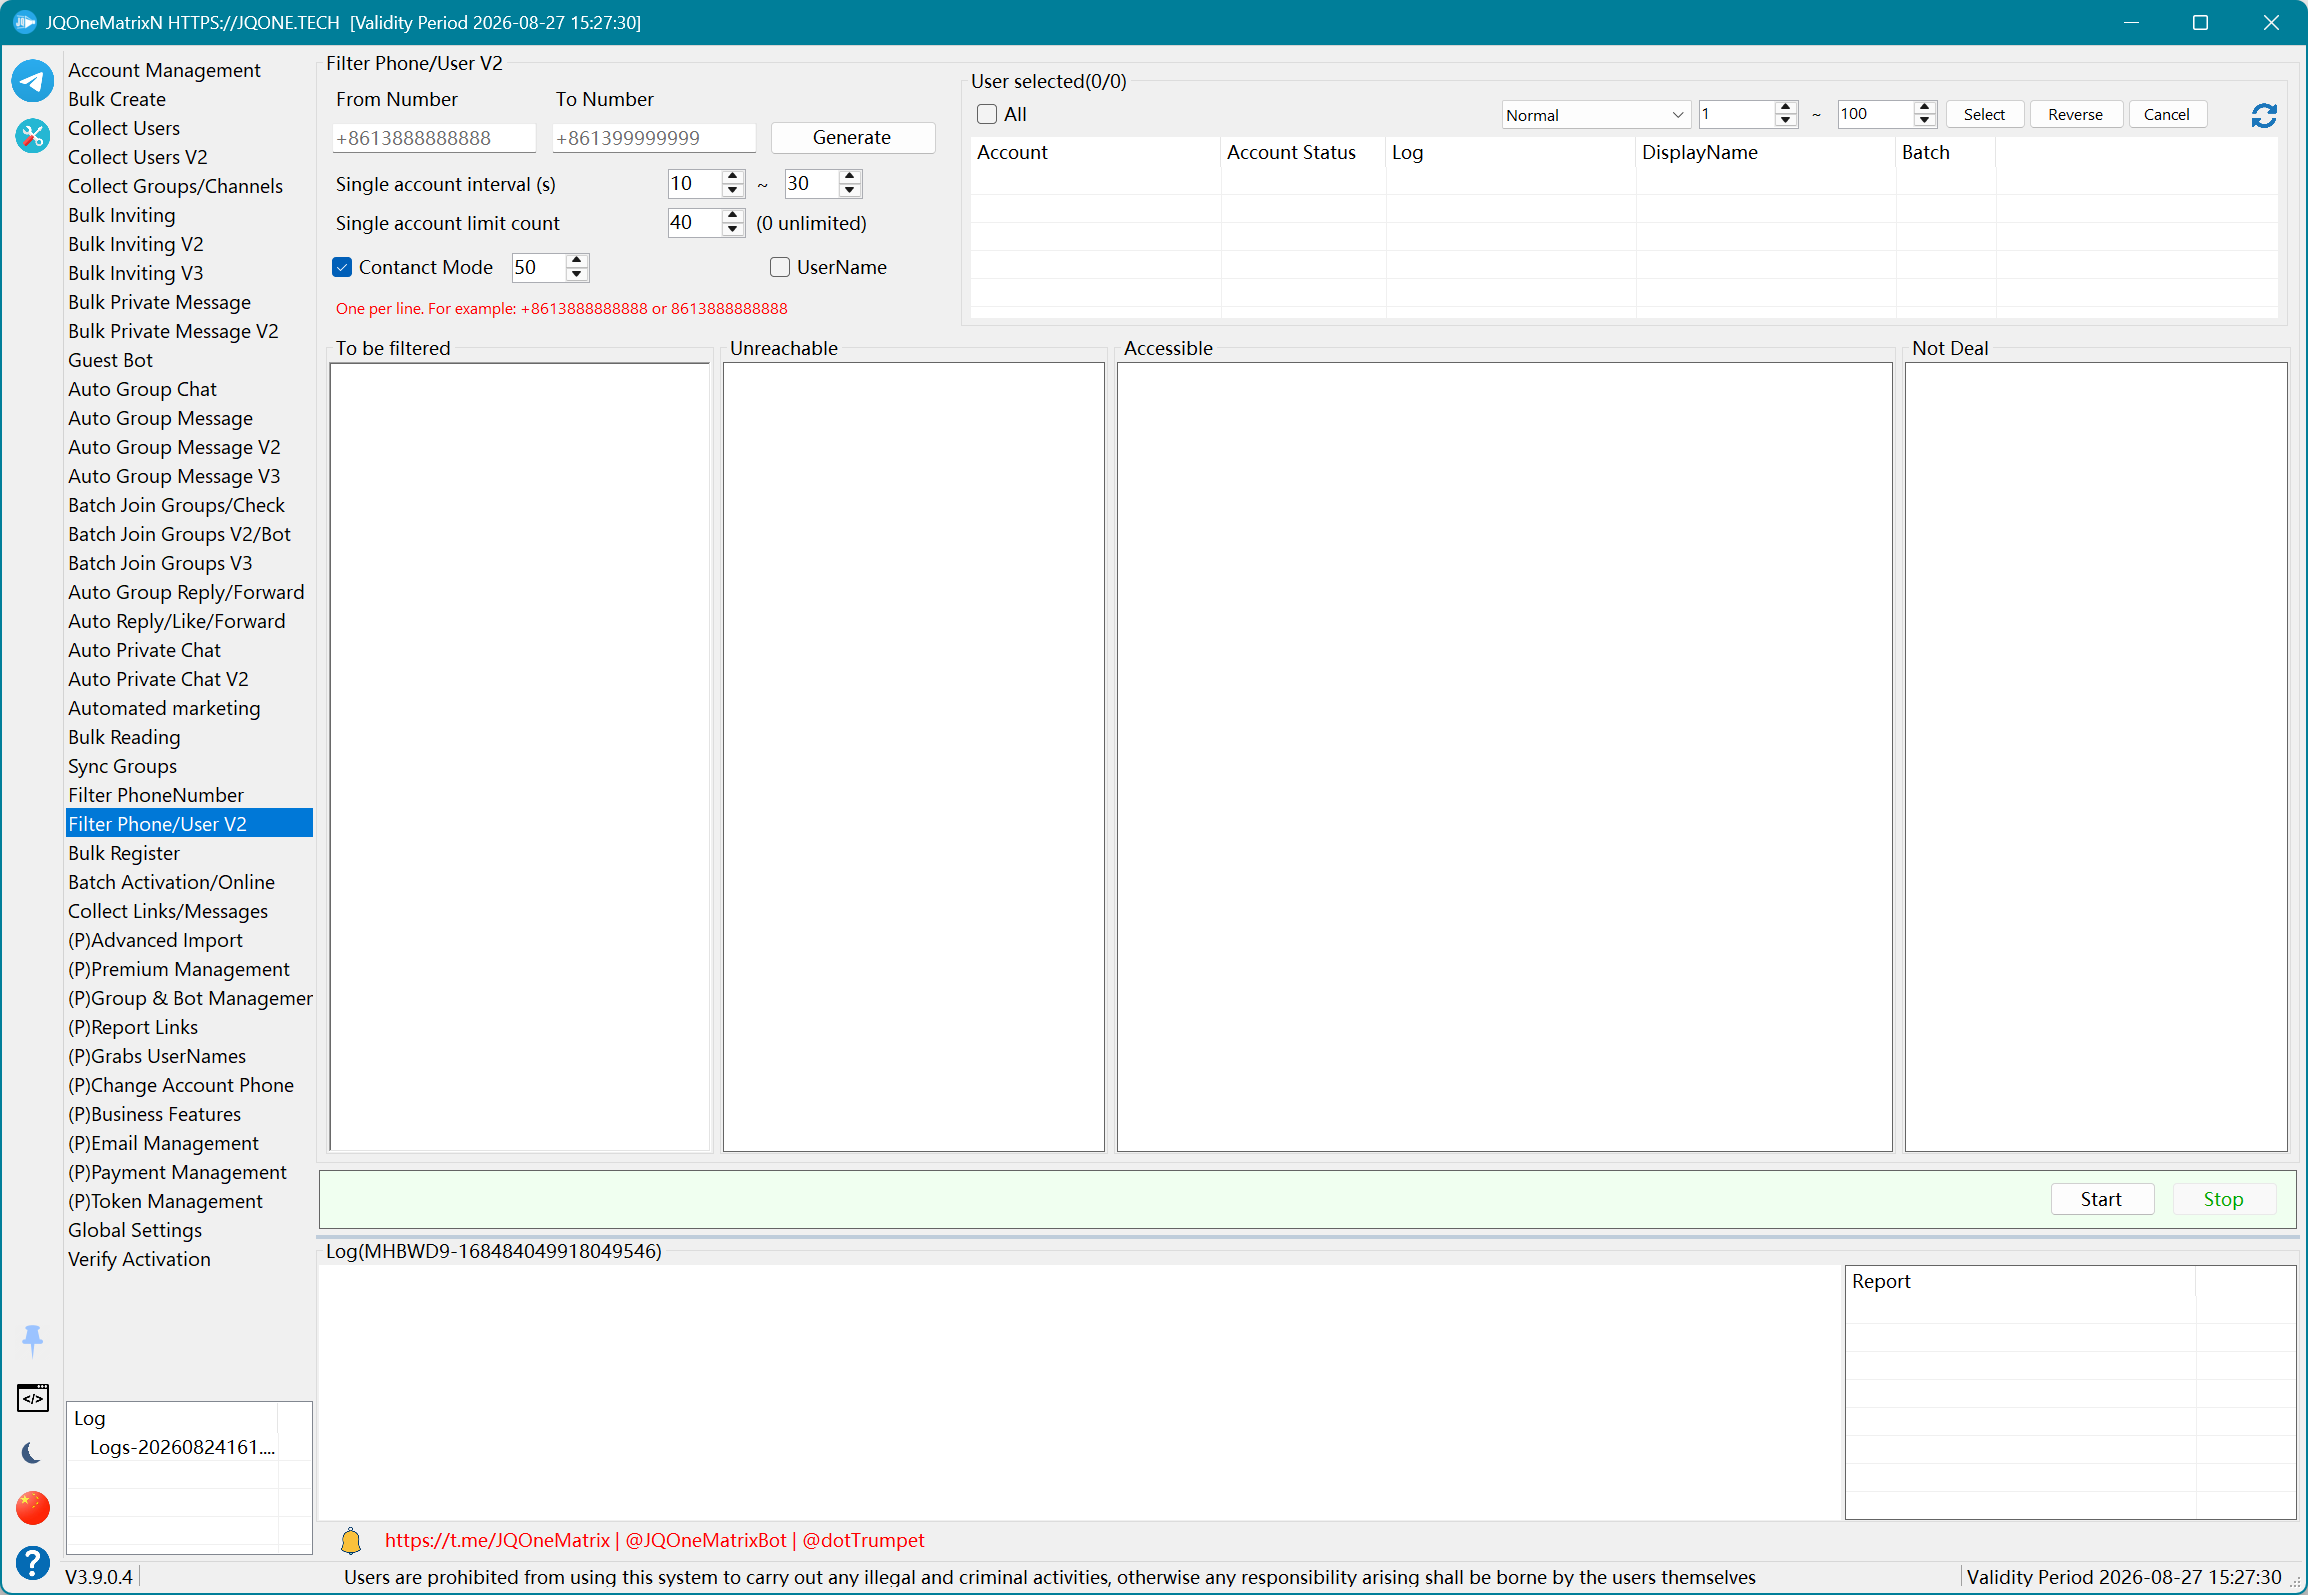
Filter Phone/User V2
Run updated batch screening and classification for phones or usernames.
Steps
- Select signed-in accounts to perform the queries.
- In phone mode, paste or generate numbers. To screen usernames, switch to Username and paste the username list.
- Enable Contact Mode when phone numbers must be queried through contacts.
- Set the per-account query limit and interval, then select Start. Select Stop before changing the data type.
- Retrieve reachable, unreachable, and unprocessed data separately from Accessible, Not Accessible, and Not Processed.
Additional information
- The value shown next to Contact Mode represents the current contact-mode processing limit or capacity; use the value displayed by the current interface.
- A registered number with privacy restrictions can still be classified as Not Accessible. Not Accessible does not always mean unregistered.
Note: Test with a small number of accounts and records first. Available controls and results depend on the license, account state, target permissions, and Telegram response.
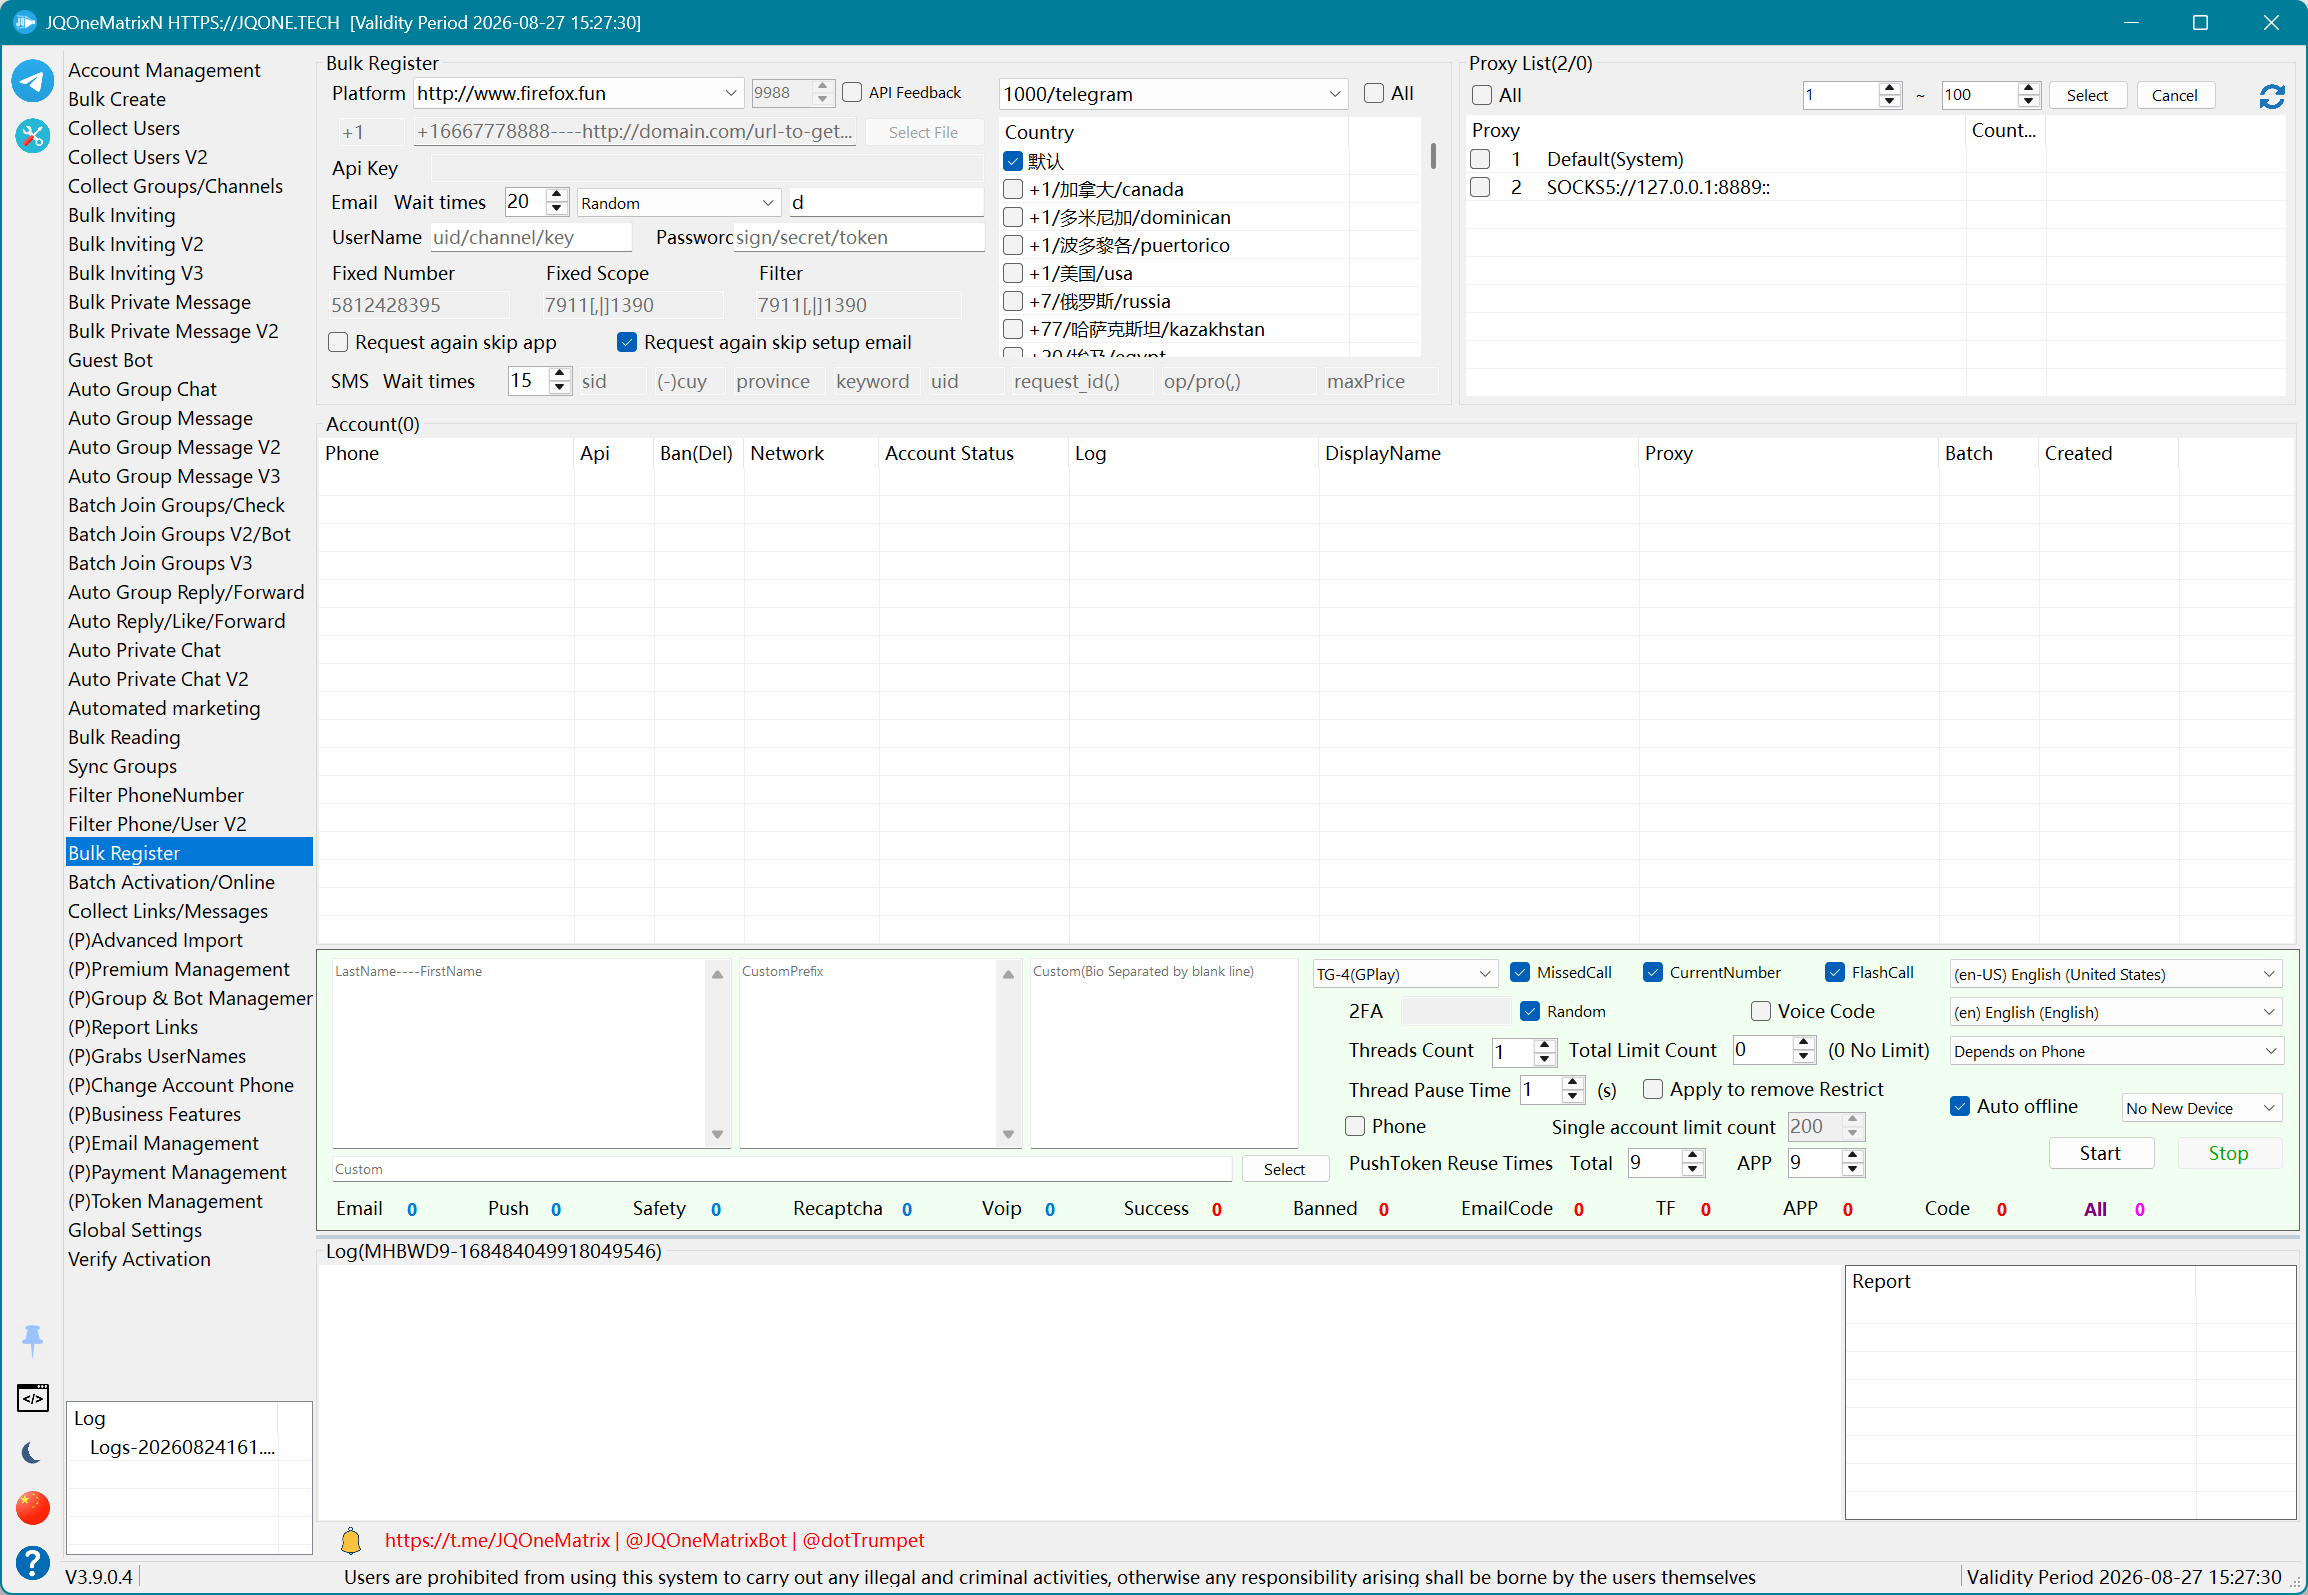
Bulk Register
Register accounts through configured verification providers and Telegram API, with email, two-step password, and device options.
Steps
- Choose a fixed range or TXT number source, then enter country, platform, and the number provider's API, user, password, or key.
- Import proxies and configure Telegram API/device type plus email and SMS wait/retry values.
- Enable voice code, missed call, Flash Call, current number, phone check, and API feedback according to the registration source.
- Set a two-step or random password, automatic offline, automatic unrestriction request, threads, pause, per-account limit, and total limit.
- Select Start and use the All, App, TF, EmailCode, Banned, Success, Safety, Push, Email, Recaptcha, Code, and Voip counters plus the account list to locate each stage. Select Stop to end.
Additional information
- For some number providers, Username means API Username rather than the provider login name. Follow the provider API documentation.
- Test a small batch with a few proxies first. For larger registration batches, prepare multiple stable proxies and preferably align the number country with the proxy exit country.
- For immediate bans or Peer Flood directly after registration, check the number source, proxy, and current API/device configuration rather than judging quality only by registration success count.
- USER_NOT_MUTUAL_CONTACT indicates a contact-relationship or account-restriction issue. Check restrictions in Account Management and request unrestriction when appropriate.
Note: Test with a small number of accounts and records first. Available controls and results depend on the license, account state, target permissions, and Telegram response.
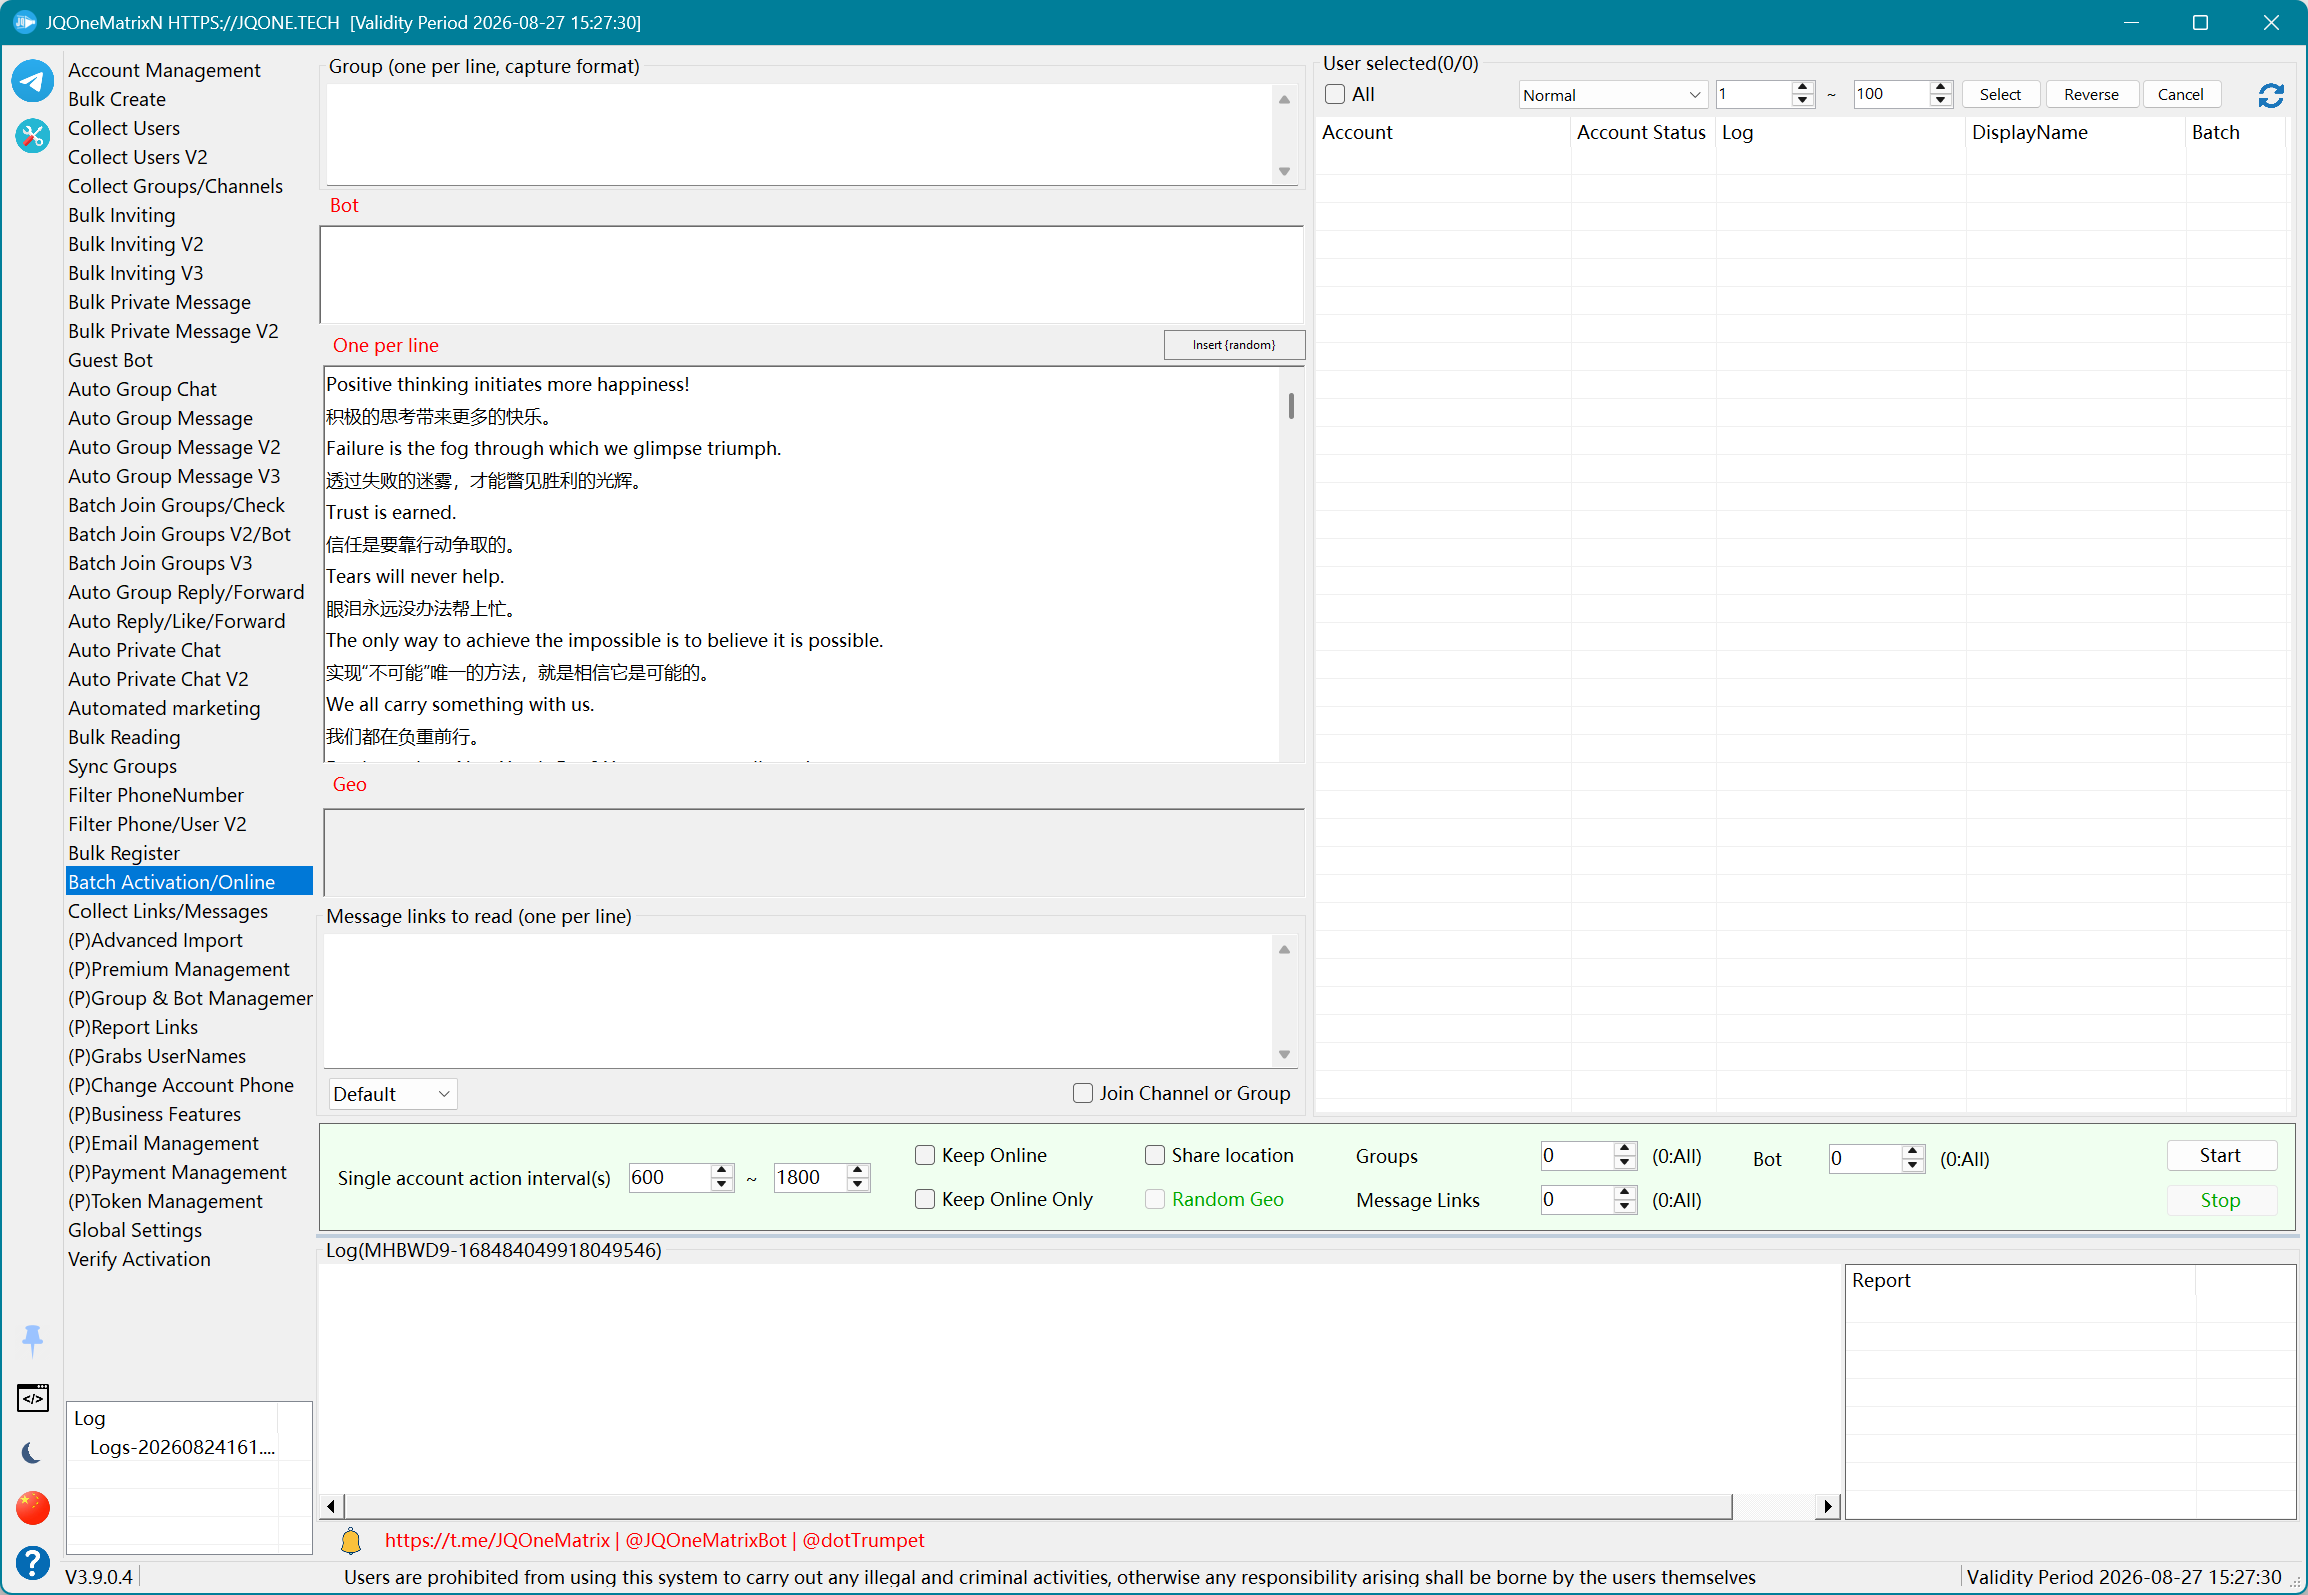
Batch Activation/Online
Keep selected accounts online and process configured group, message-link, Bot, or location tasks.
Steps
- Select the accounts to activate or keep online.
- Enter groups, messages, message links, Bots, or location data as required. Enable Join Group when group access is needed first.
- For online-only operation, enable Keep Online and Only Keep Online. For location work, enter coordinates or enable random location.
- Set processing counts for groups, message links, and Bots, plus the task interval.
- Select Start and confirm the current action in account status and logs. Select Stop before changing online mode or task data.
Additional information
- Keep Online mainly sends periodic client-activity signals to Telegram; it does not automatically chat or browse.
- Group, message-link, Bot, and Geo actions run only when their corresponding data and counts are configured.
Note: Test with a small number of accounts and records first. Available controls and results depend on the license, account state, target permissions, and Telegram response.
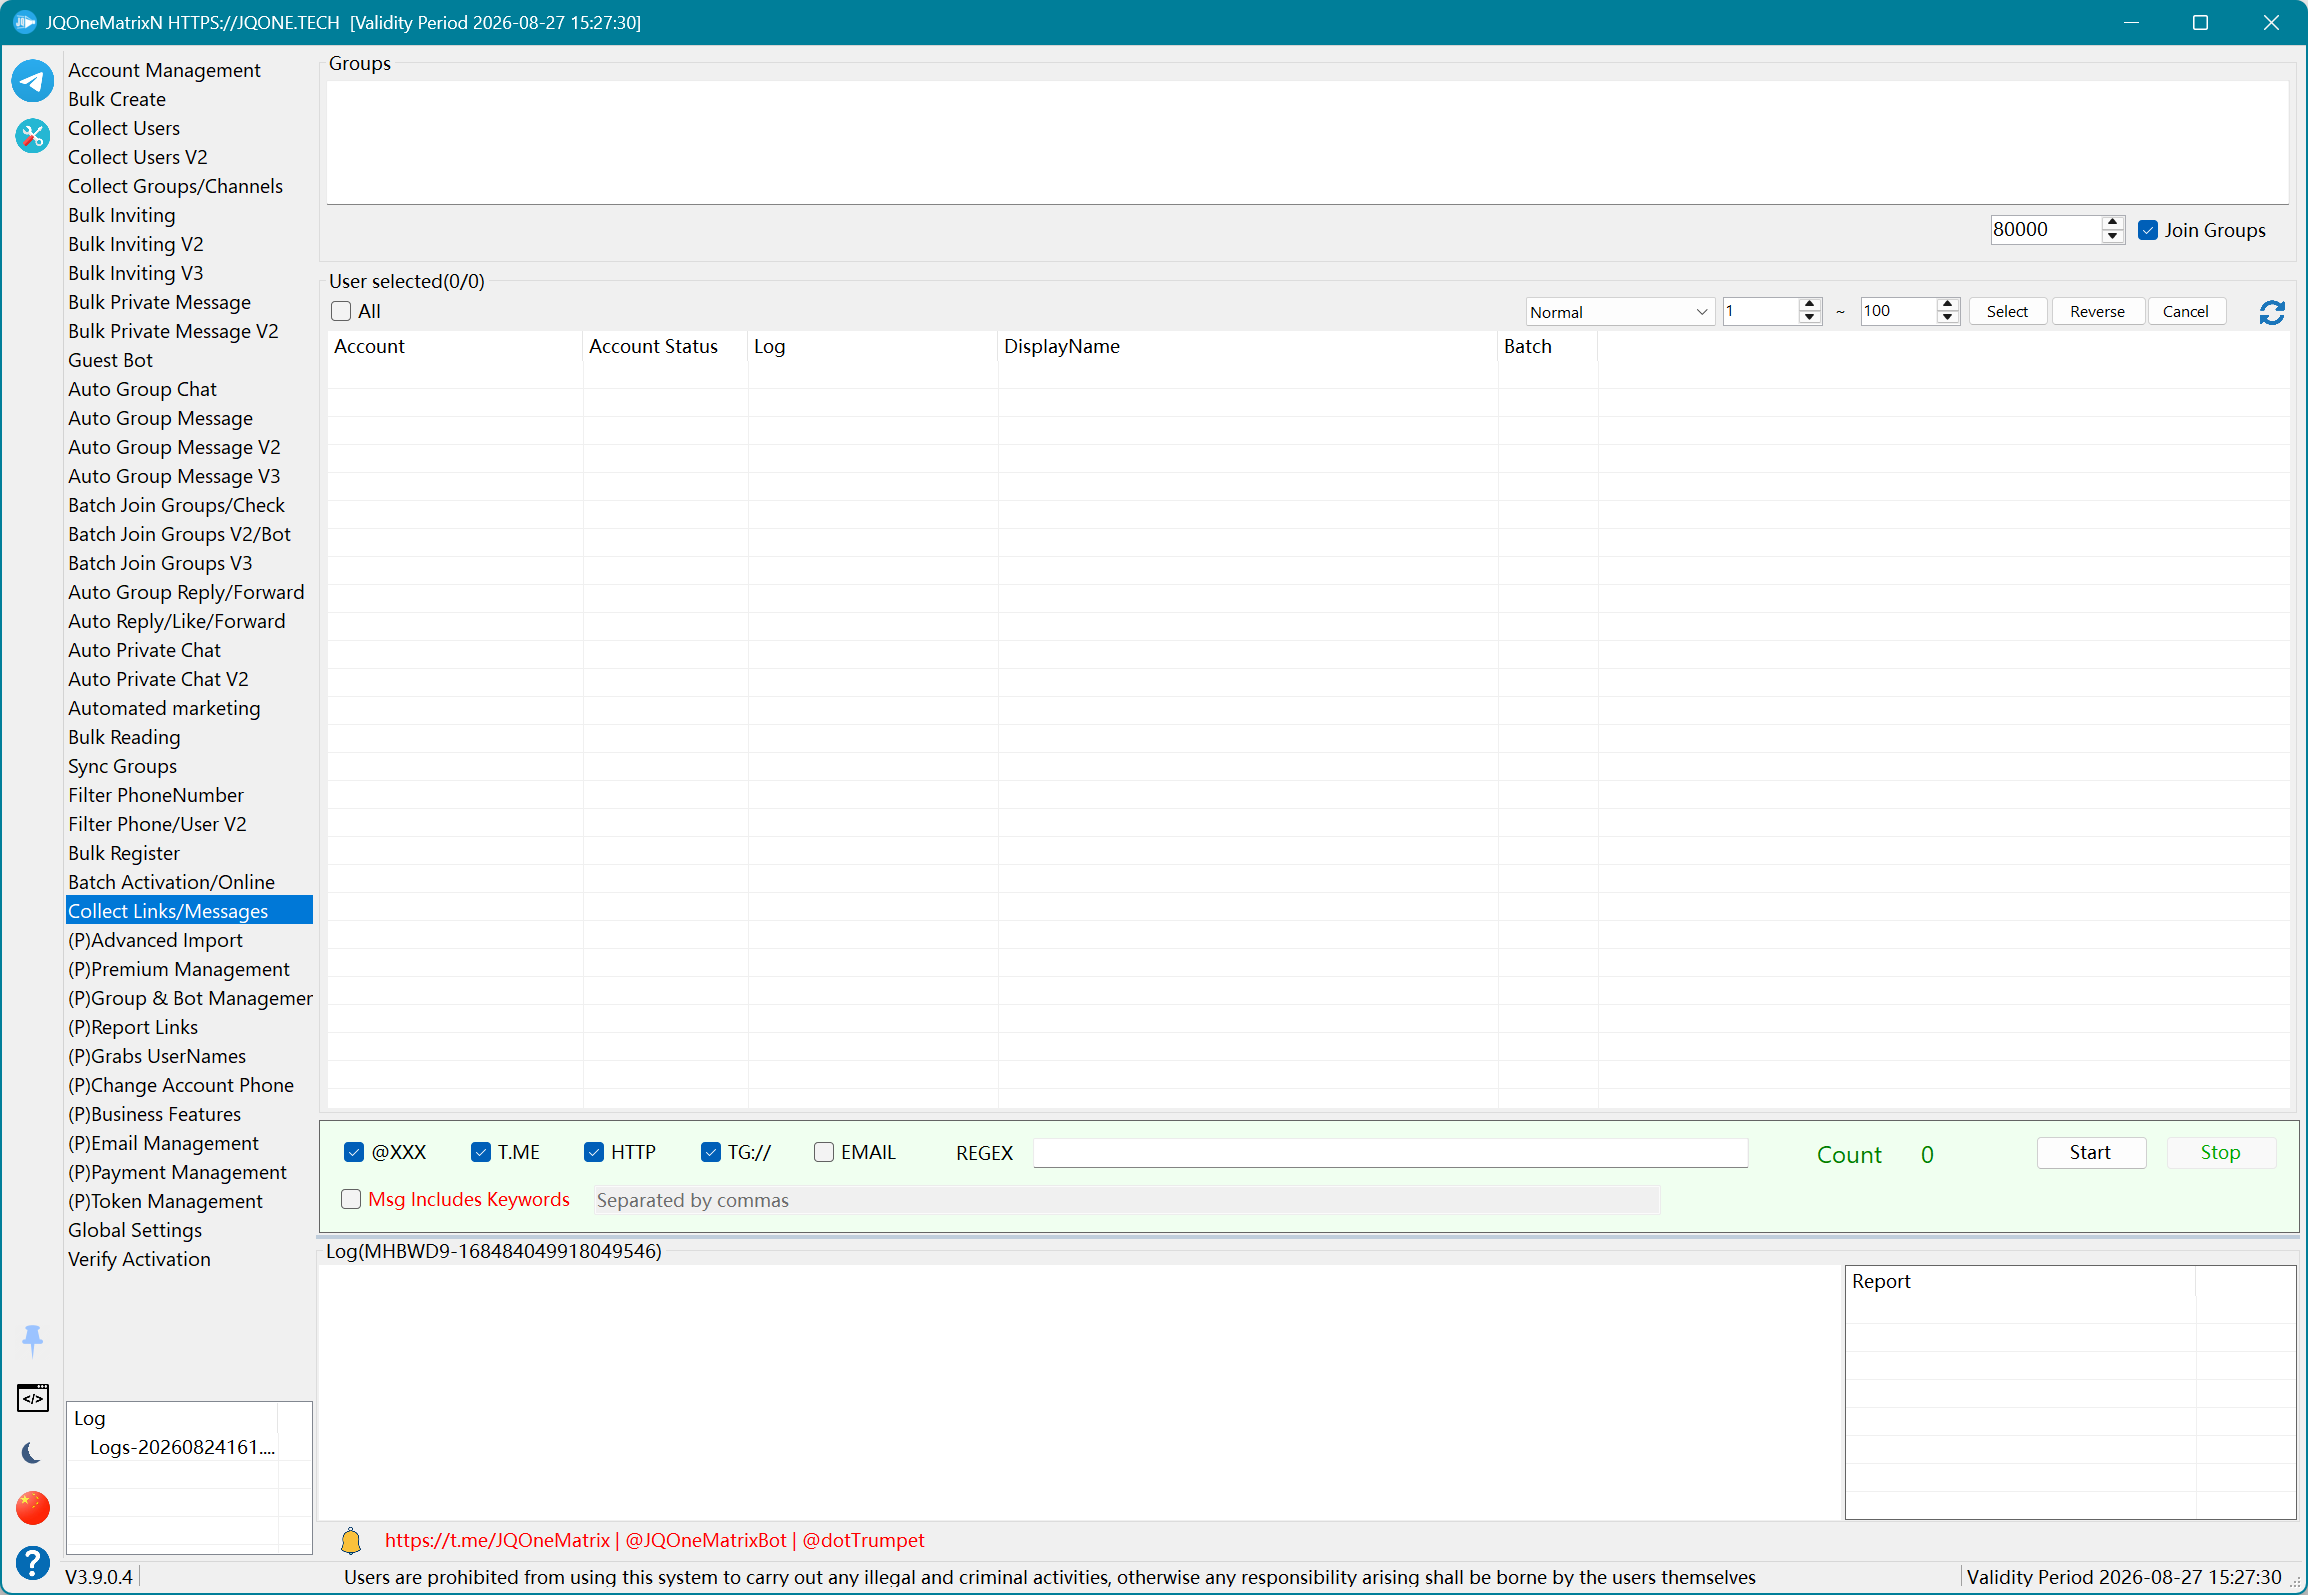
Collect Links/Messages
Collect message links from a source or filter messages by conditions.
Steps
- Select worker accounts and enter source groups.
- Enable Join Group when the accounts have not entered the sources.
- Choose link types to extract: TG://, T.ME, @XXX, EMAIL, HTTP, or REGEX. Enter the expression when REGEX is selected.
- To process only matching messages, enable message-keyword filtering and enter the keywords.
- Select Start and review the collected count, log, and output. Select Stop before changing link types or regular expressions.
Note: Test with a small number of accounts and records first. Available controls and results depend on the license, account state, target permissions, and Telegram response.
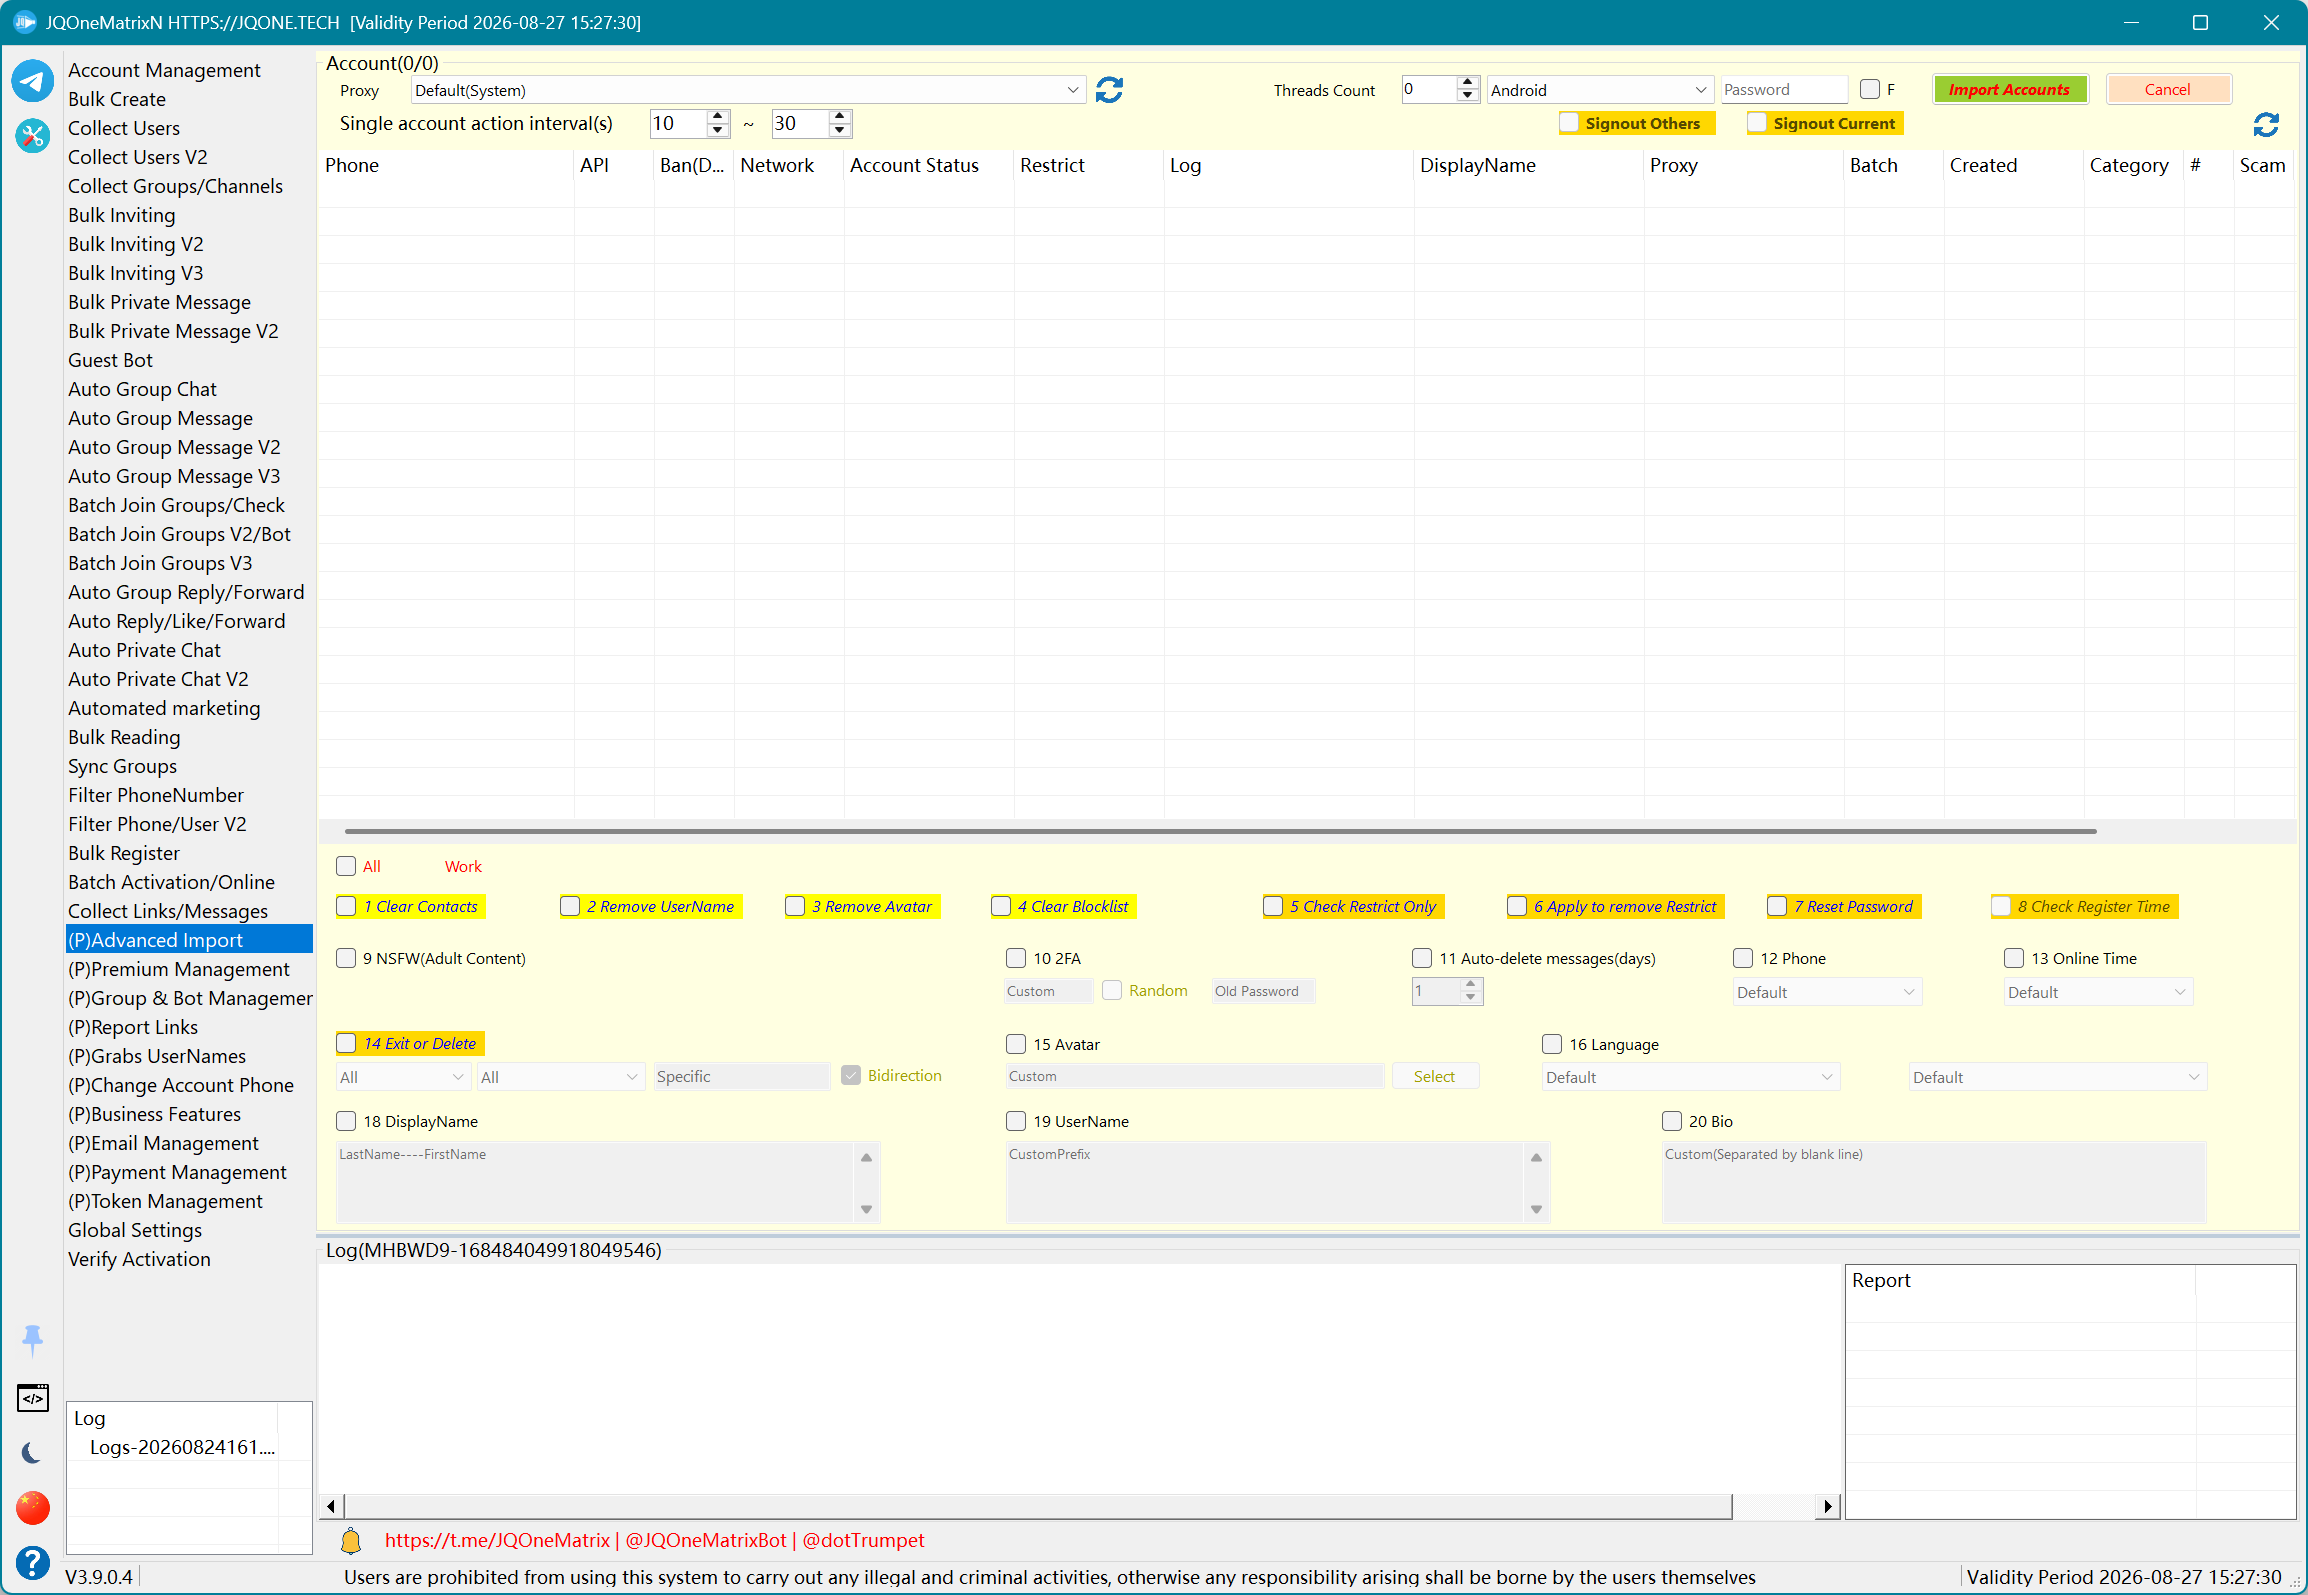
(P)Advanced Import
Import accounts, then run numbered cleanup, checking, security, profile, and device tasks in sequence.
Steps
- Back up original account data, select Import Accounts to load original Sessions that can still sign in, and define the scope with filters, indexes, and selection boxes.
- For a QRCode new device, select a QRCode type ending in -New, configure proxy, password, threads, and current/other-device session options, then start import.
- Confirm new-device QRCode creation, old-device QRCode acceptance, two-step-password submission, and new-device sign-in in the log. Stop and retain the original Session if any phase fails.
- For Passkey, select the matching Passkey-*-New source and follow that workflow. Do not use a Passkey file as a QRCode Session.
- After new-device authorization, select numbered cleanup, checking, security, privacy, language, and profile tasks. Confirm each result in Status and Log, or use Cancel to stop unfinished work.
Additional information
- QRCode import uses an original Session that can still sign in to accept the new-device login token. Logs show the new QRCode and the old device's acceptance status separately.
- Choose a QRCode type ending in -New and import the original Session. After the new device creates a QR token, the old Session confirms it automatically; if two-step verification is requested, the saved account password continues authorization.
- Passkey is a separate new-device authorization source and must not be mixed with QRCode. Back up the original account data for either workflow.
- For standard import with F selected, the entered password replaces the JSON password. For Import New without F, the JSON password is tried first and the entered password is retried if needed. For Import New with F, the entered password is tried first and the JSON password is the fallback.
Note: Test with a small number of accounts and records first. Available controls and results depend on the license, account state, target permissions, and Telegram response.
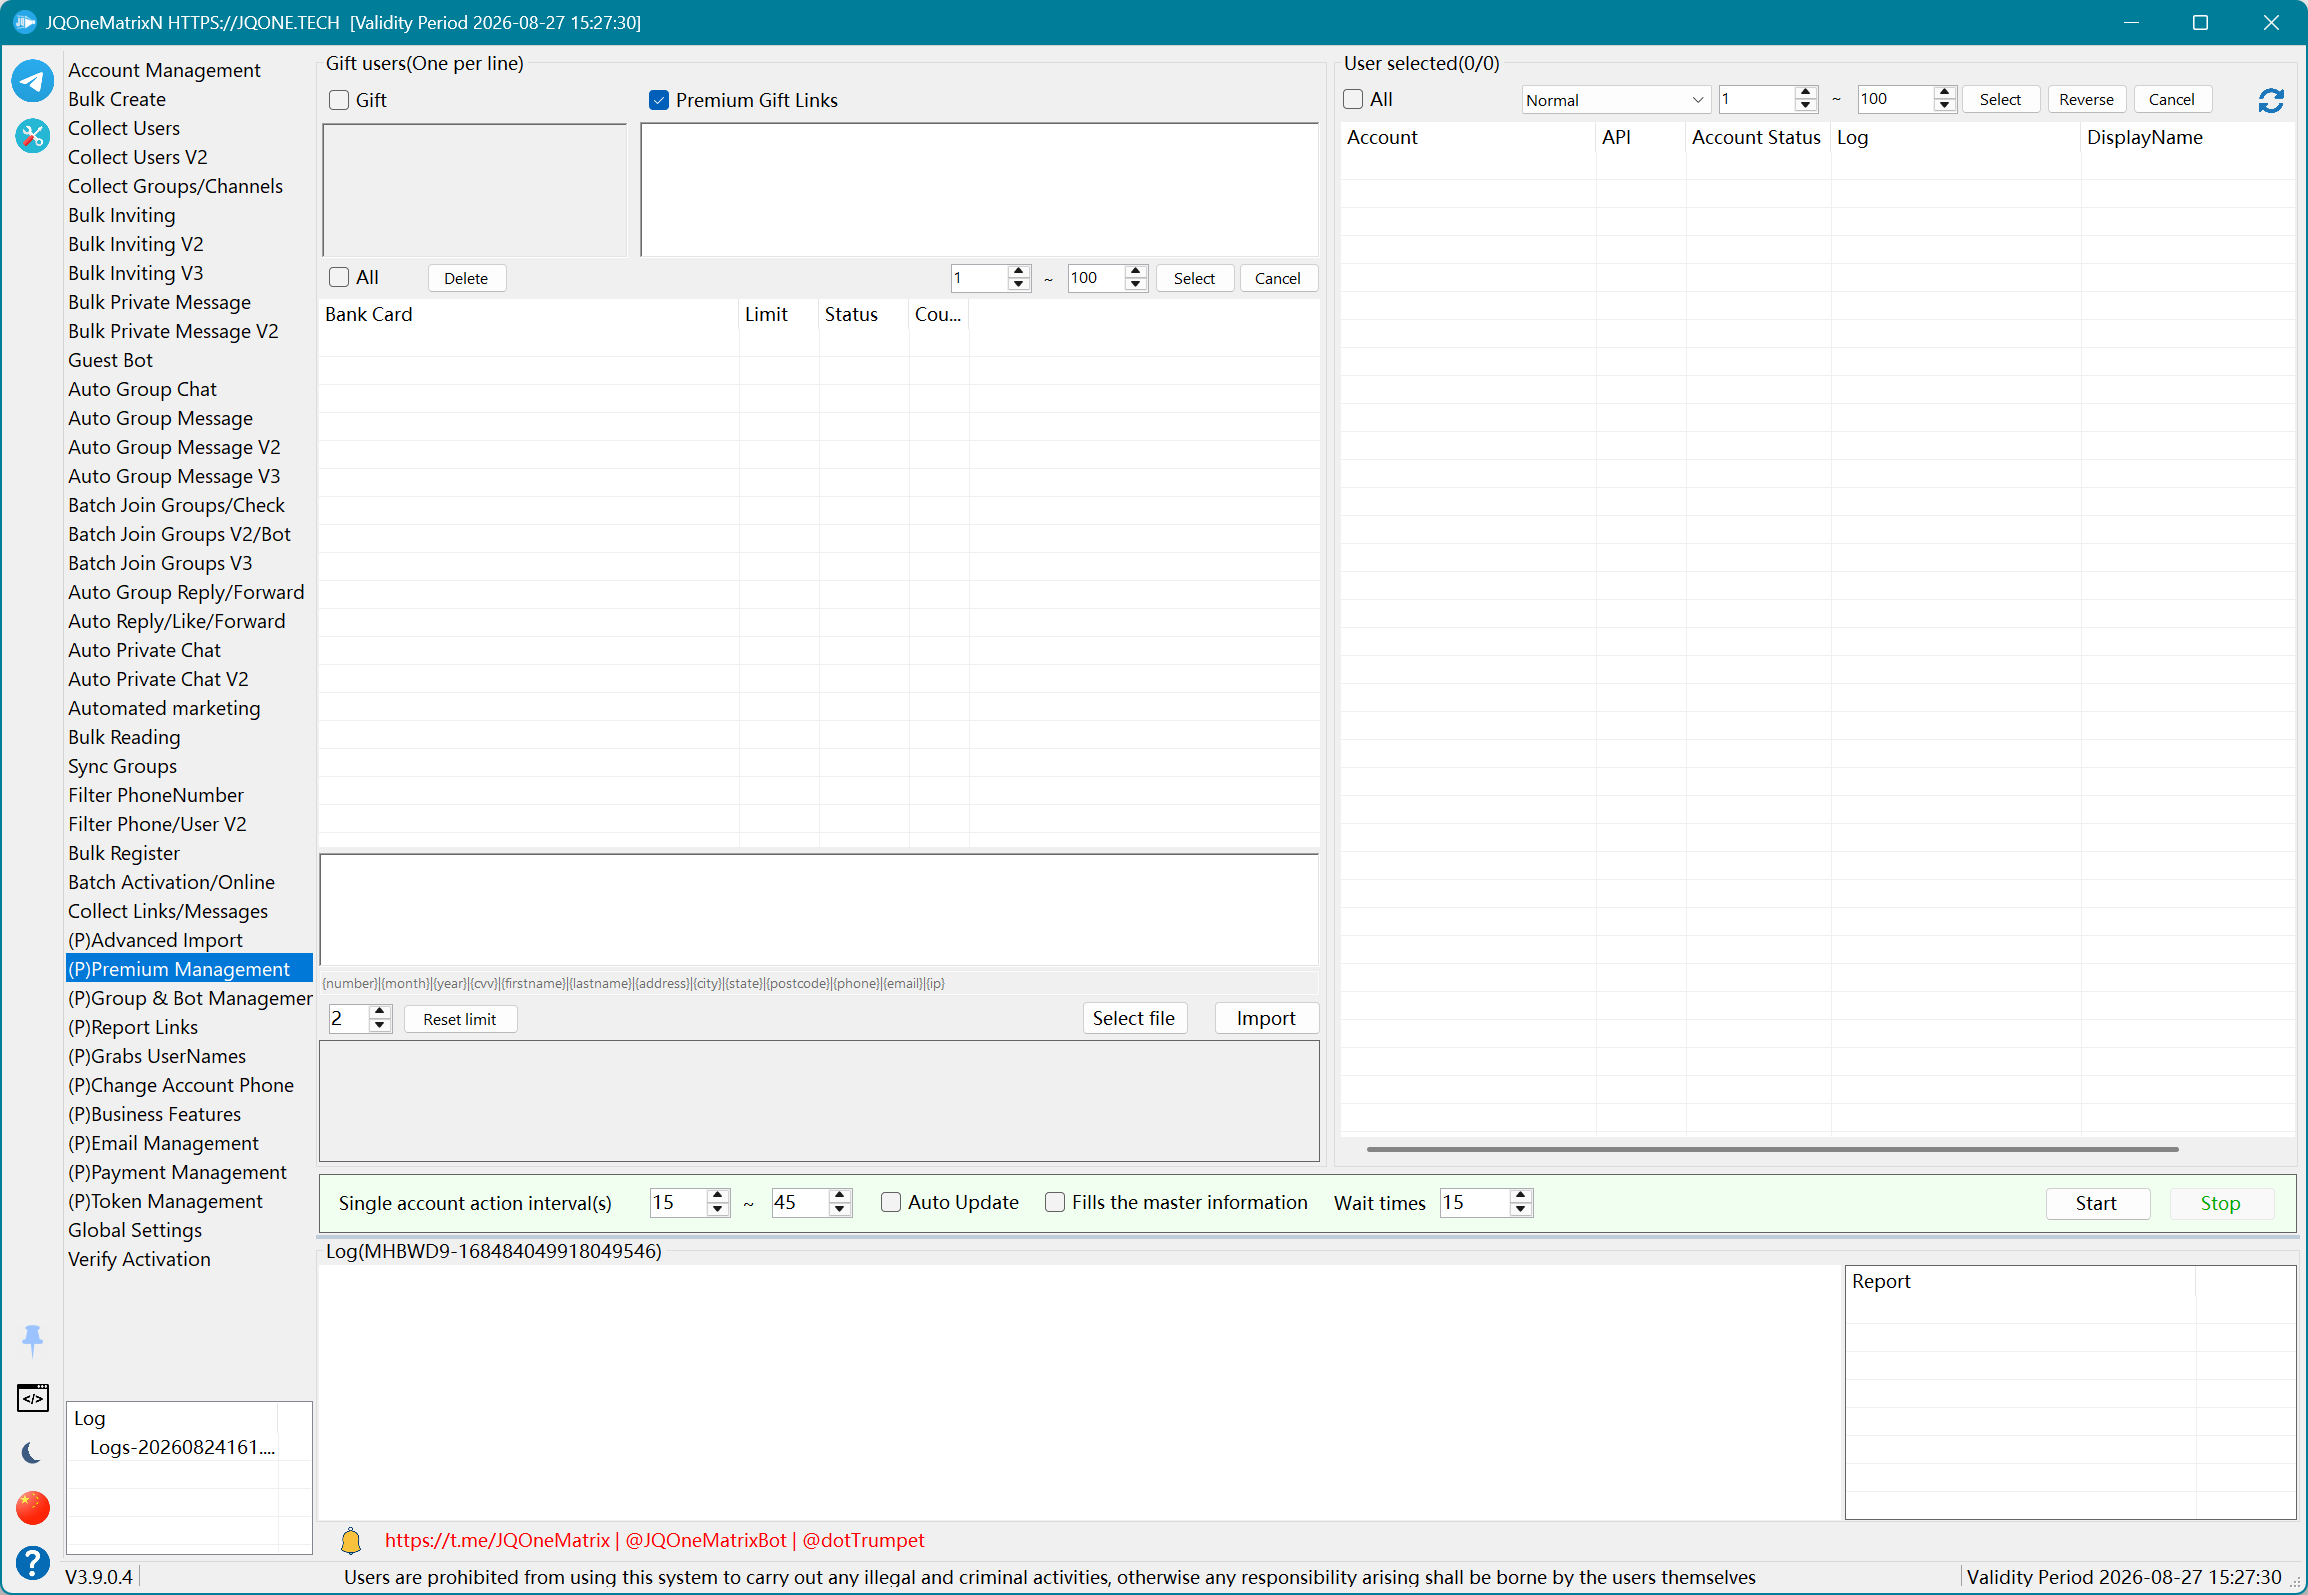
(P)Premium Management
Manage Premium purchase, gifting, and payment data.
Steps
- Select accounts that will purchase Premium. In Gift mode, also enter recipients.
- Choose Self Purchase or Gift. Enable Gift Link when a gift link must be produced.
- Import and select payment cards, enter cardholder information when required, and configure automatic update and wait count.
- For a restricted card, use the delete or reset card-restriction action, then select an available card again. Set the task interval.
- Select Start and confirm purchase or gift results in account logs and card status. Select Stop to end.
Note: Test with a small number of accounts and records first. Available controls and results depend on the license, account state, target permissions, and Telegram response.
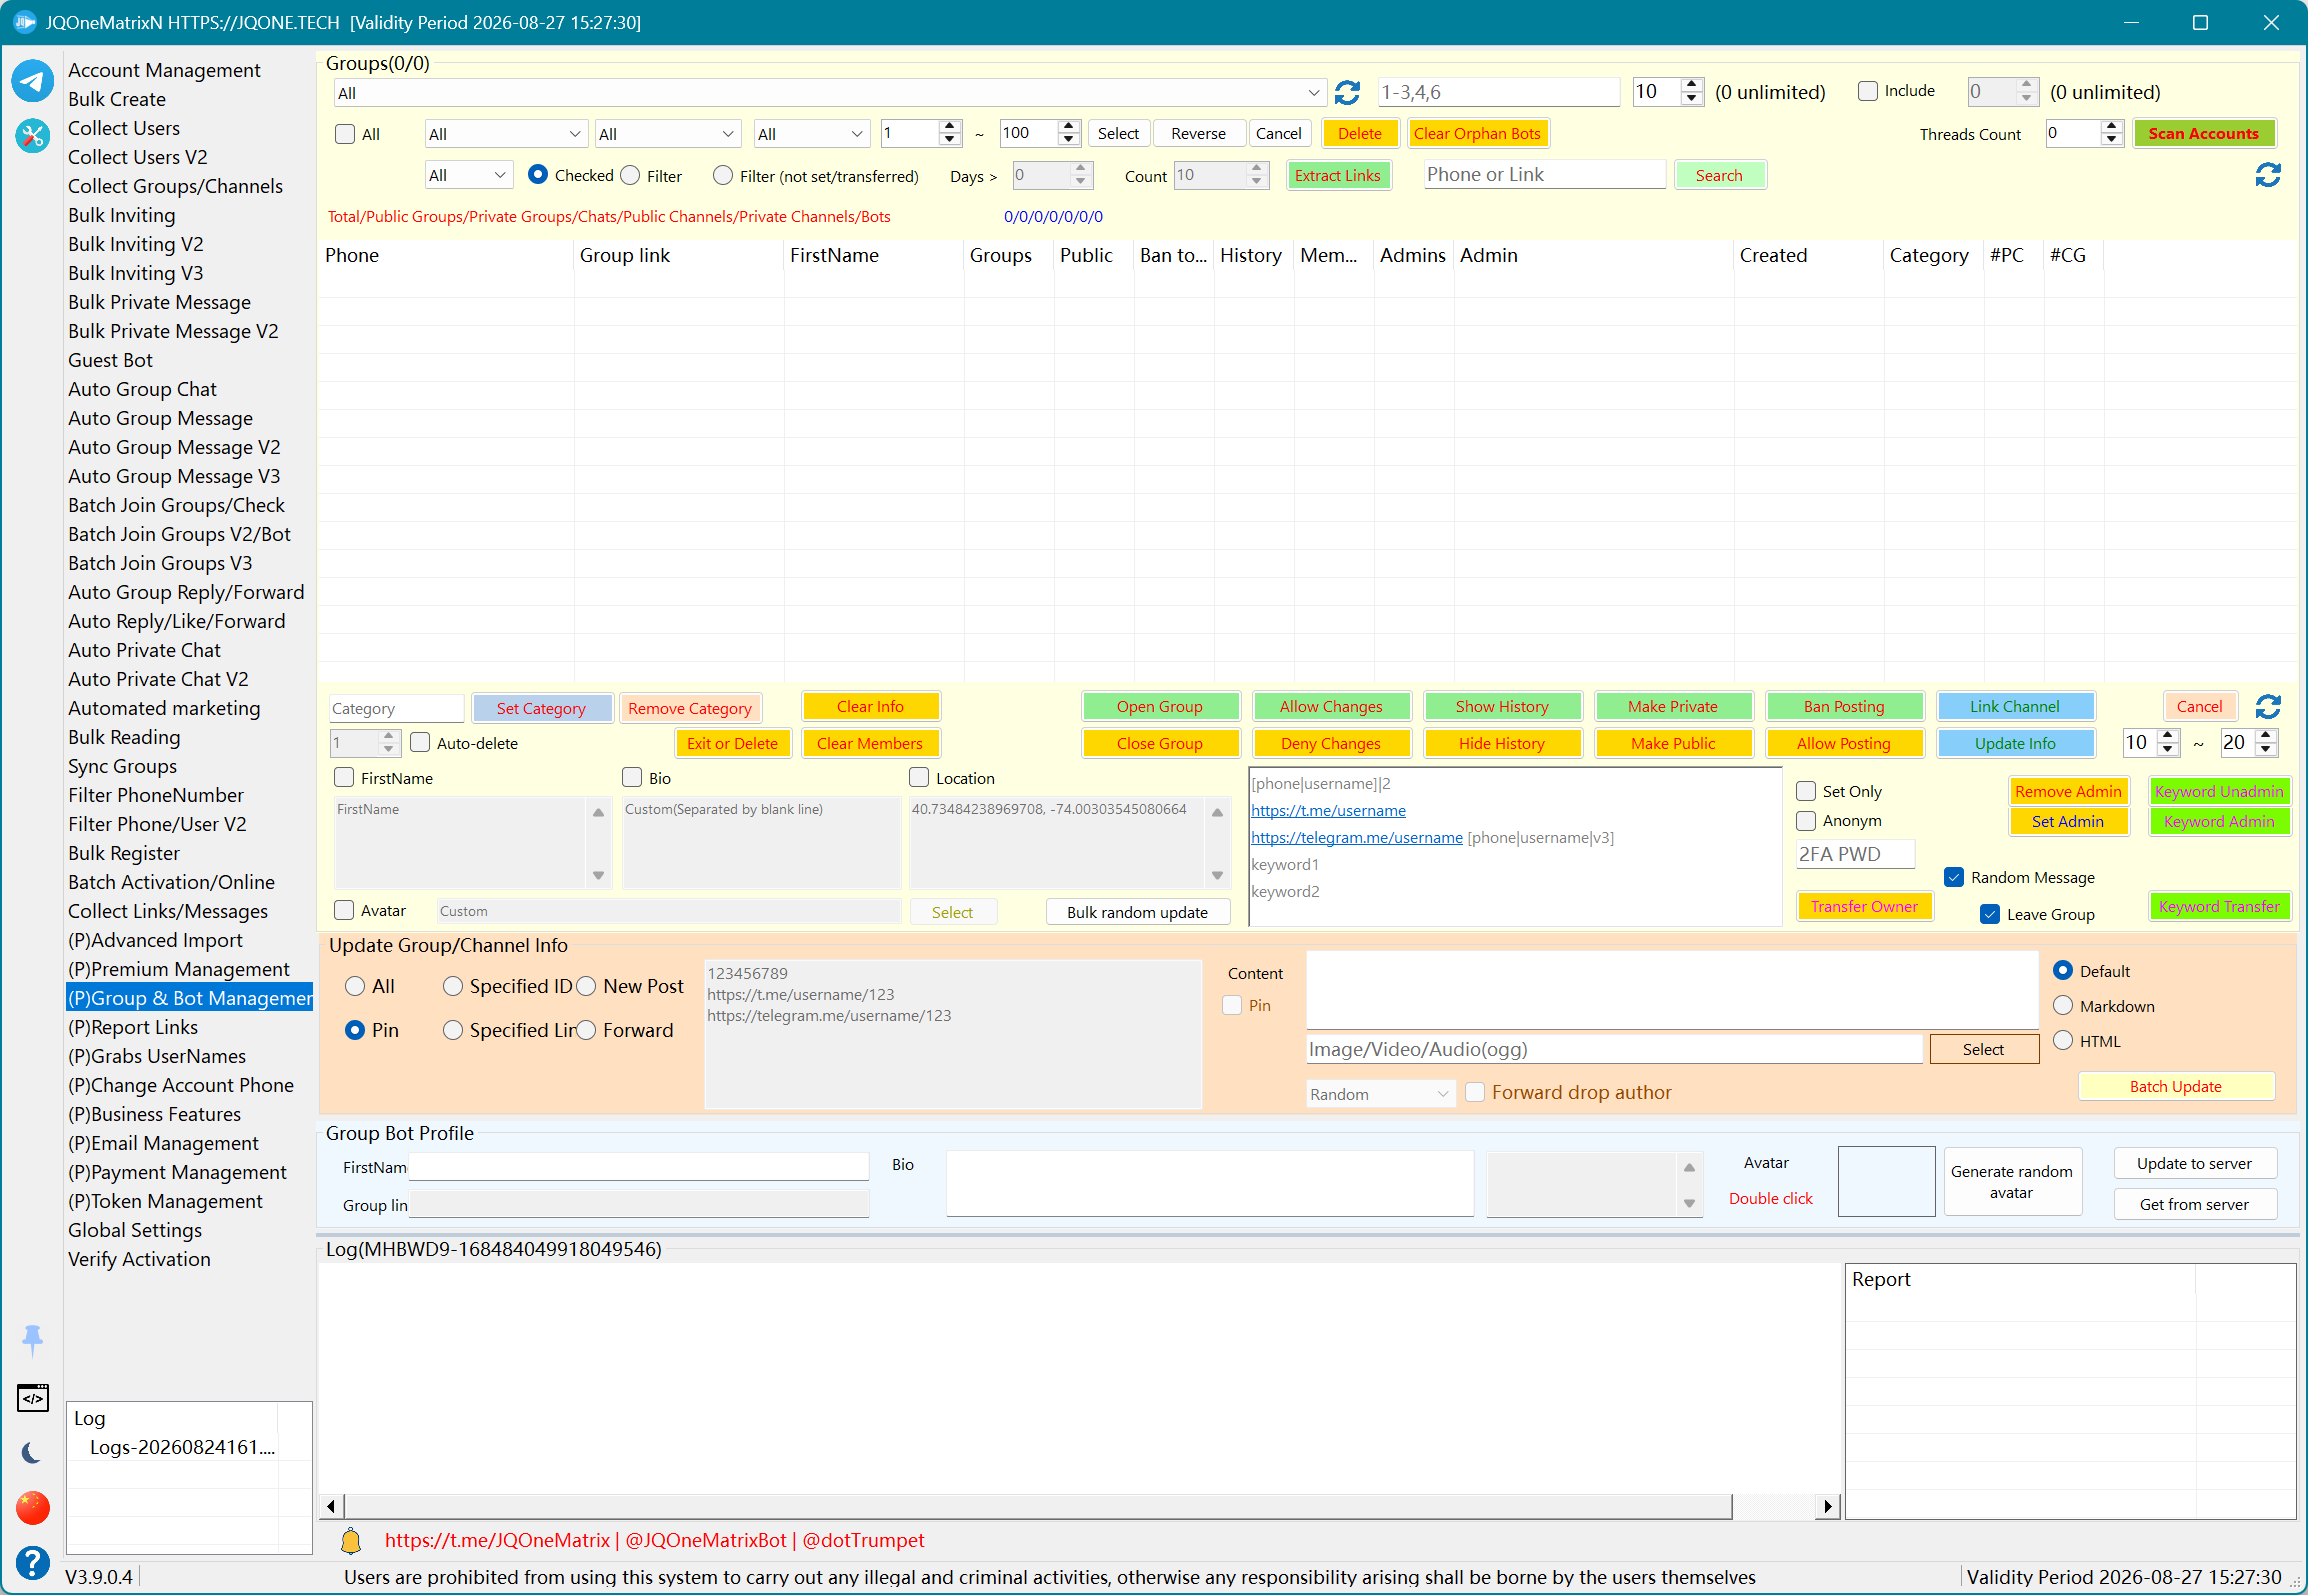
(P)Group & Bot Management
Maintain group, channel, and bot profiles, permissions, links, and members.
Steps
- Refresh accounts and select Scan Accounts to load groups, channels, and Bots those accounts can manage.
- Filter targets by type, keyword, and selection boxes. Fetch the current profile from the server before editing existing profile data.
- Choose one operation family at a time: update/randomize profile and image, public/private conversion, group/history switch, posting permissions, administrators, linked channel, ownership, member/history cleanup, or exit/delete.
- Enter the username, title, bio, image, administrator, permission, link, message, or forwarding data required by that operation and confirm the target scope.
- Select that operation's own button and verify the group-list status and log. Run publish, forward, and pin operations separately rather than triggering several management actions together.
Note: Test with a small number of accounts and records first. Available controls and results depend on the license, account state, target permissions, and Telegram response.
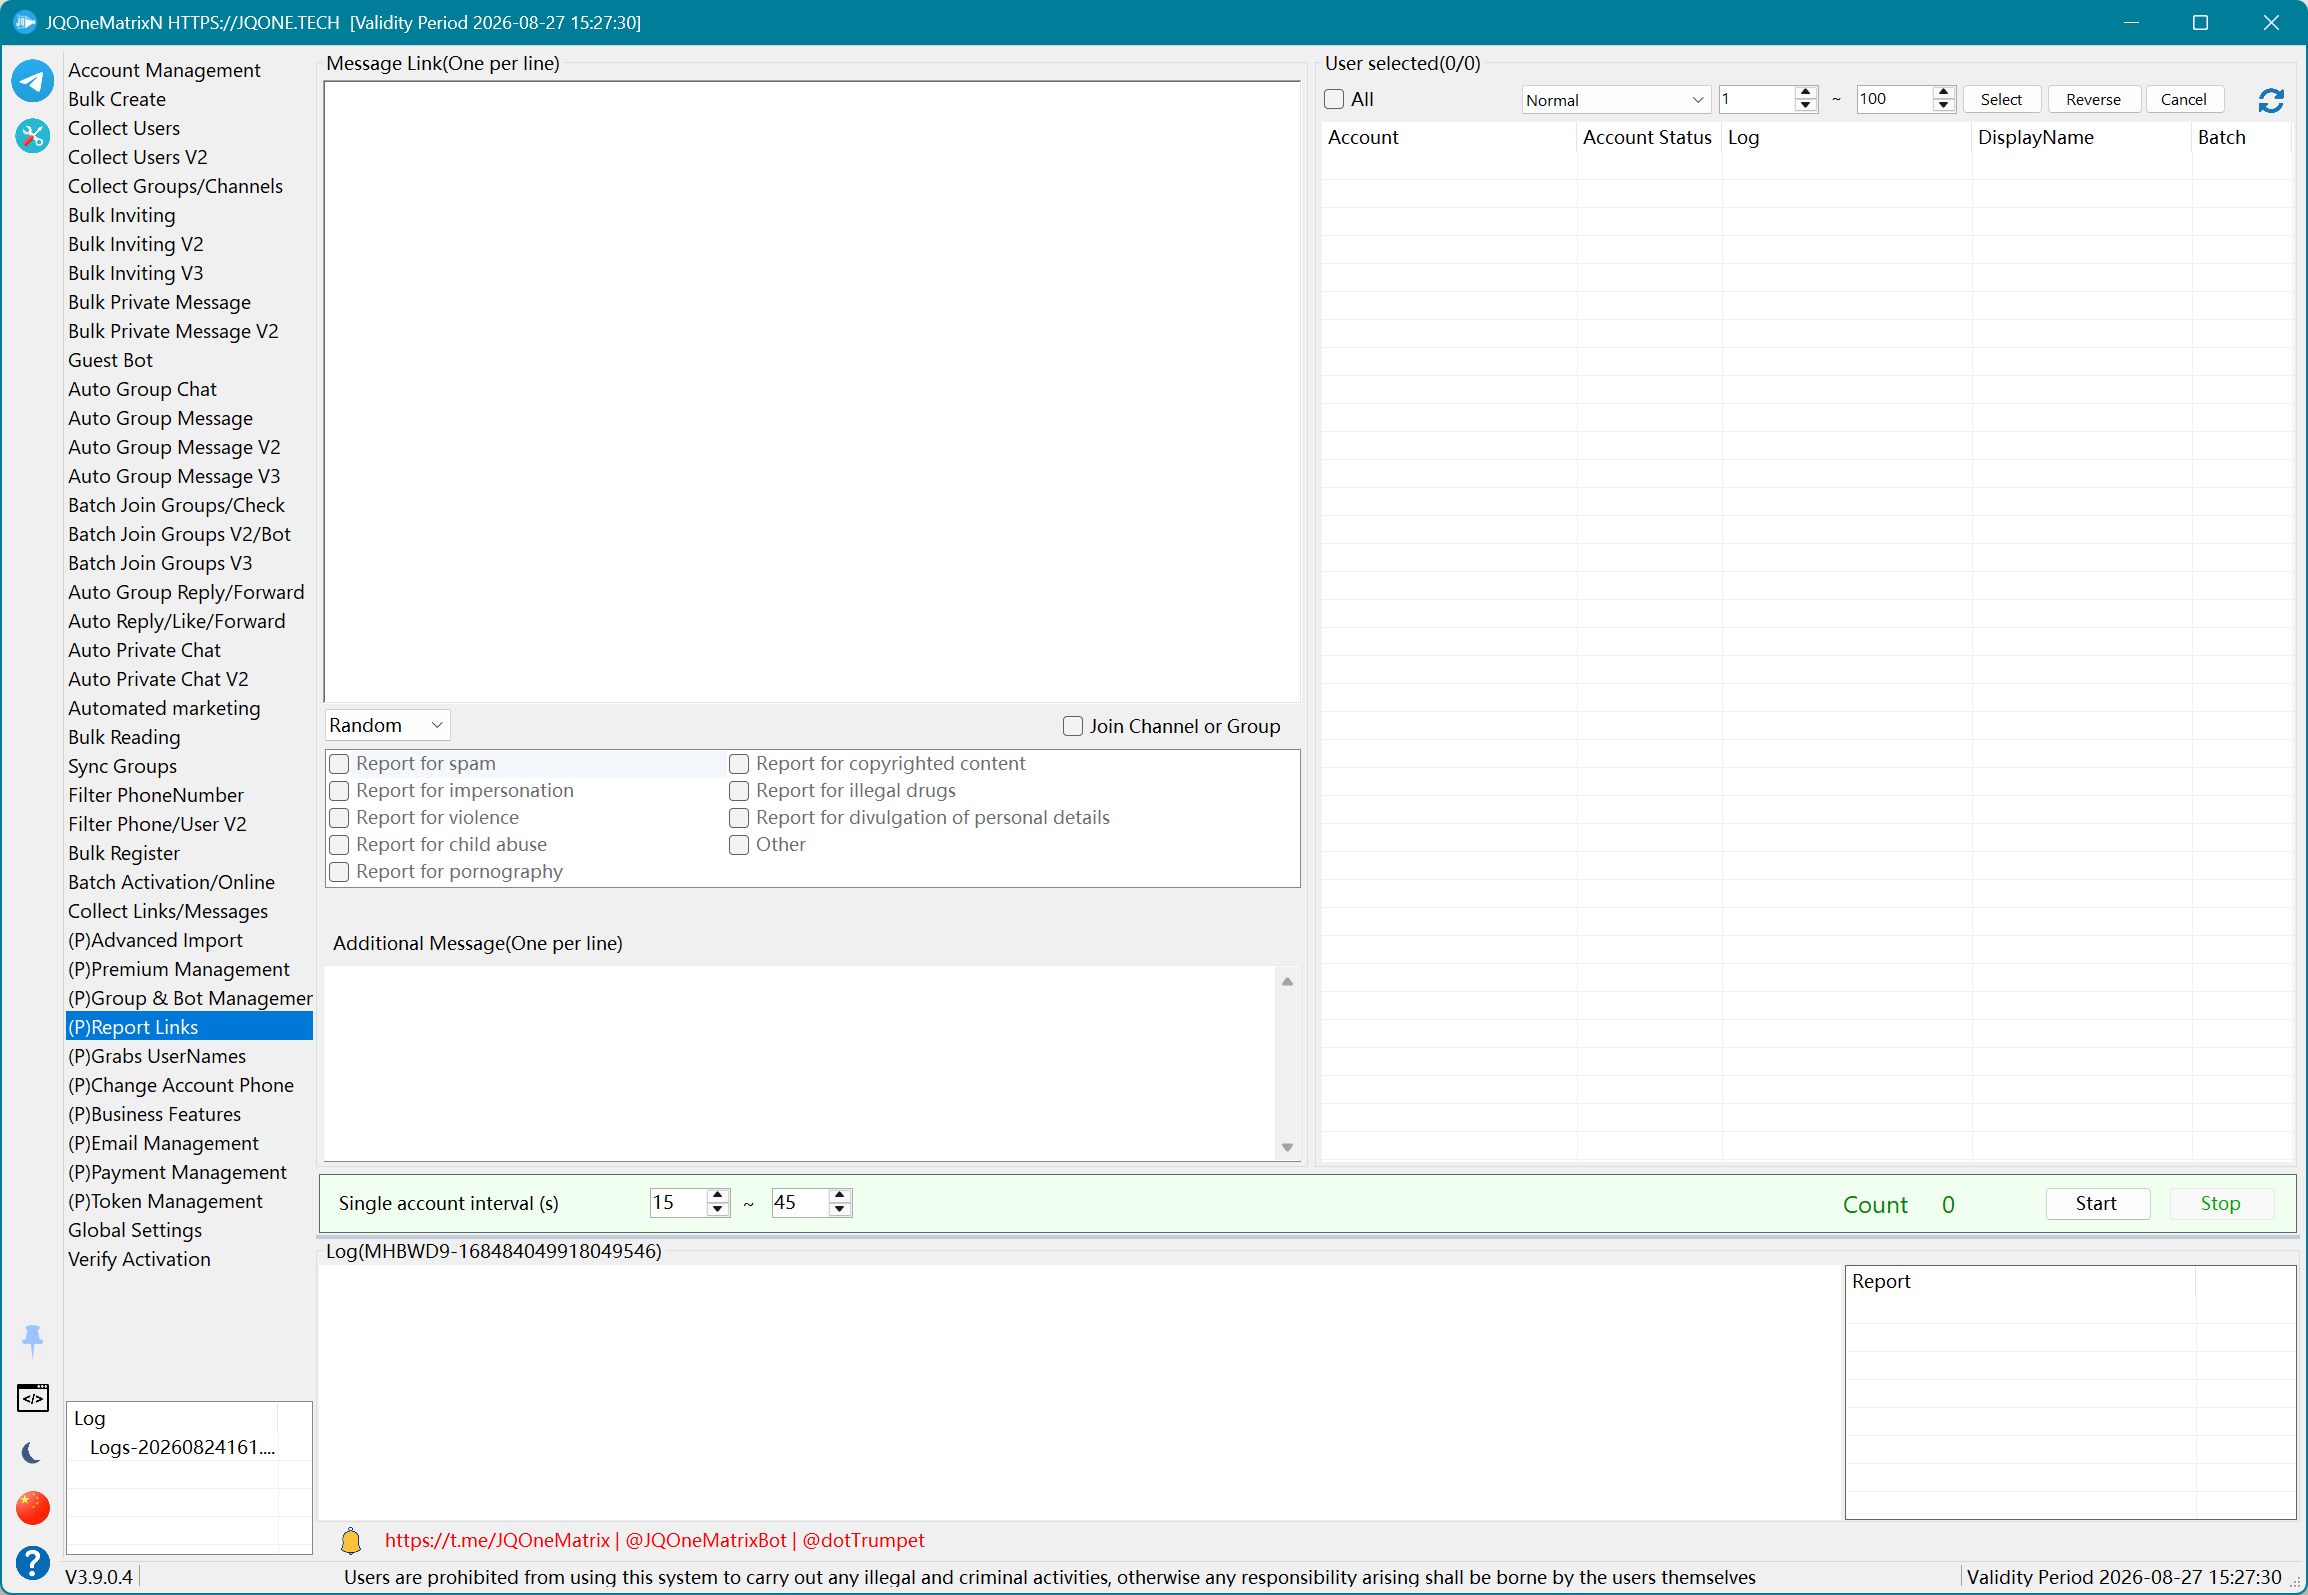
(P)Report Links
Use selected accounts to report imported message links with optional line-by-line additional information.
Steps
- Select the accounts used for reporting.
- Paste one message link per line and preserve link order.
- For additional information, enter one line per link in the same order. Enable Join Target when the accounts must enter the target first.
- Set the operation interval and select Begin.
- Review each link response in the log and completion count. Select Stop to end and retain unprocessed links for a later retry.
Note: Test with a small number of accounts and records first. Available controls and results depend on the license, account state, target permissions, and Telegram response.
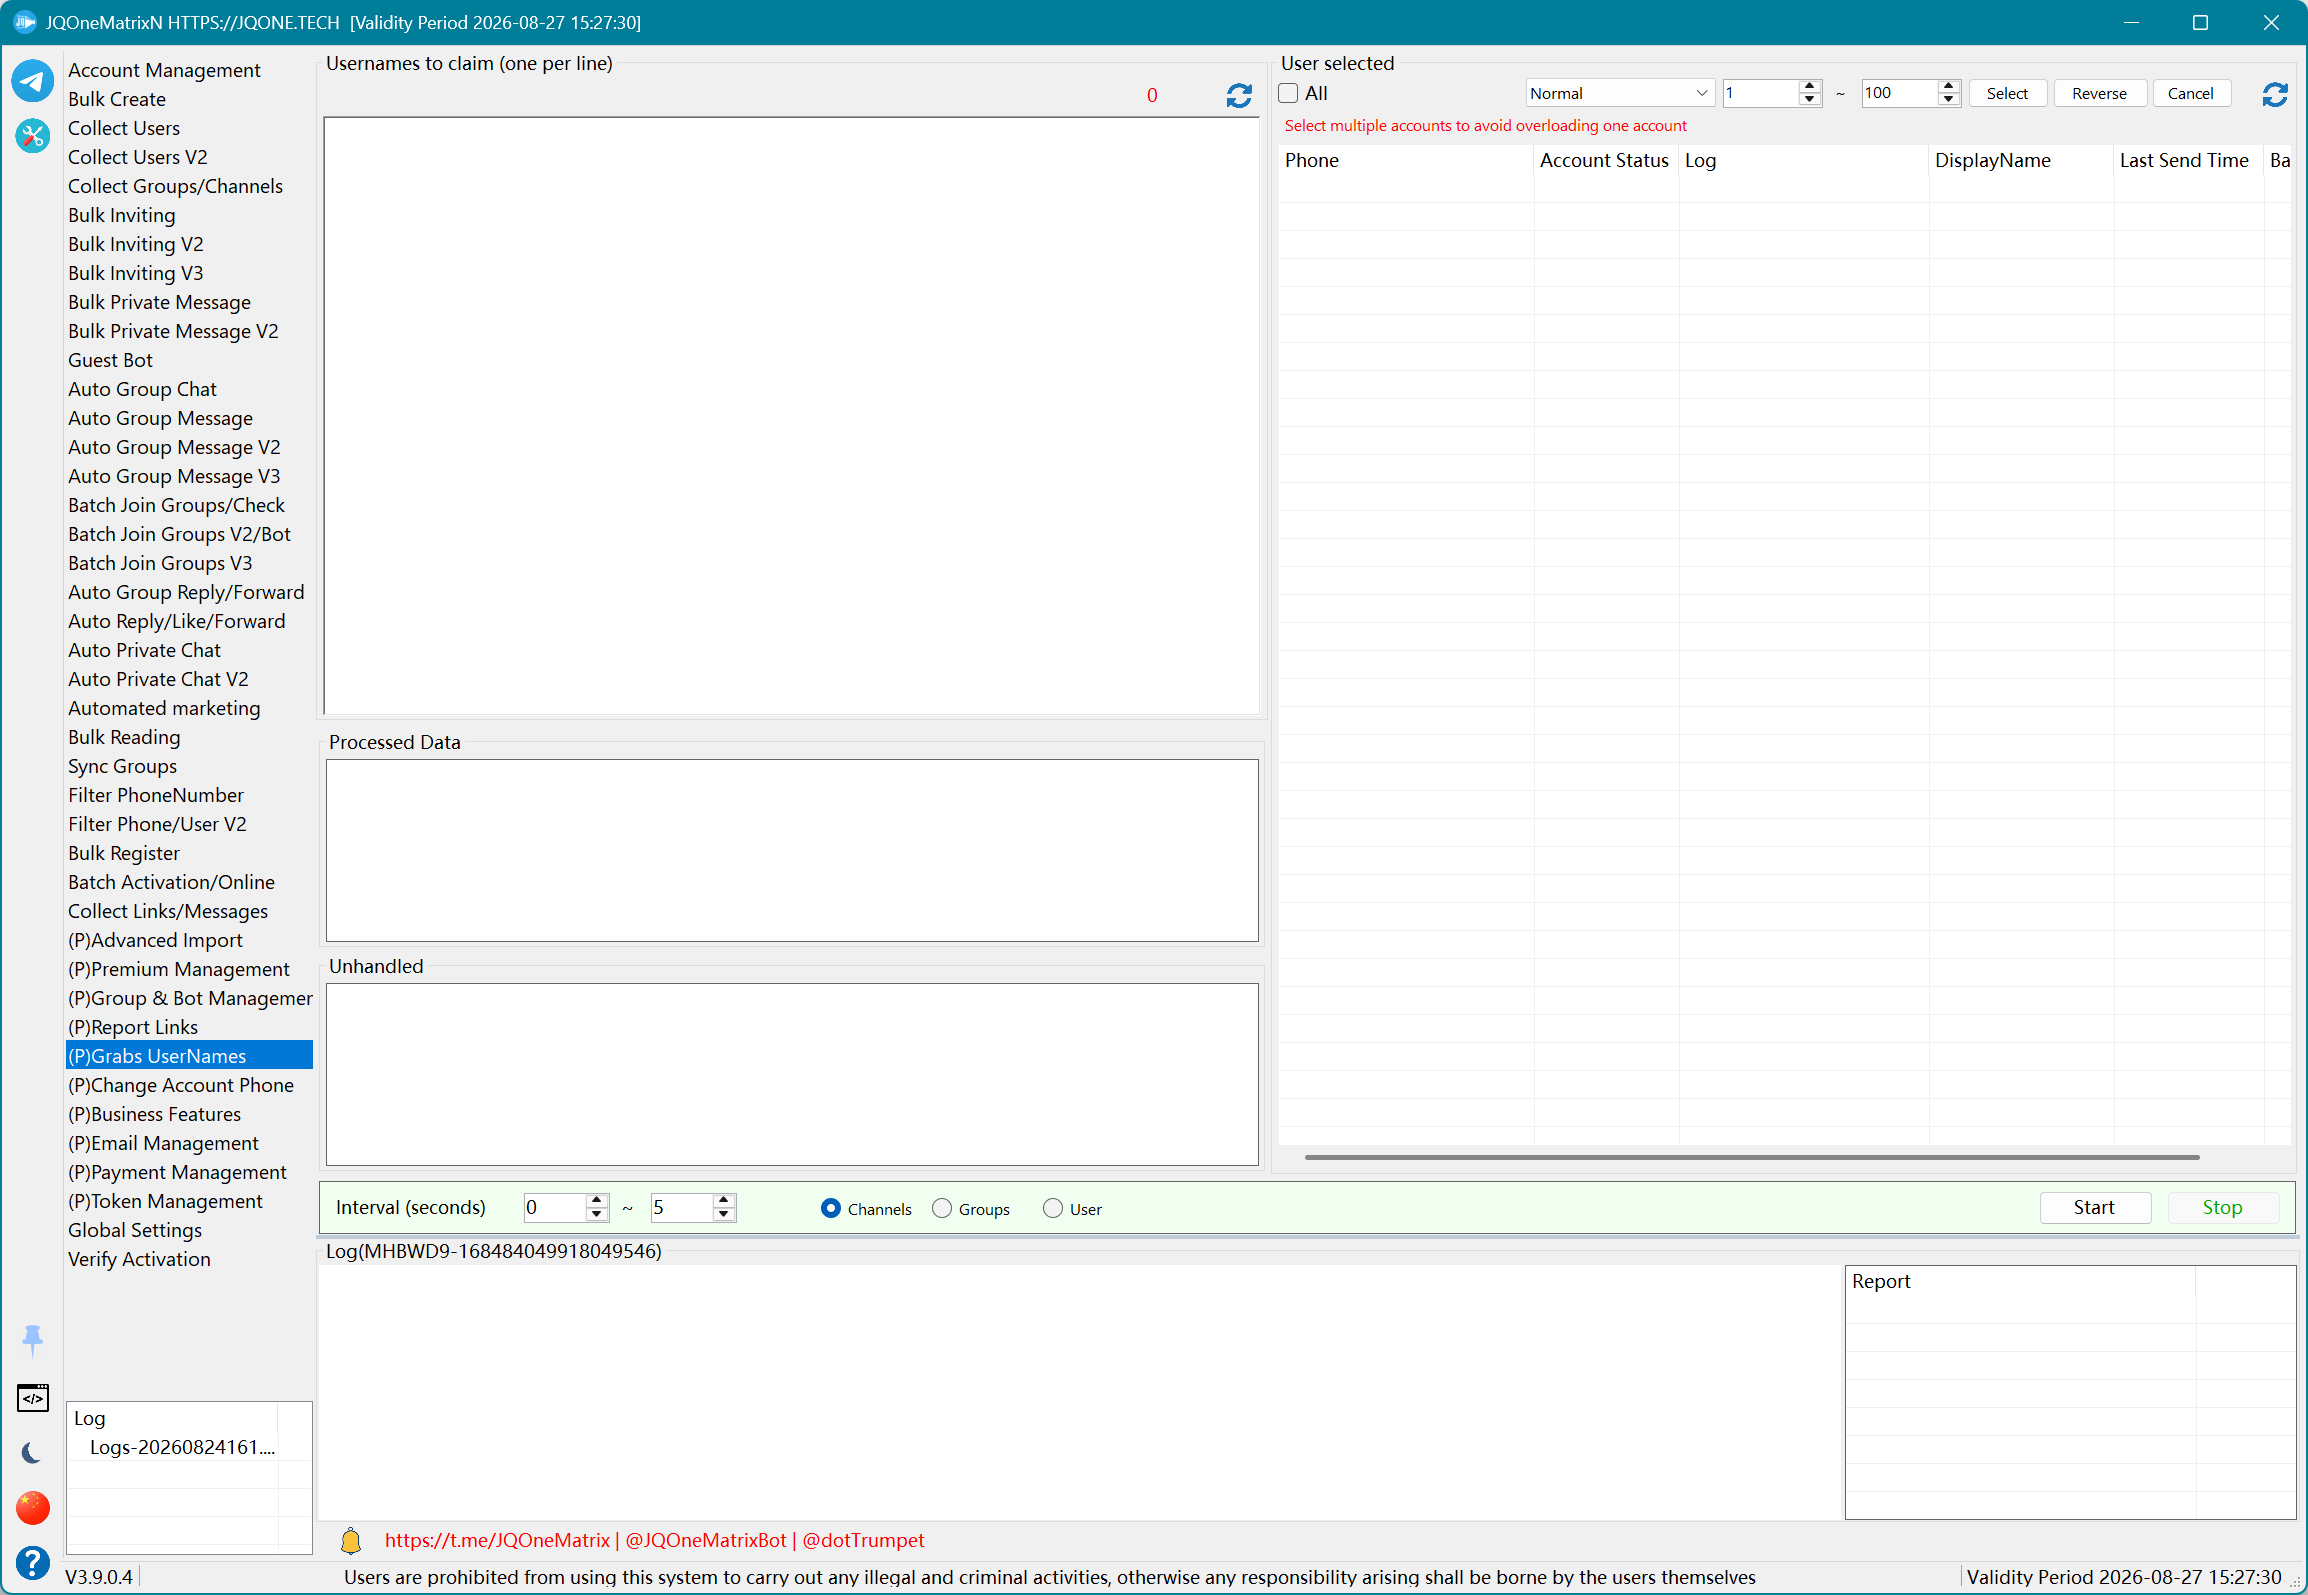
(P)Grabs UserNames
Use selected accounts to attempt username assignment for users, groups, or channels.
Steps
- Choose the target type first: User, Group, or Channel.
- Select accounts used to assign usernames. For Group or Channel mode, use accounts with management permission on the targets.
- Enter one desired username per line and remove entries you do not want before running.
- Set the check/attempt interval and select Begin.
- Confirm each username in Processed, Not Processed, and the log. Select Cancel before changing the target type.
Note: Test with a small number of accounts and records first. Available controls and results depend on the license, account state, target permissions, and Telegram response.
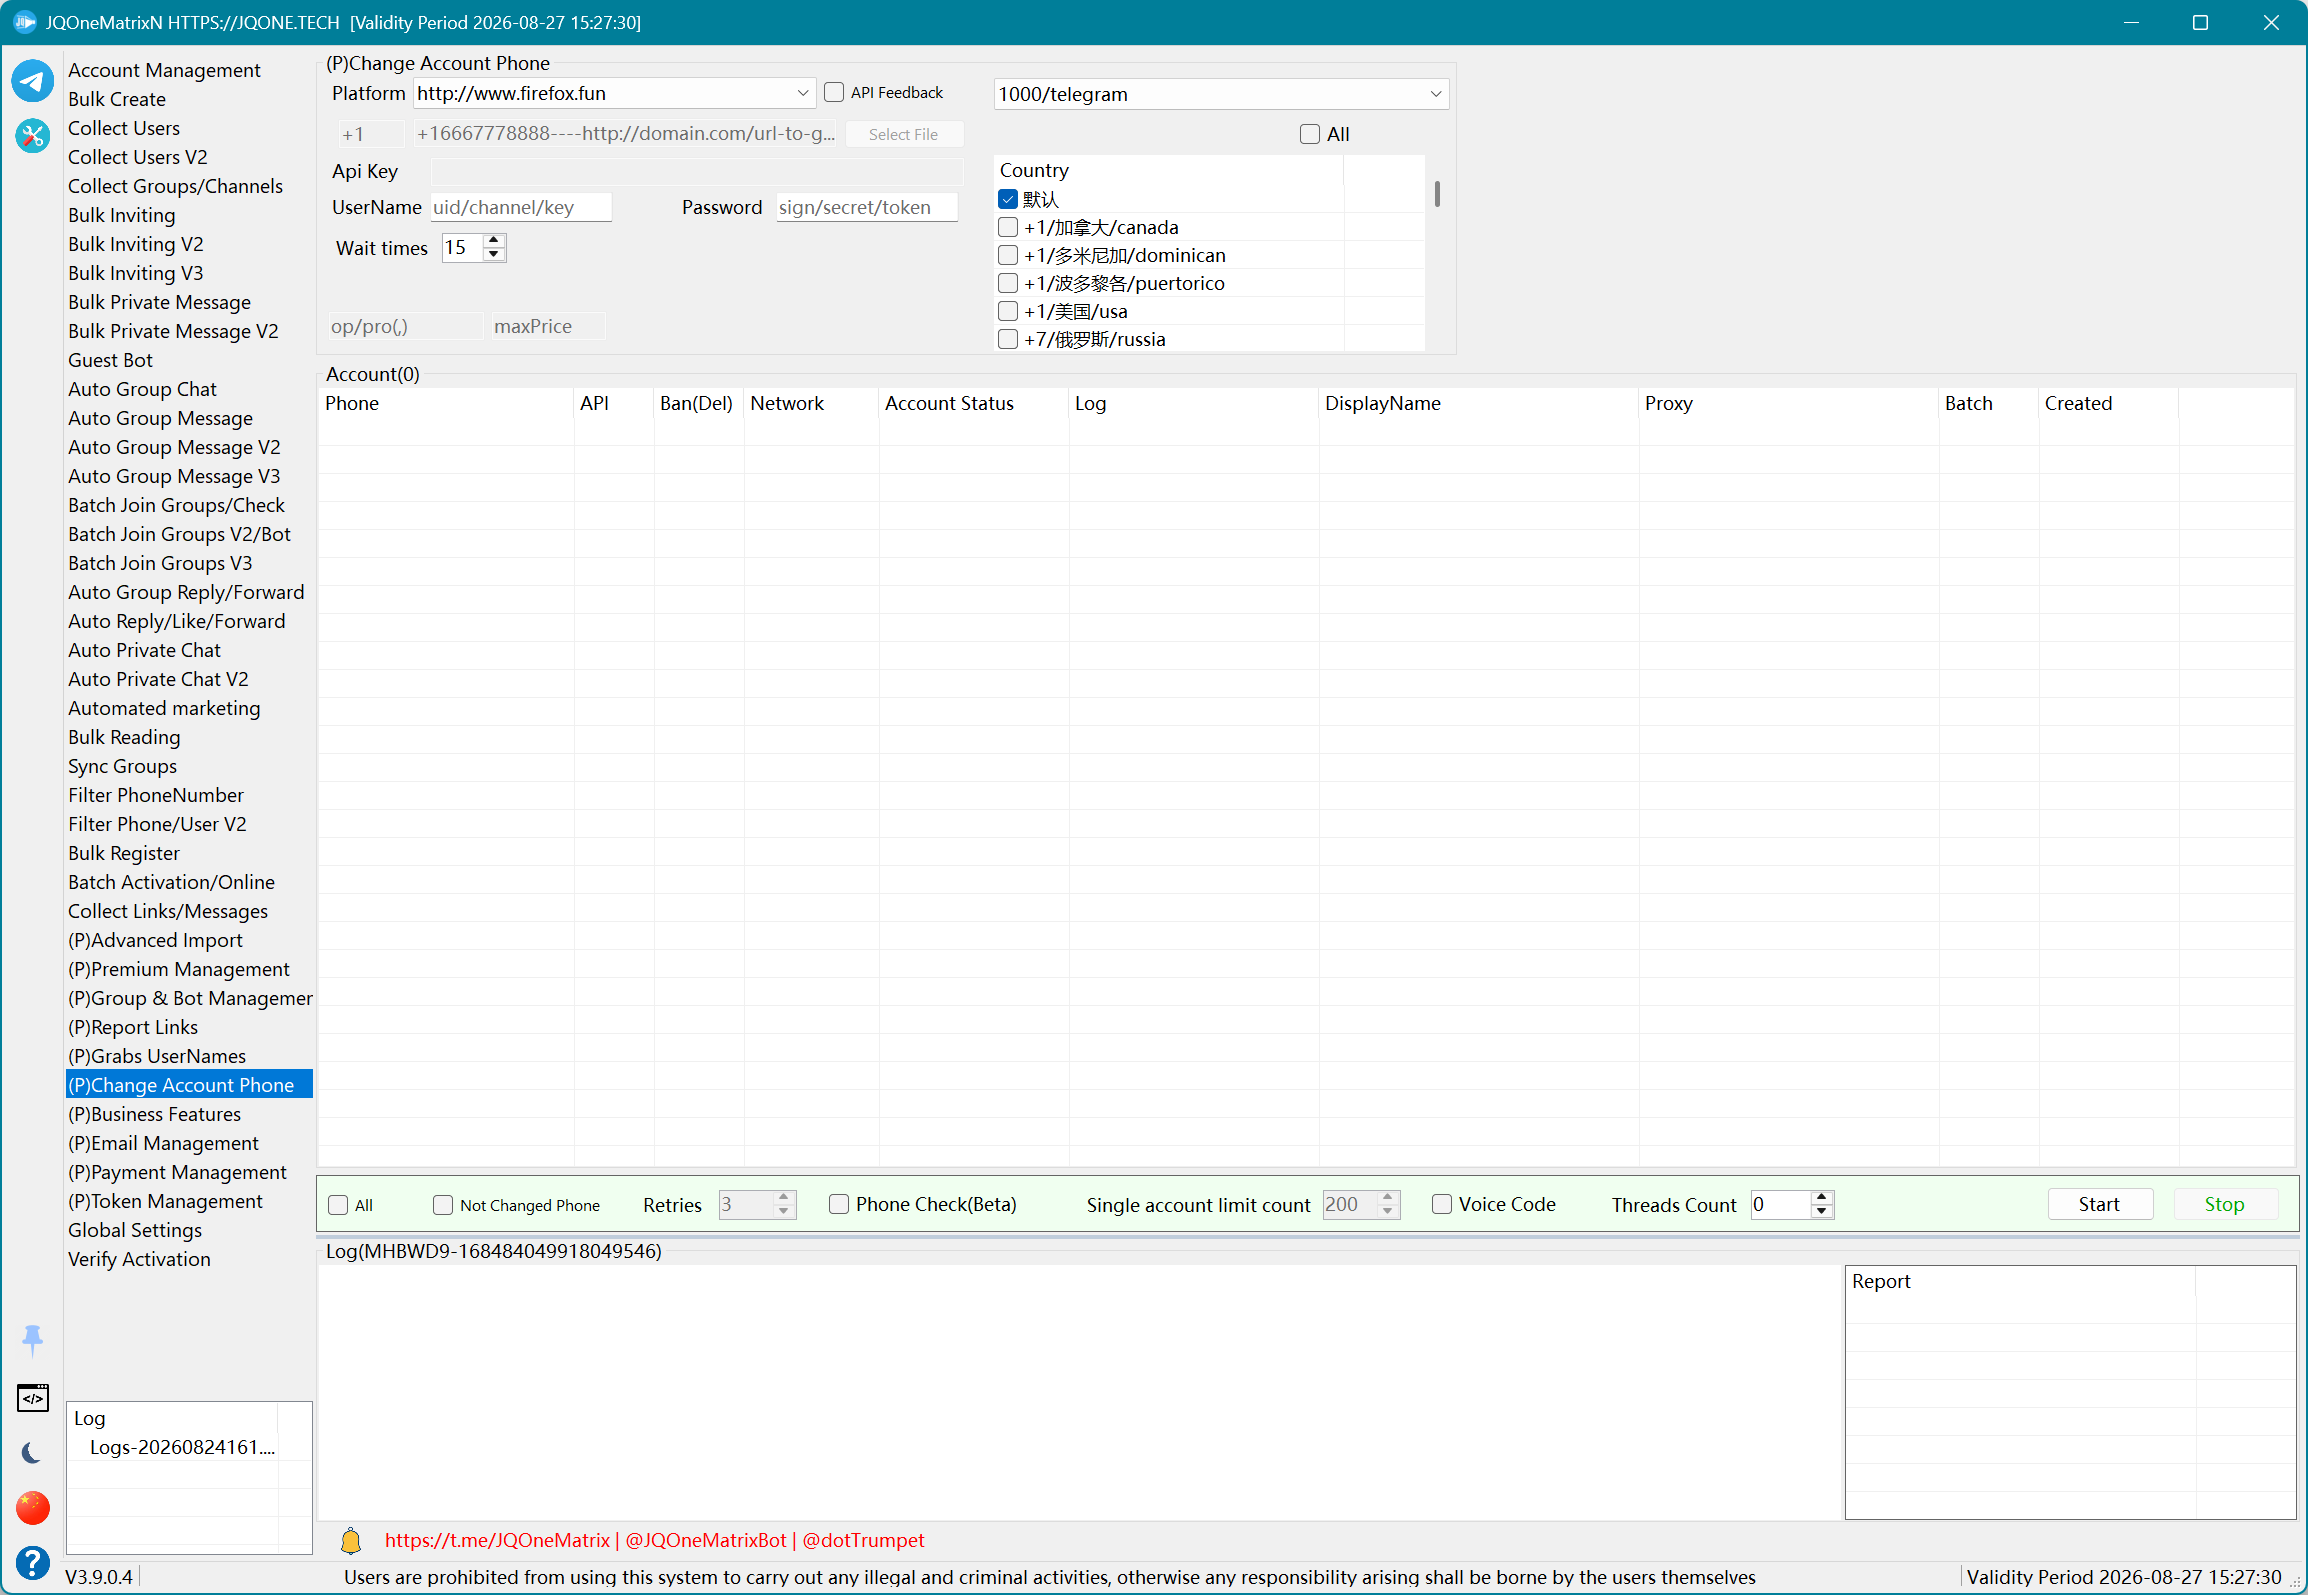
(P)Change Account Phone
Change bound phone numbers for selected accounts and process verification.
Steps
- Select accounts whose phone numbers will change and import the new-number TXT file.
- Choose country and number provider, enter the provider API, user, password, or key, and import proxies.
- Set verification-code wait and retry values. Enable voice code and API feedback when supported by the provider.
- Enable number checking and the Not Changed filter as needed, then set threads and the per-account processing limit.
- Select Start and confirm old-account/new-number results in account status and logs. Select Stop to end and do not reassign unfinished numbers.
Note: Test with a small number of accounts and records first. Available controls and results depend on the license, account state, target permissions, and Telegram response.
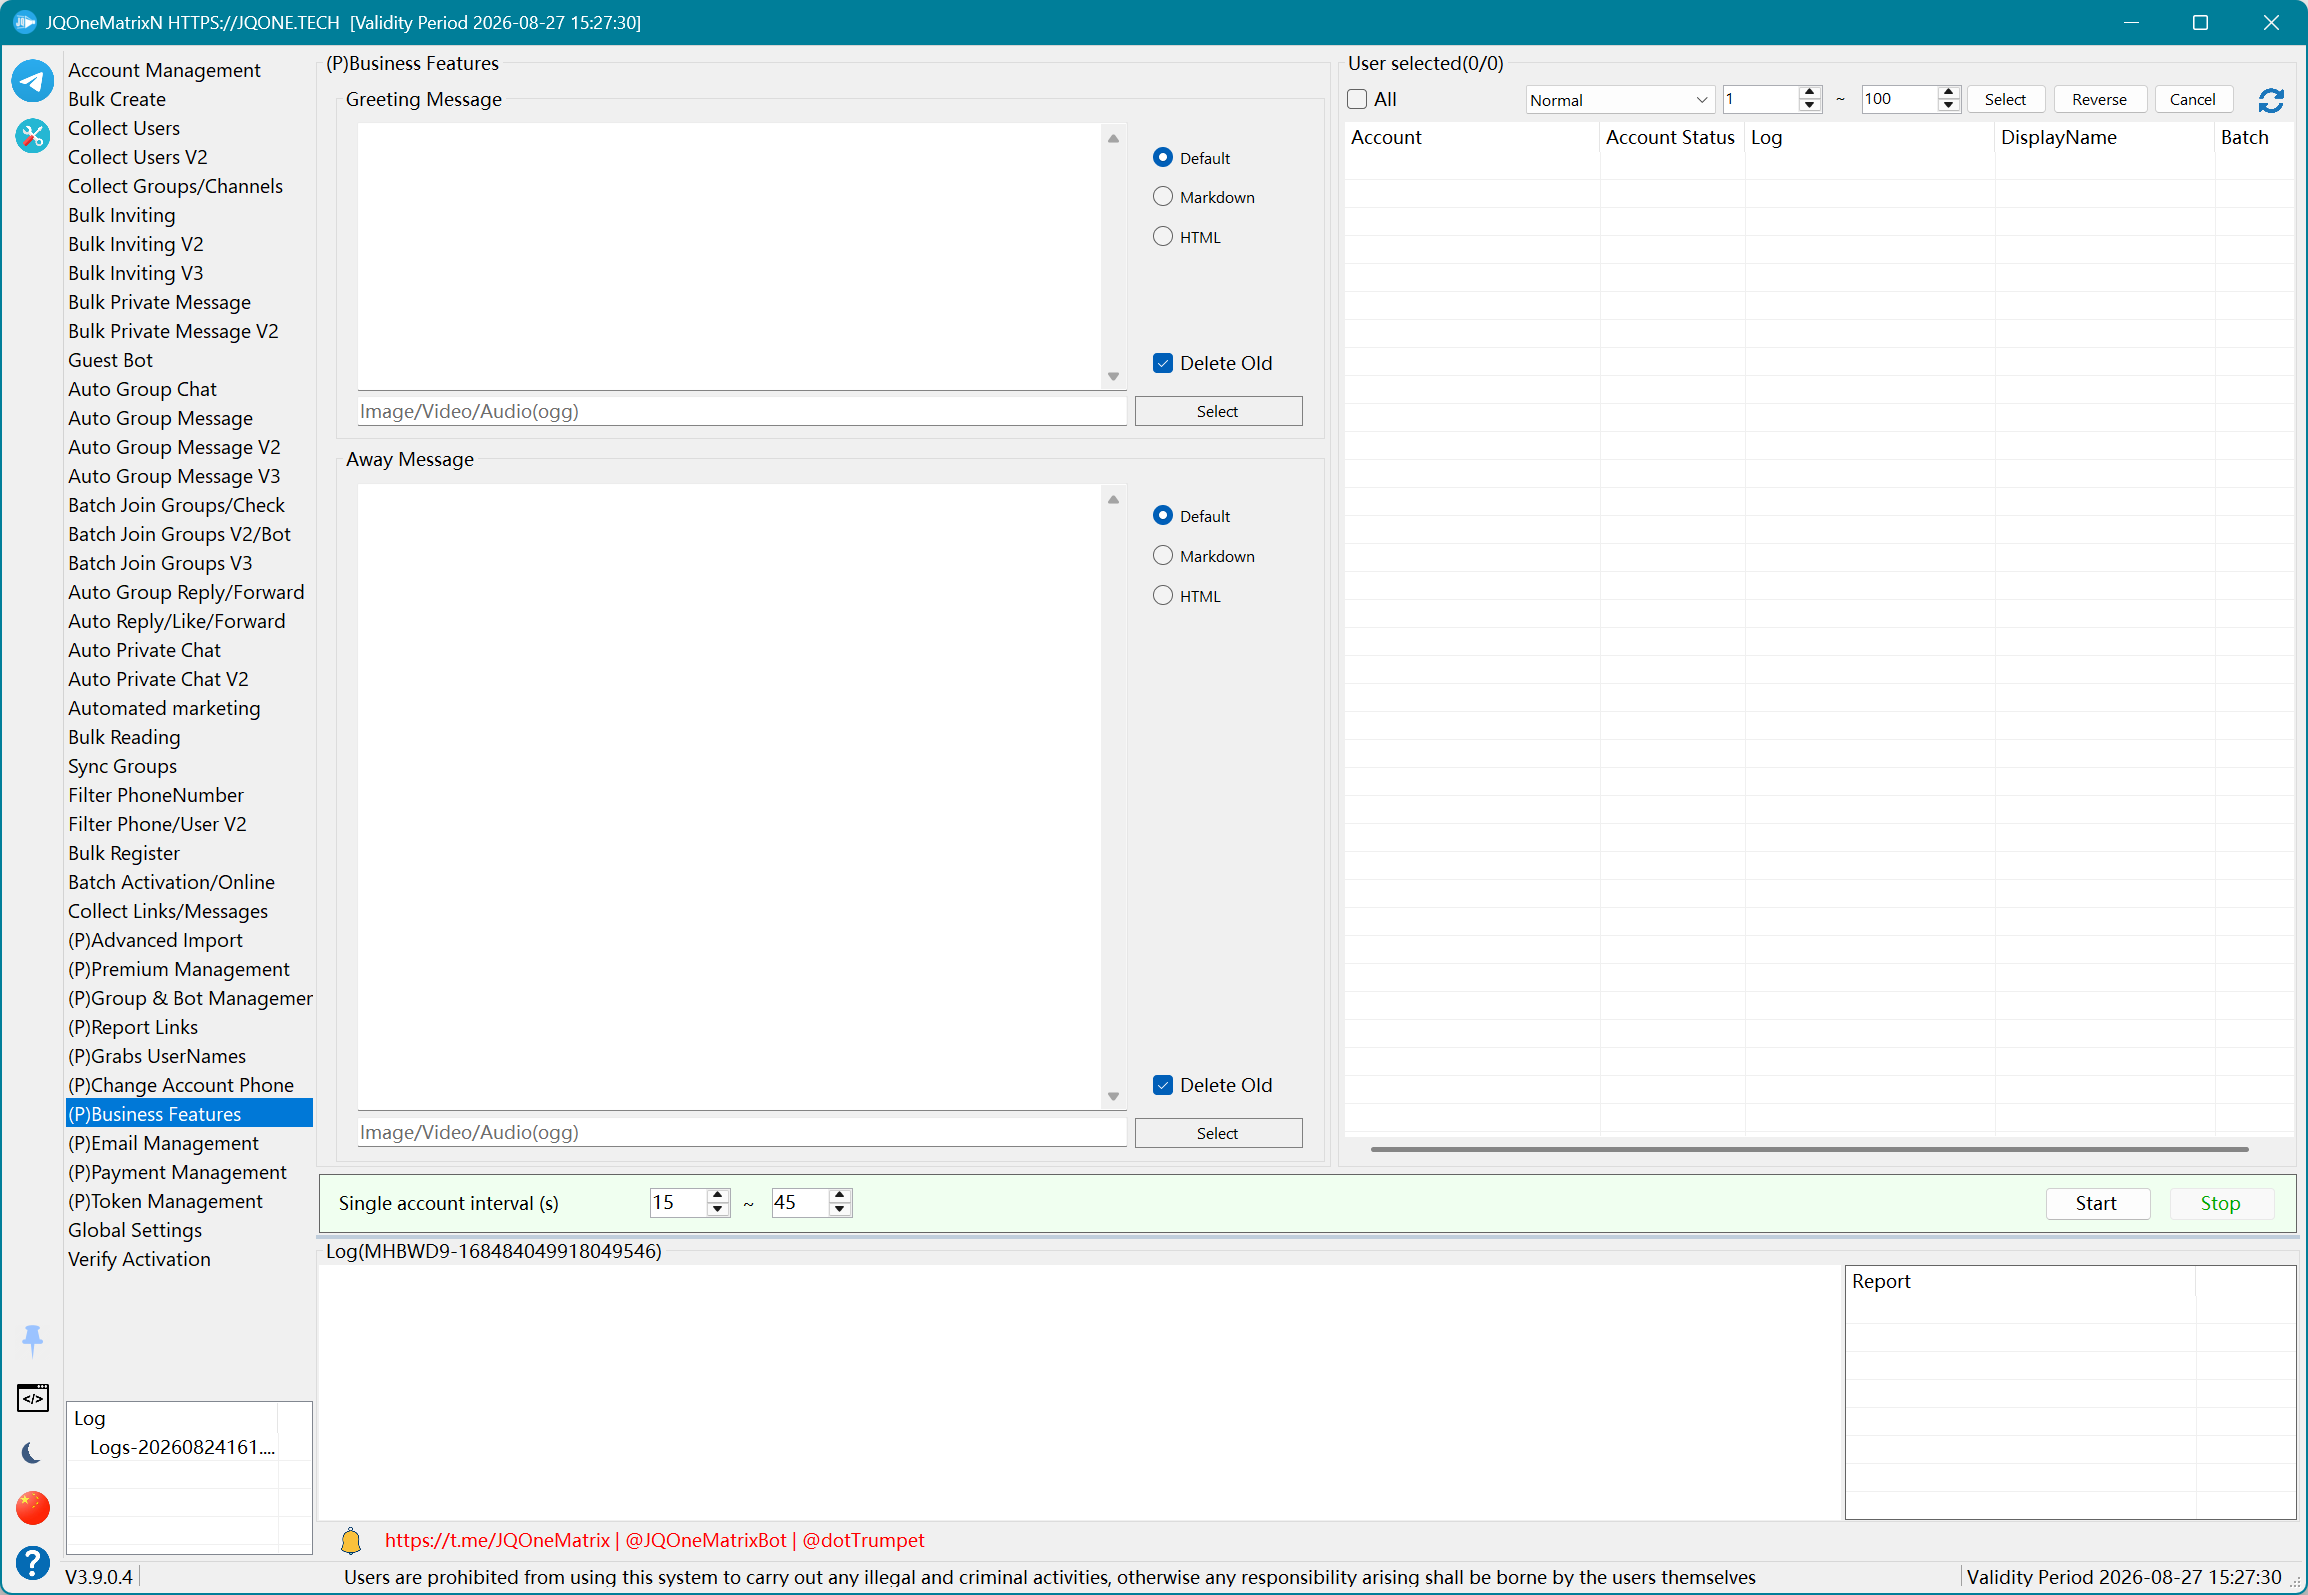
(P)Business Features
Configure welcome and offline messages for business accounts in bulk, including text formats and media.
Steps
- Select the accounts whose business messages will be configured.
- In Welcome Message, choose Default, Markdown, or HTML, enter the welcome message, and attach media if needed.
- In Offline Message, choose a format, enter the offline message, and attach media if needed.
- To replace an existing configuration, enable deletion for that specific message type first. Do not delete the other type by mistake.
- Set the account-processing interval and select Begin. Confirm Welcome and Offline results separately in the log, or select Stop to end.
Note: Test with a small number of accounts and records first. Available controls and results depend on the license, account state, target permissions, and Telegram response.
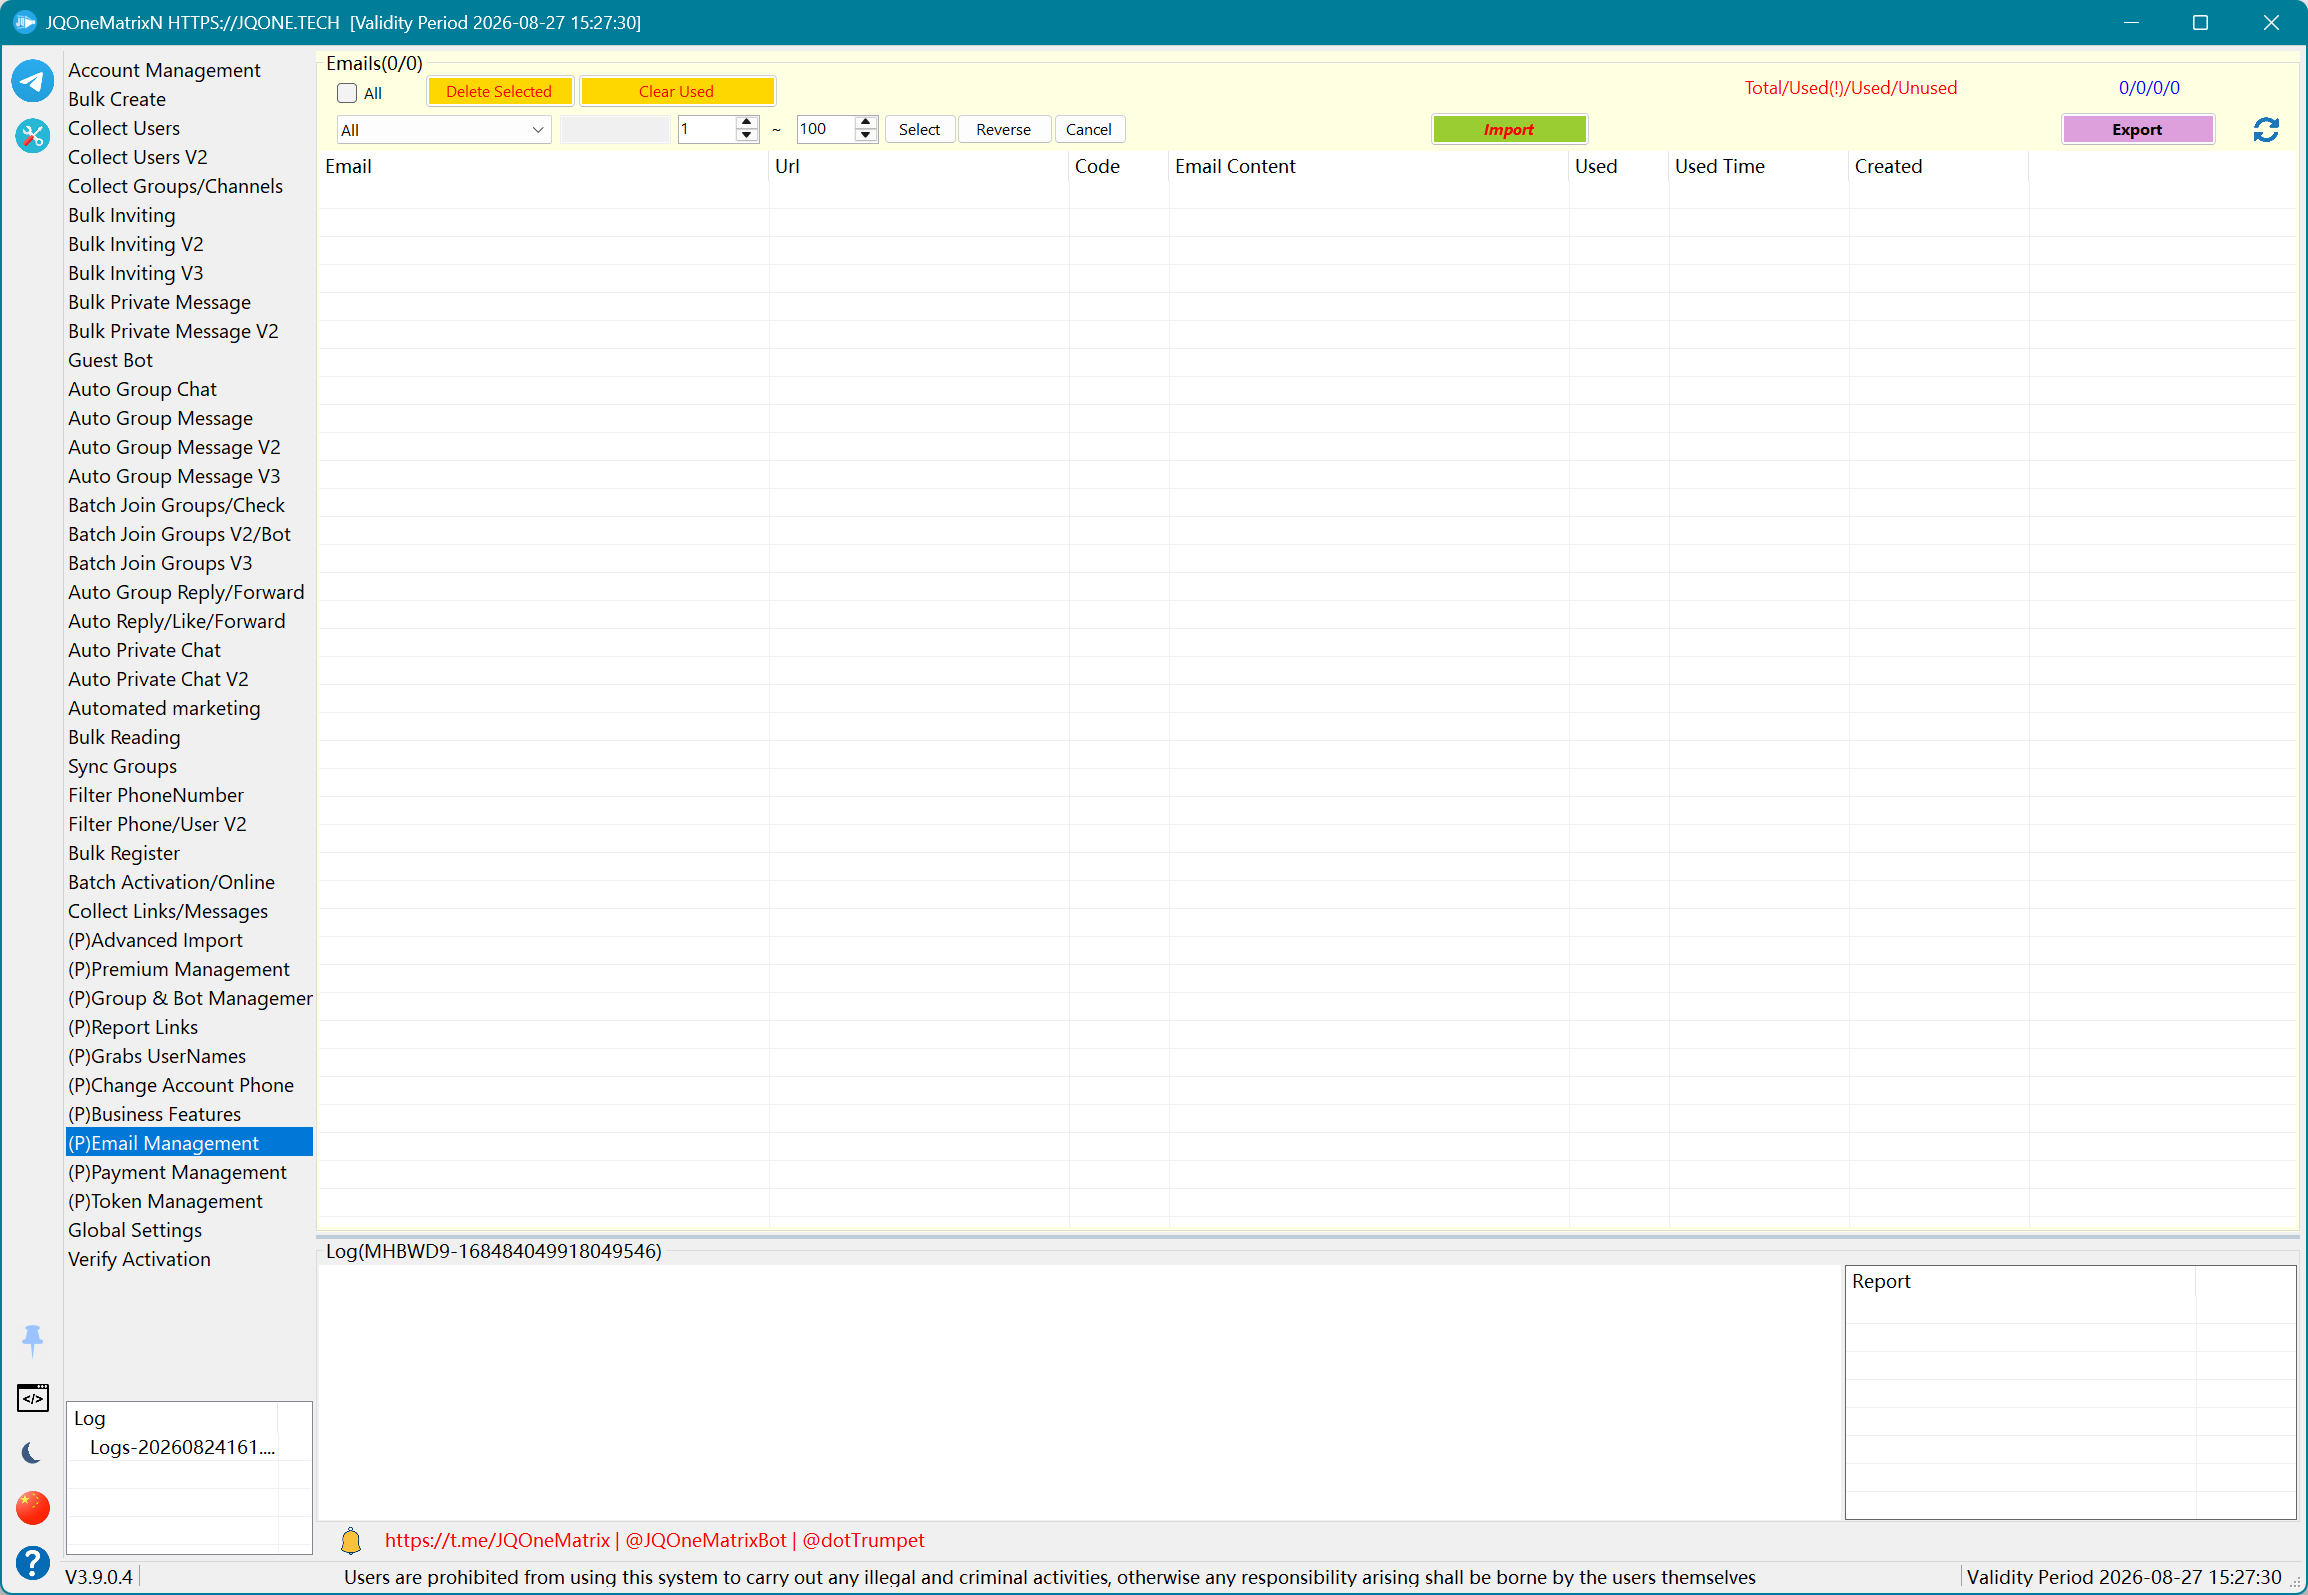
(P)Email Management
Import, filter, clear used records, and export email data.
Steps
- Select Import Email to load email records, then refresh the list.
- Filter emails by index and state, then select the records to process.
- Review the Email, URL, Code, Content, Used, and Time columns to confirm verification content and usage state.
- Use Total, Future Code, Used, and Unused counts to verify the filtered scope.
- Choose Clear Used, Delete Selected, or Export as required. Confirm selected records again before deletion.
Note: Test with a small number of accounts and records first. Available controls and results depend on the license, account state, target permissions, and Telegram response.
(P)Payment Management
Manage payment records and usage states.
Steps
- Select Import Payment to load payment data, then refresh the list.
- Filter by index and usage state, then select the records to process.
- Review Payment, API, Used, Time, Create, and Days to confirm provider, usage state, and validity days.
- Compare Total, Used, and Unused counts to confirm the filtered result.
- Clear used records, delete selected records, or export a backup as required. Confirm the filter and selection before deletion.
Note: Test with a small number of accounts and records first. Available controls and results depend on the license, account state, target permissions, and Telegram response.
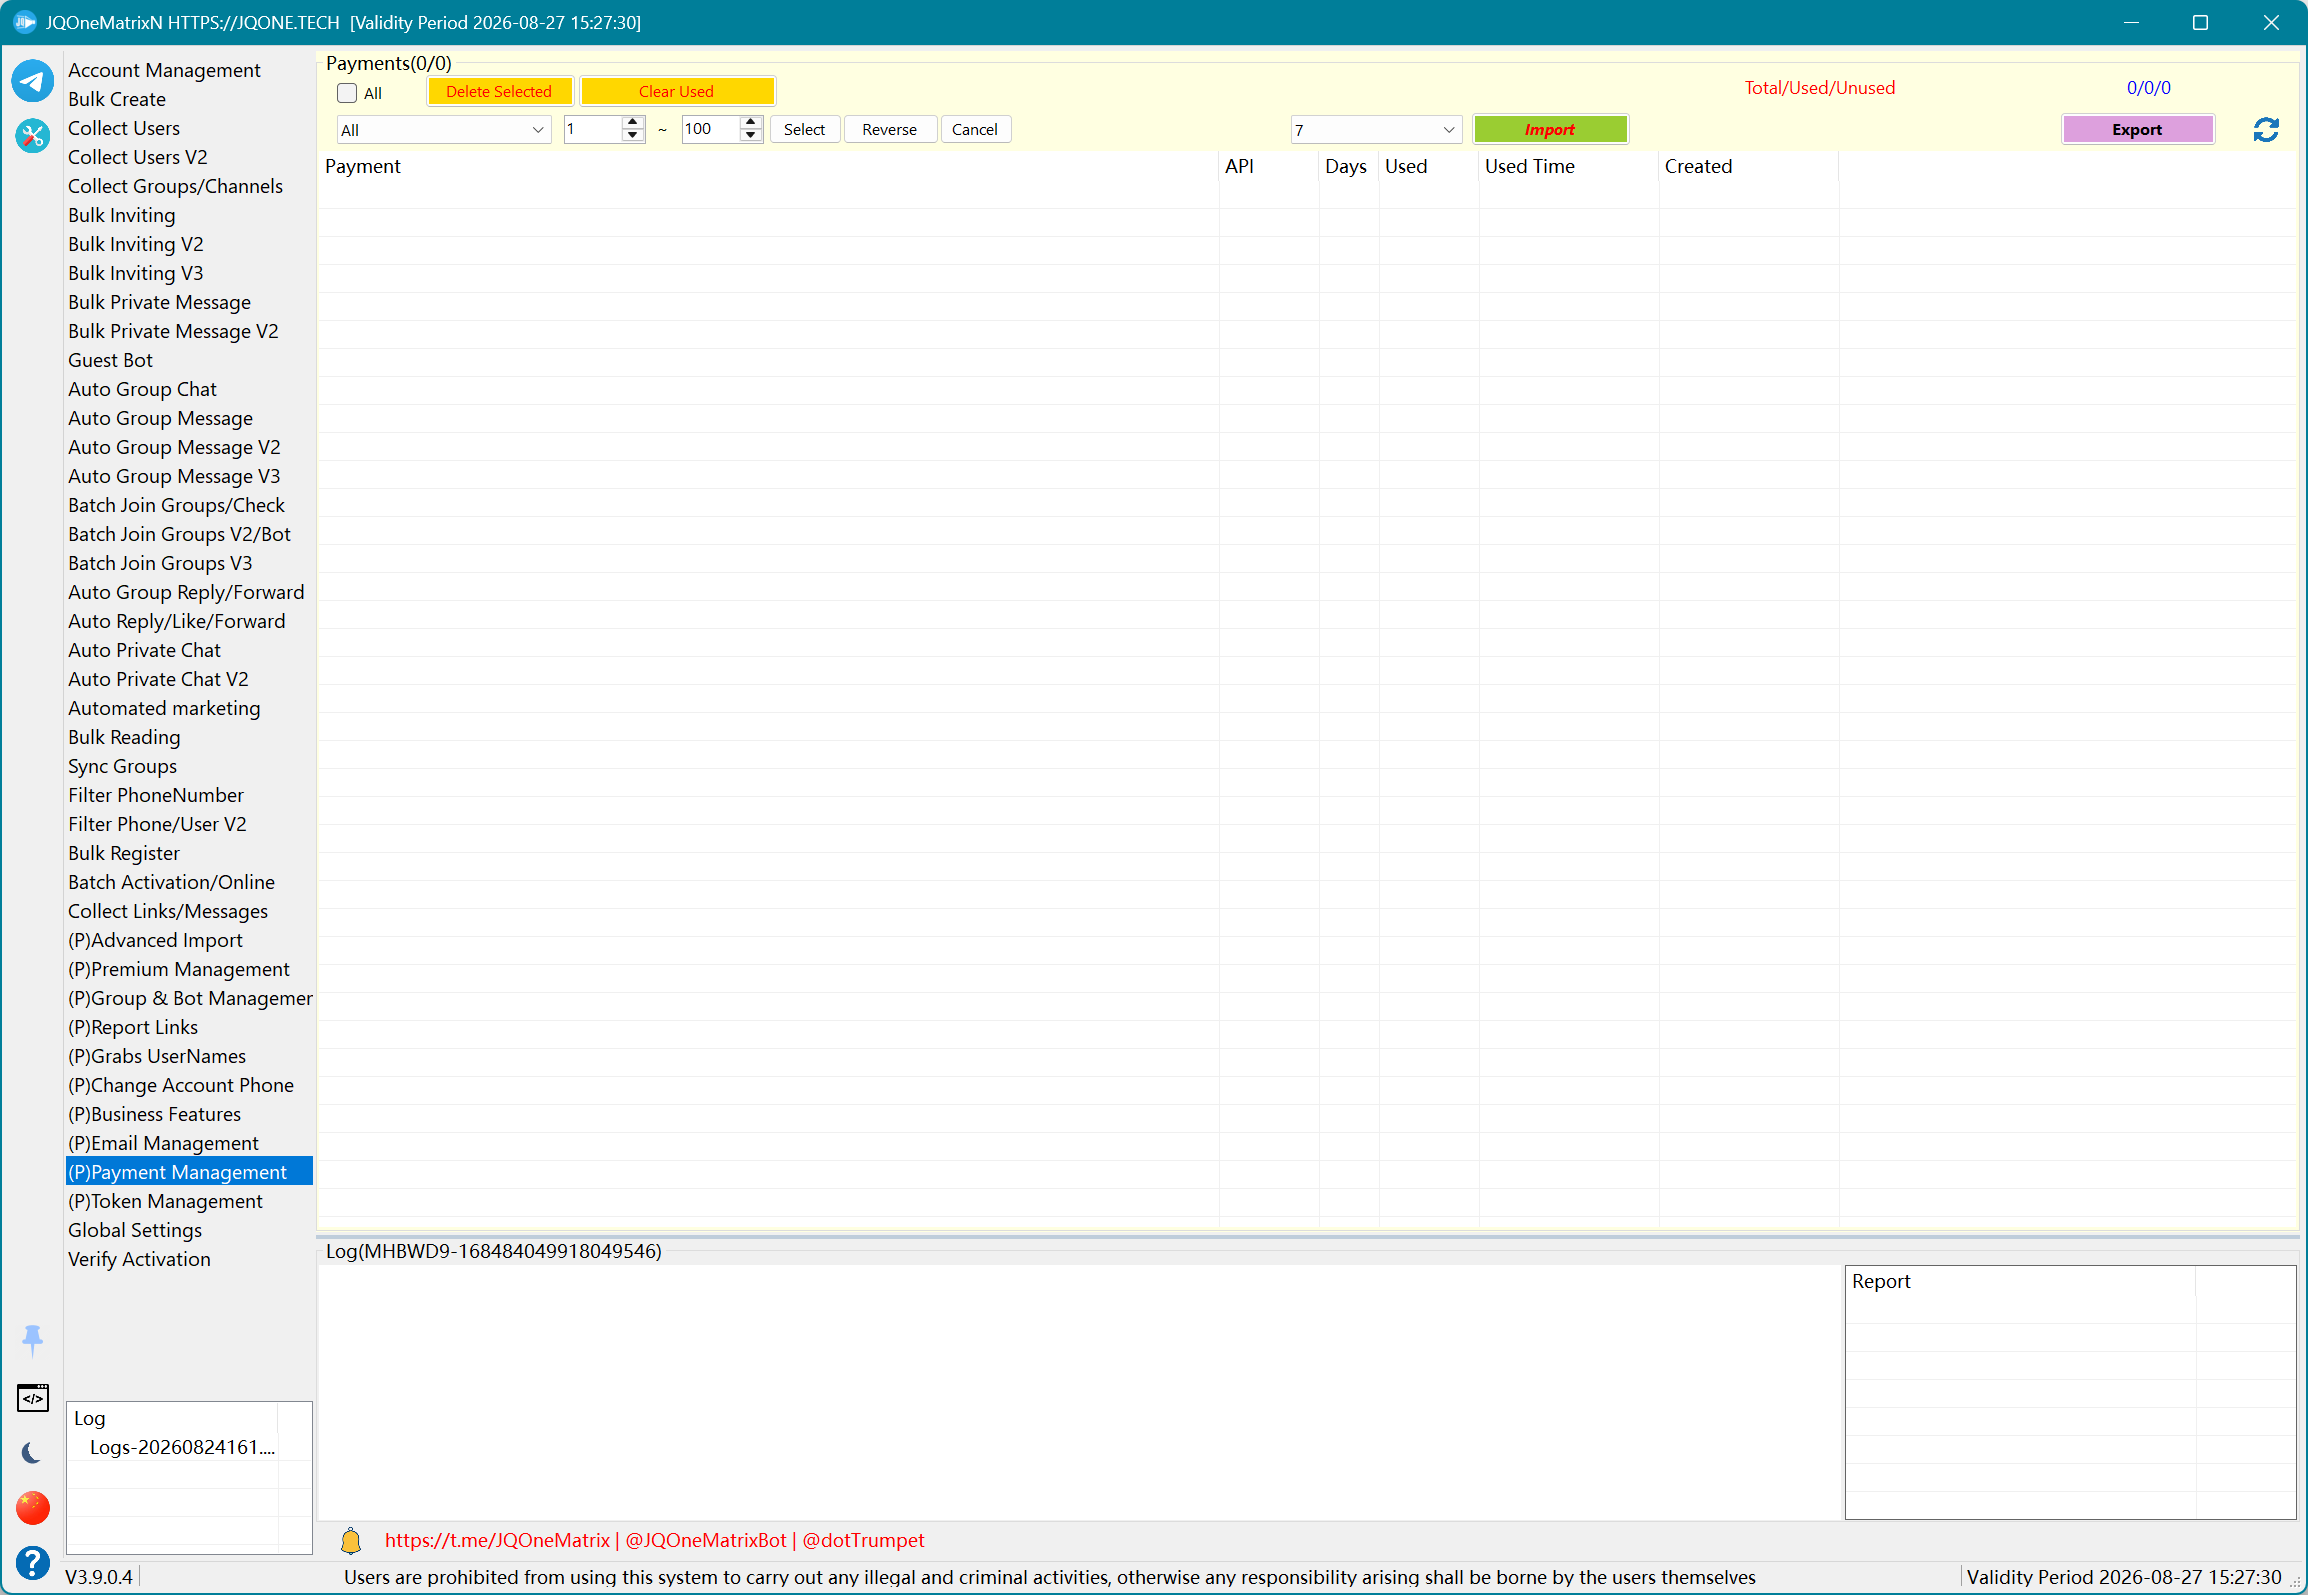
(P)Token Management
View each token's API, total, used, and successful counts, and delete records no longer needed.
Steps
- Open Token Management and select Refresh to load the current token list.
- Use index, search, or selection boxes to choose the Tokens to inspect.
- Review Token, API, Total, App, Used, Success, and Create to understand usage and successful counts.
- Token content is not edited on this page; the page is for statistics and record selection.
- After confirming the selection, delete the selected Tokens and refresh the list to confirm removal.
Note: Test with a small number of accounts and records first. Available controls and results depend on the license, account state, target permissions, and Telegram response.
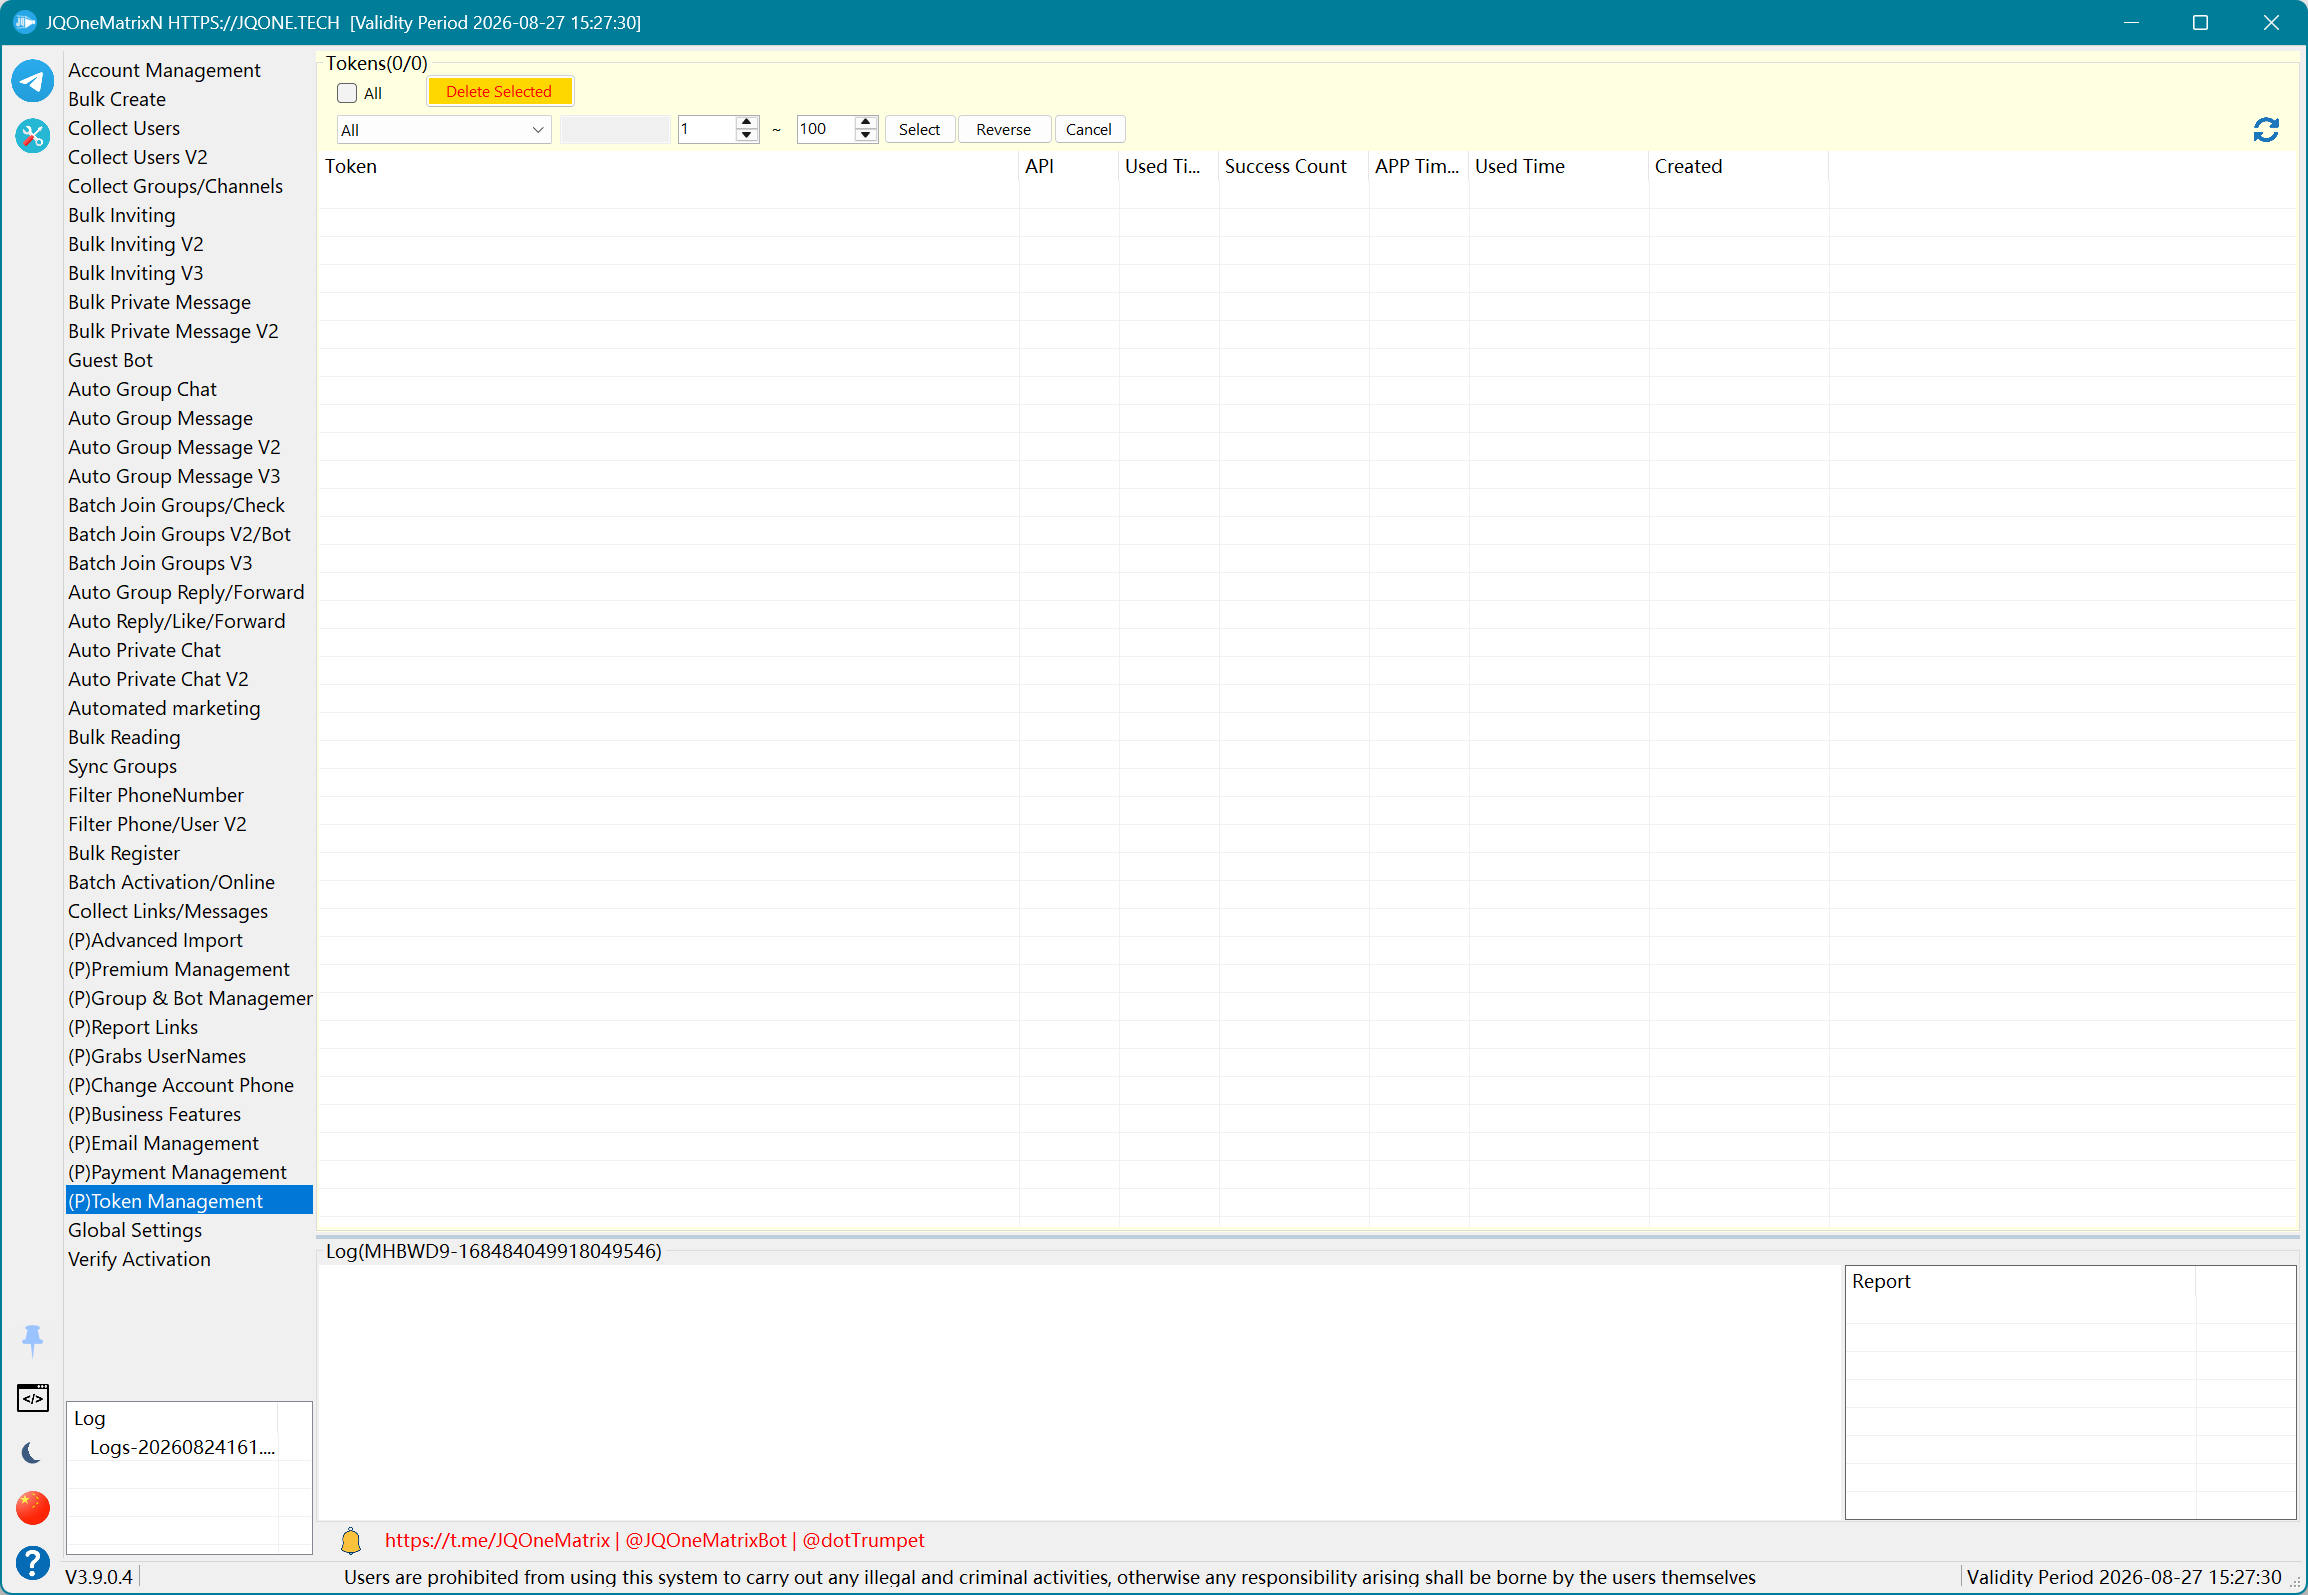
Global Settings
Configure startup login, cache cleanup, log files, SafetyNet, email, random usernames, interface logs, Telegram updates, link-to-media conversion, media caption position, and online-status reporting.
Steps
- Review the current global settings first. These options affect multiple features, so do not change them while tasks are running.
- Configure startup auto sign-in, cache/offline cleanup, TXT logging, thread-start interval, network retries, concurrency, and proxy concurrency for the environment.
- For registration and device behavior, configure SafetyNet, Push Token, email/Premium, registration retries, Recaptcha, and real-device simulation sections.
- For messages and UI, configure Telegram updates, simplified UI logs, link-to-media, media caption position, MD5, online reporting, switch proxy on reconnect, and skip linked channels.
- Set Bot-verification waits, log output, keep-alive, test password, and unrestriction message when required, then select Save. New settings apply to subsequent tasks.
Additional information
- Use startup auto sign-in cautiously with many accounts because simultaneous sign-in greatly increases startup time, network connections, and proxy load.
- Monitoring, automatic reply, and other real-time message features require Receive Telegram Updates. Ordinary batch tasks can configure it as needed.
Note: Test with a small number of accounts and records first. Available controls and results depend on the license, account state, target permissions, and Telegram response.
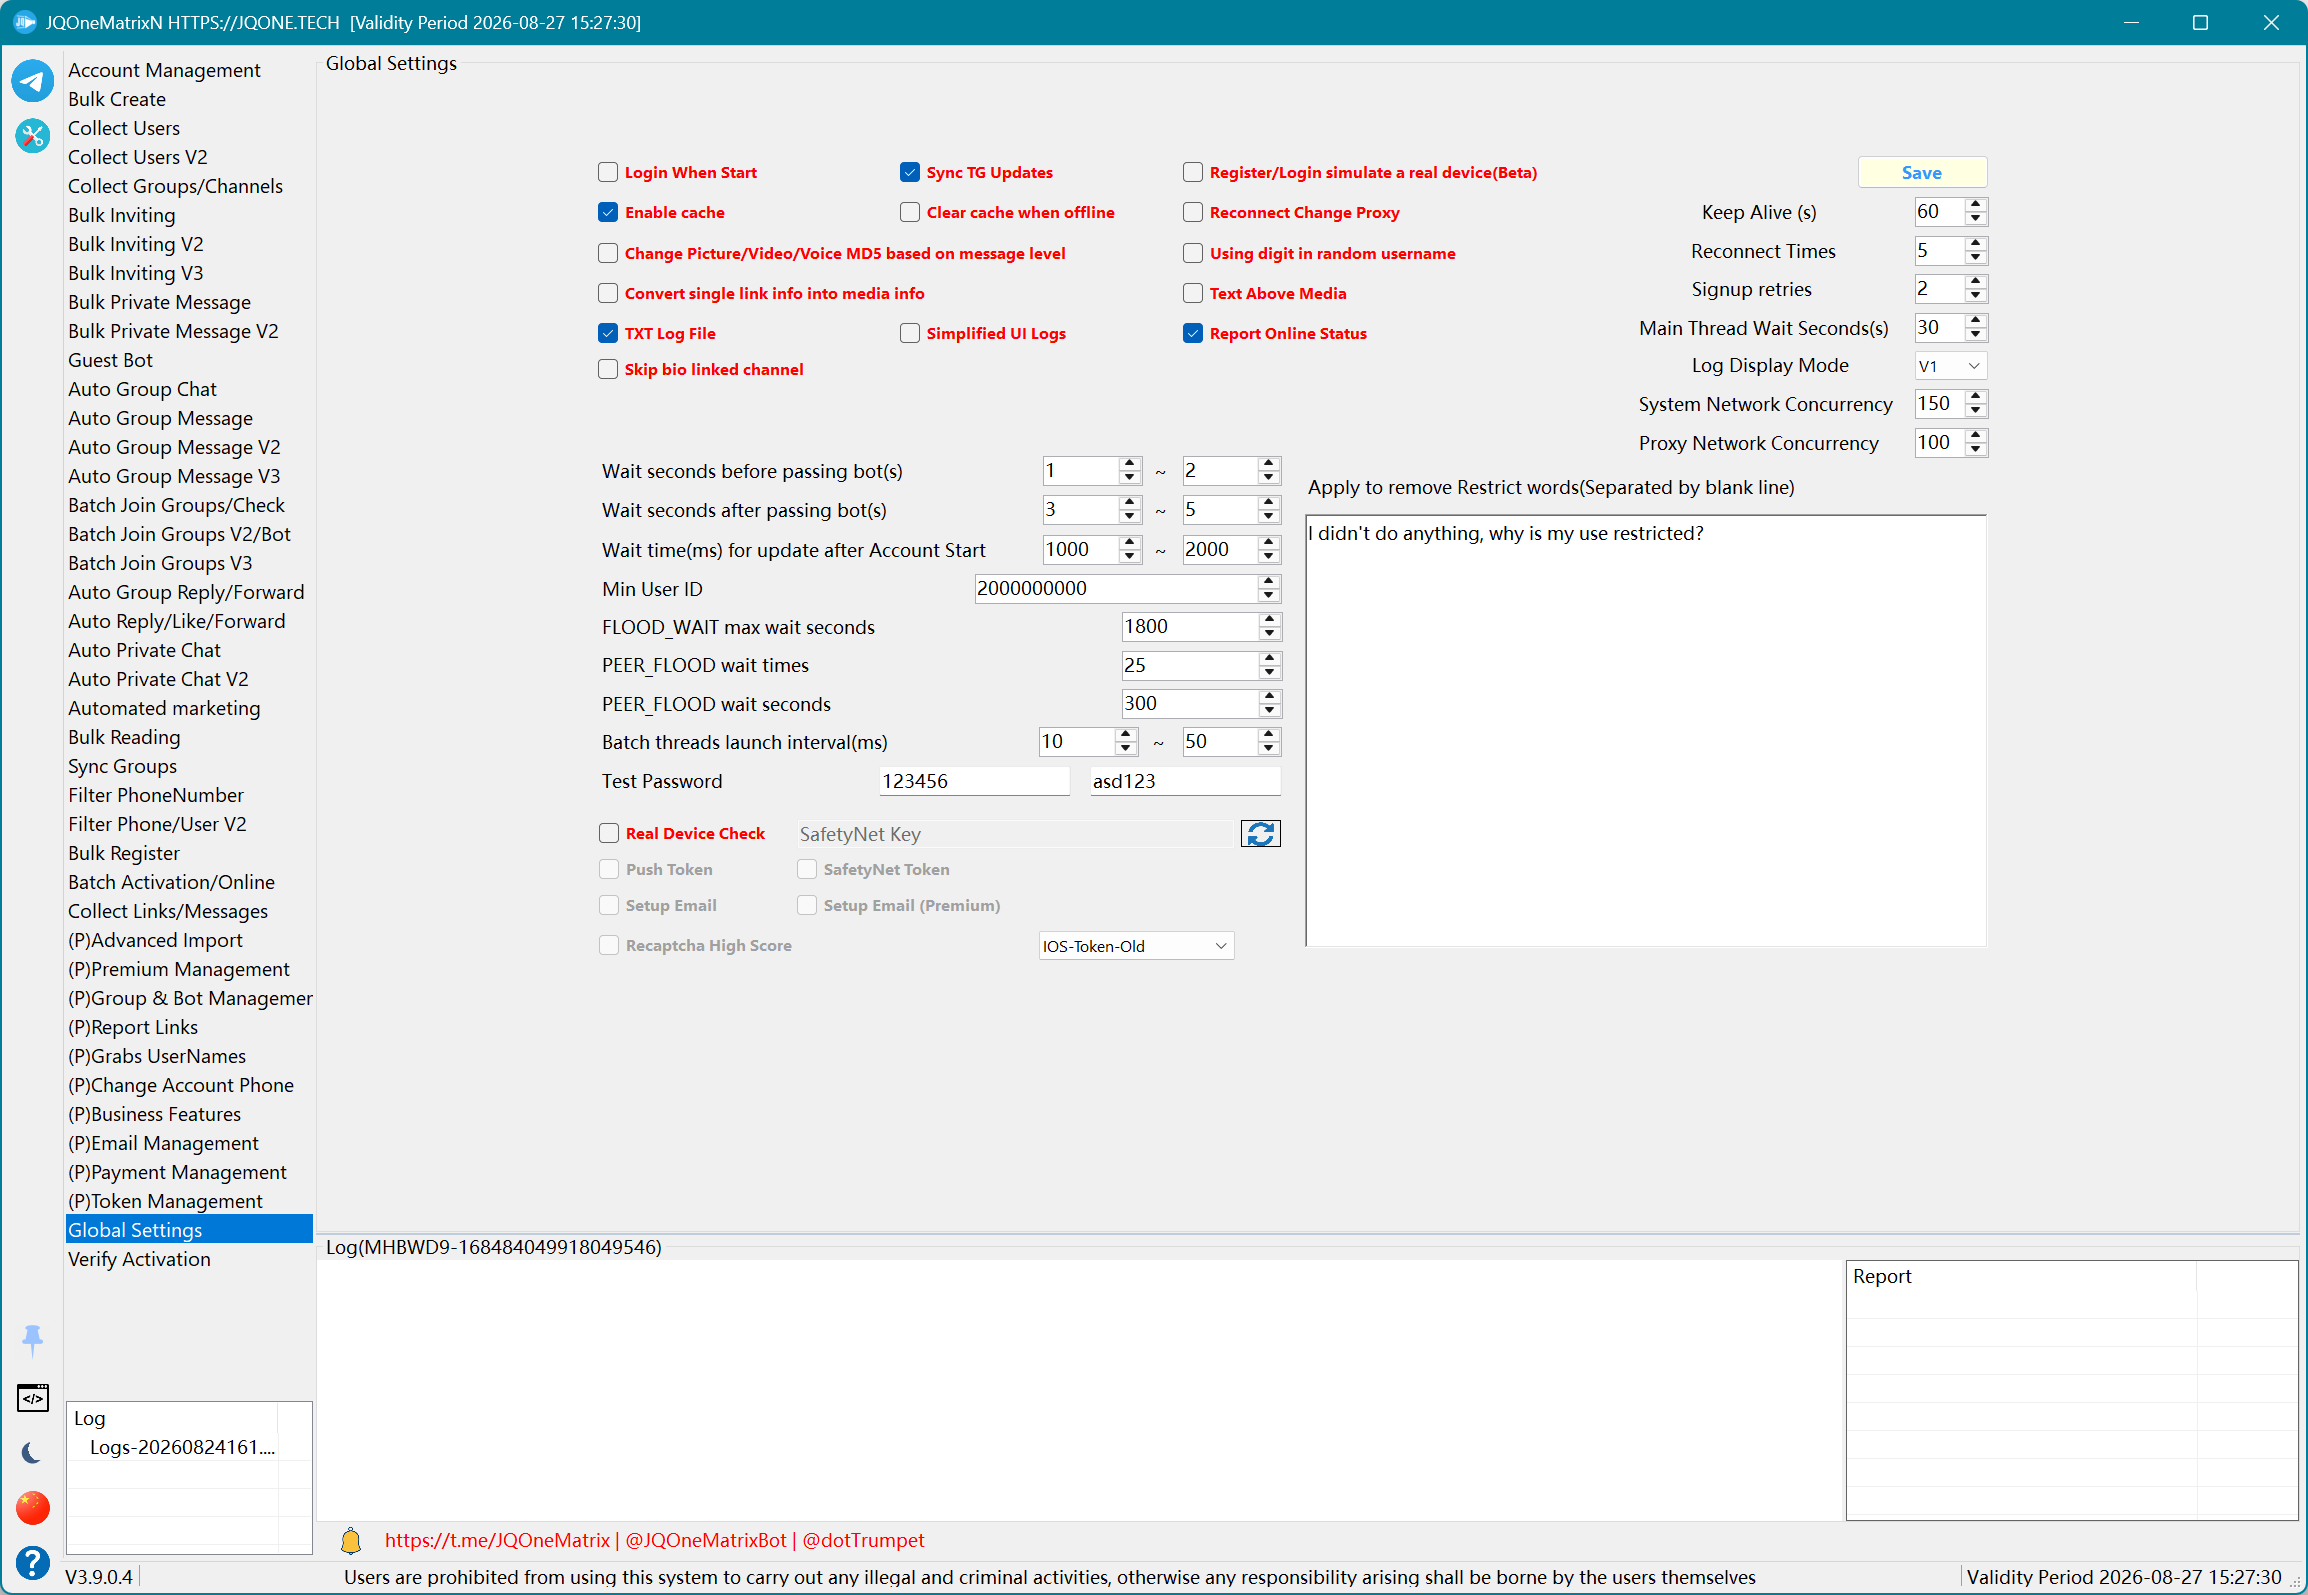
Verify Activation
View the machine code, enter an activation code, and validate the current license.
Steps
- Open Verify Activation and first copy or record the displayed machine code.
- Enter the activation code issued for that machine code in the activation-code field.
- Select Validate Activation Code.
- Review the returned Valid state and current license information to confirm validation.
- If validation fails, keep the machine code, activation source, and software version for support rather than repeatedly changing machine information.
Note: Test with a small number of accounts and records first. Available controls and results depend on the license, account state, target permissions, and Telegram response.
SOFTWARE SETTINGS
Shared data and utility tools
Proxy List
Import, add, test, filter, and save task proxies.
Steps
- For manual entry, choose network/proxy type, enter address, port, username, password, secret, country, and remark, then select Save Proxy.
- For batch entry, select Import Proxy and choose the prepared file. Use Add Proxy when a new blank record is needed.
- Select the proxies to check and choose Test Proxy.
- Review available and unavailable counts and narrow the selection for another test when necessary.
- Delete selected proxies or use Delete Unavailable to remove failed entries in one action. Use only tested available proxies in tasks.
Additional information
- HTTP and Socks5 normally use address, port, username, and password. MTProto uses address, port, and Secret.
- When Api-Http or Api-Socks5 exists in the current type list, enter only the API URL that returns the real proxy address and port, and configure the required access-IP allowlist with the provider.
- Proxies returned by an API URL are often time-limited and produce connection errors after expiry. Do not add credentials to returned endpoints unless the provider explicitly requires them.
- A successful proxy test proves only that one connection can be established; it does not guarantee a stable Telegram long connection.
- For repeated disconnects, retest the proxy and check allowlists, validity, exit region, and long-connection stability.
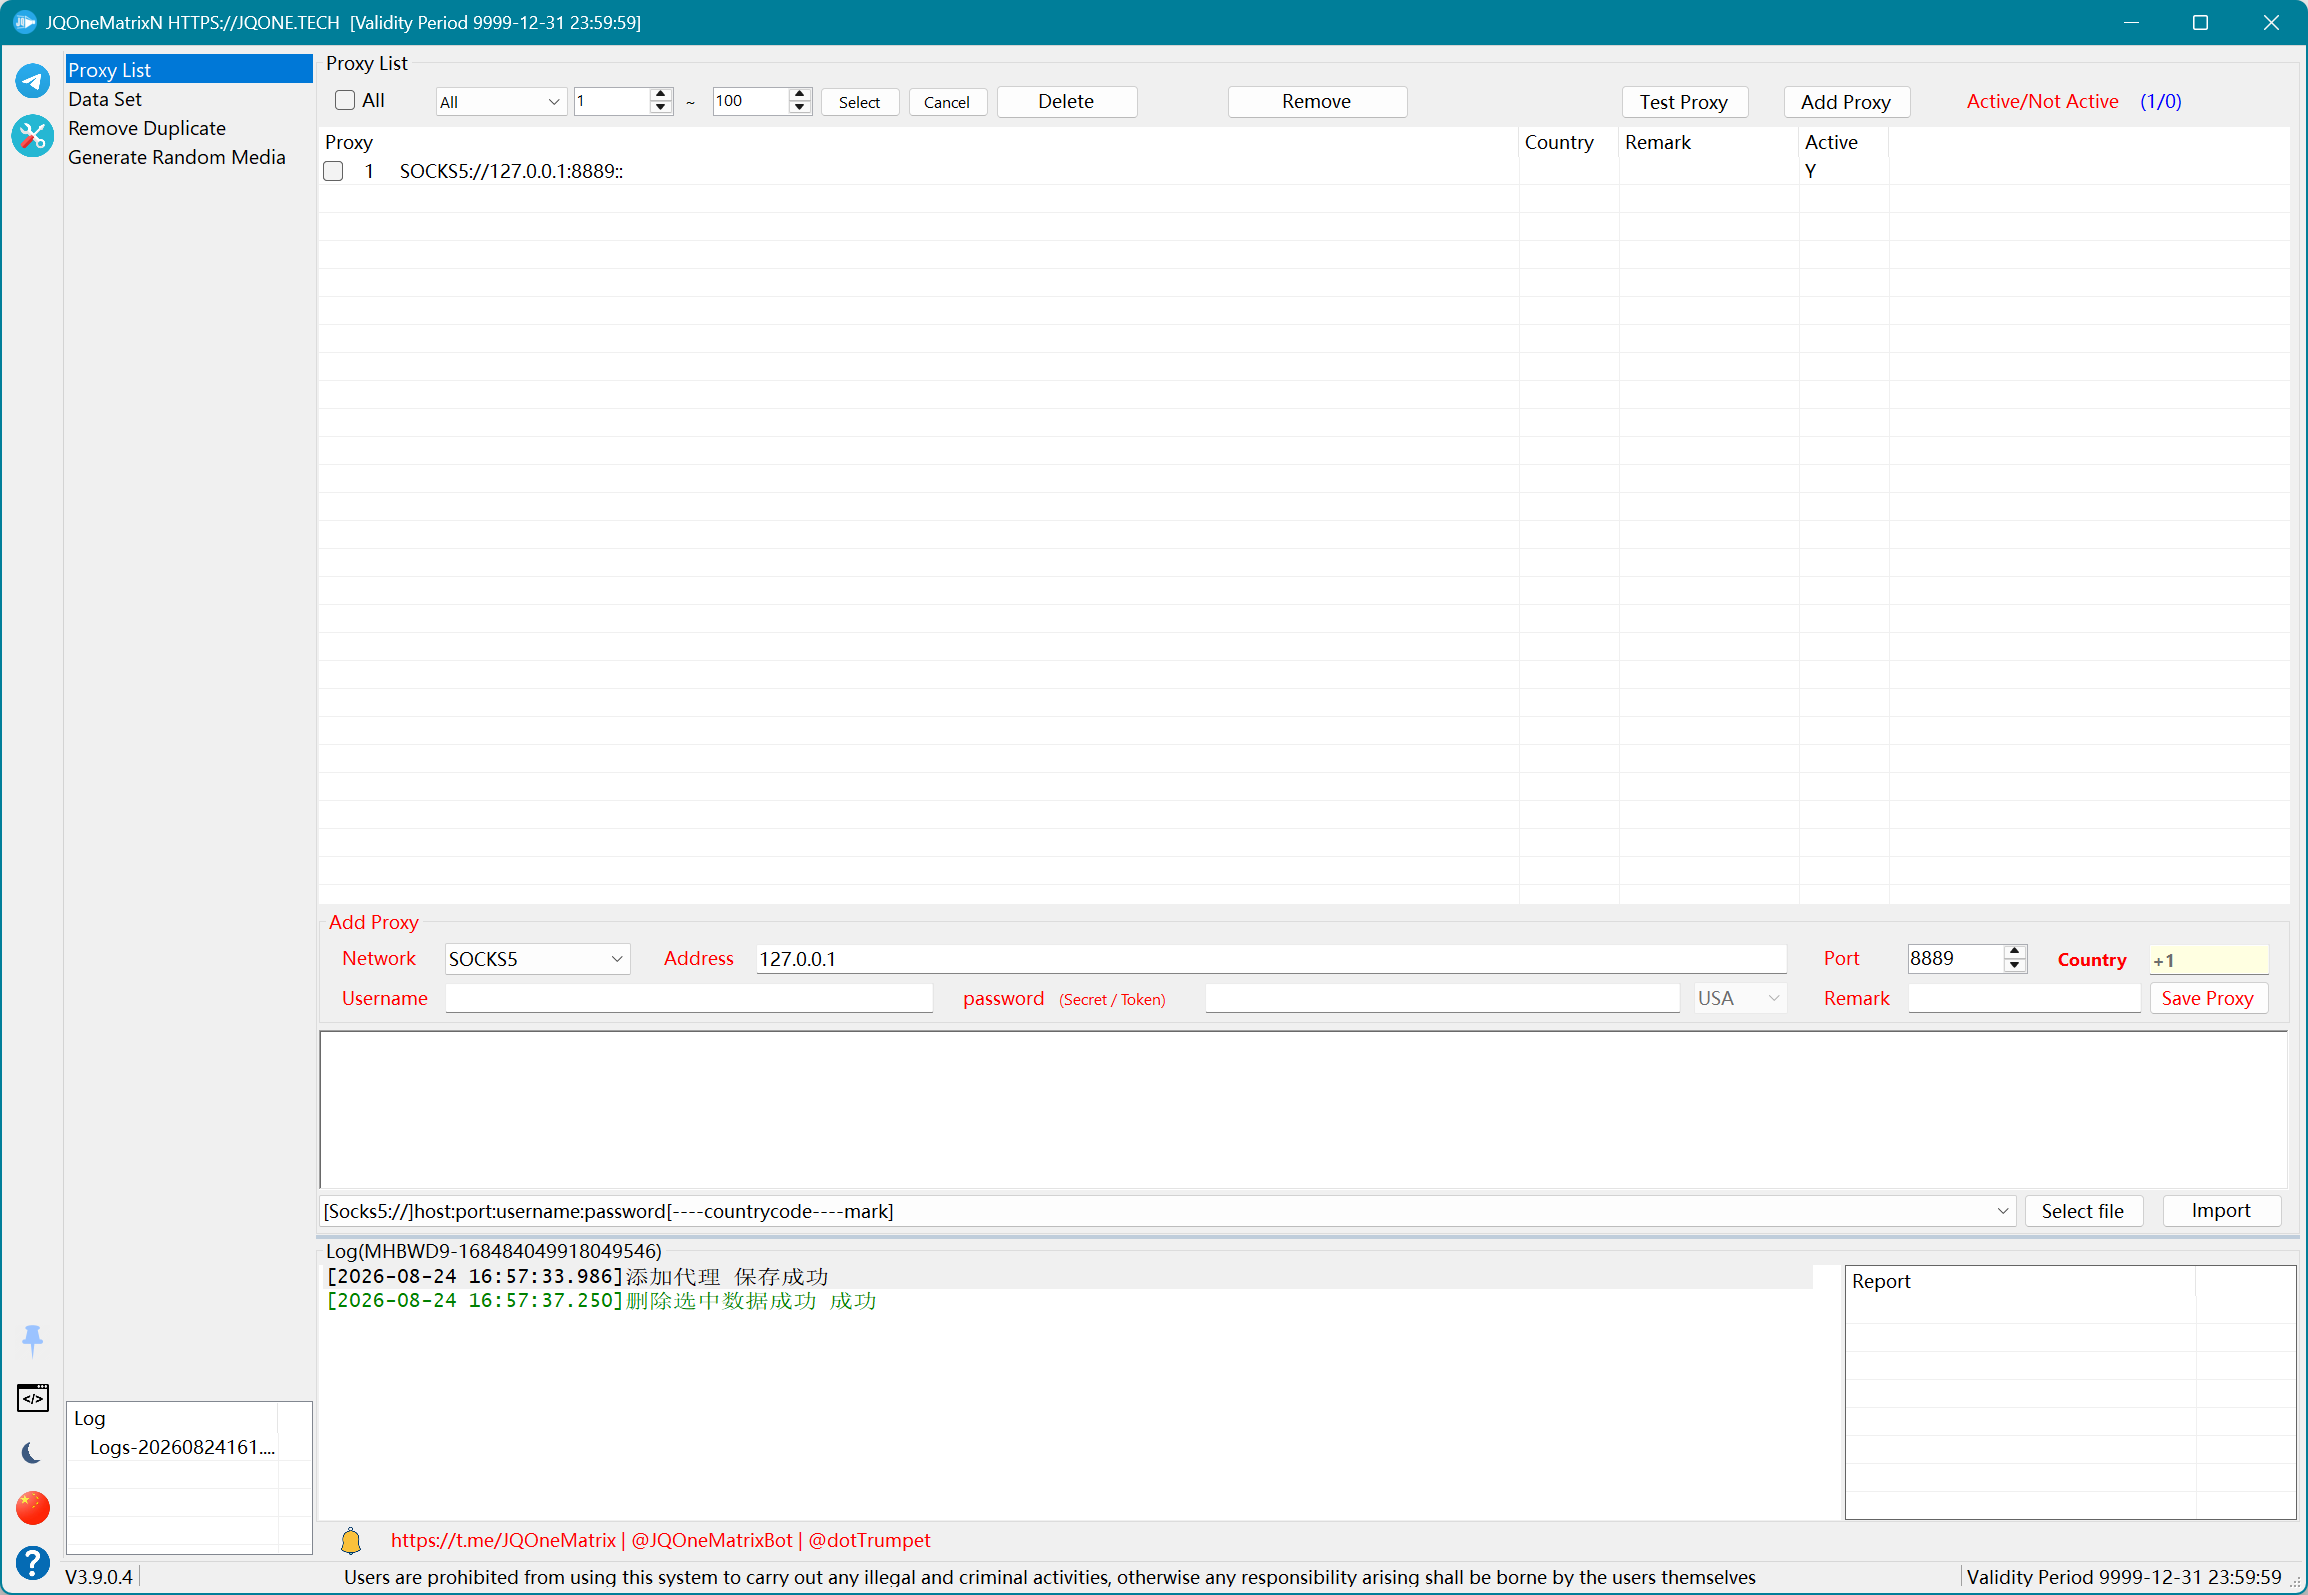
Dictionary/Data Set
Maintain random strings, system languages, time zones, Telegram languages, Telegram versions, and system SDK data.
Steps
- Open Dictionary/Data Set and choose the area to maintain: random strings, specified system language, time zone, TG language, TG version, or system SDK.
- Enter one item per line in the matching text area. Do not mix different data types in one area.
- Use values recognized by the application for TG language, version, and system SDK, and preserve the expected format for time zones and system languages.
- Select Save, then switch to another area if more datasets need maintenance.
- Later randomized-profile or device tasks read from these saved values. Use the updated data in a new task.
Additional information
- The random-character dataset supplies content for {random} in messages.
- System language, time zone, TG language, TG version, and SDK datasets can also be read by registration, profile, or device-randomization features.
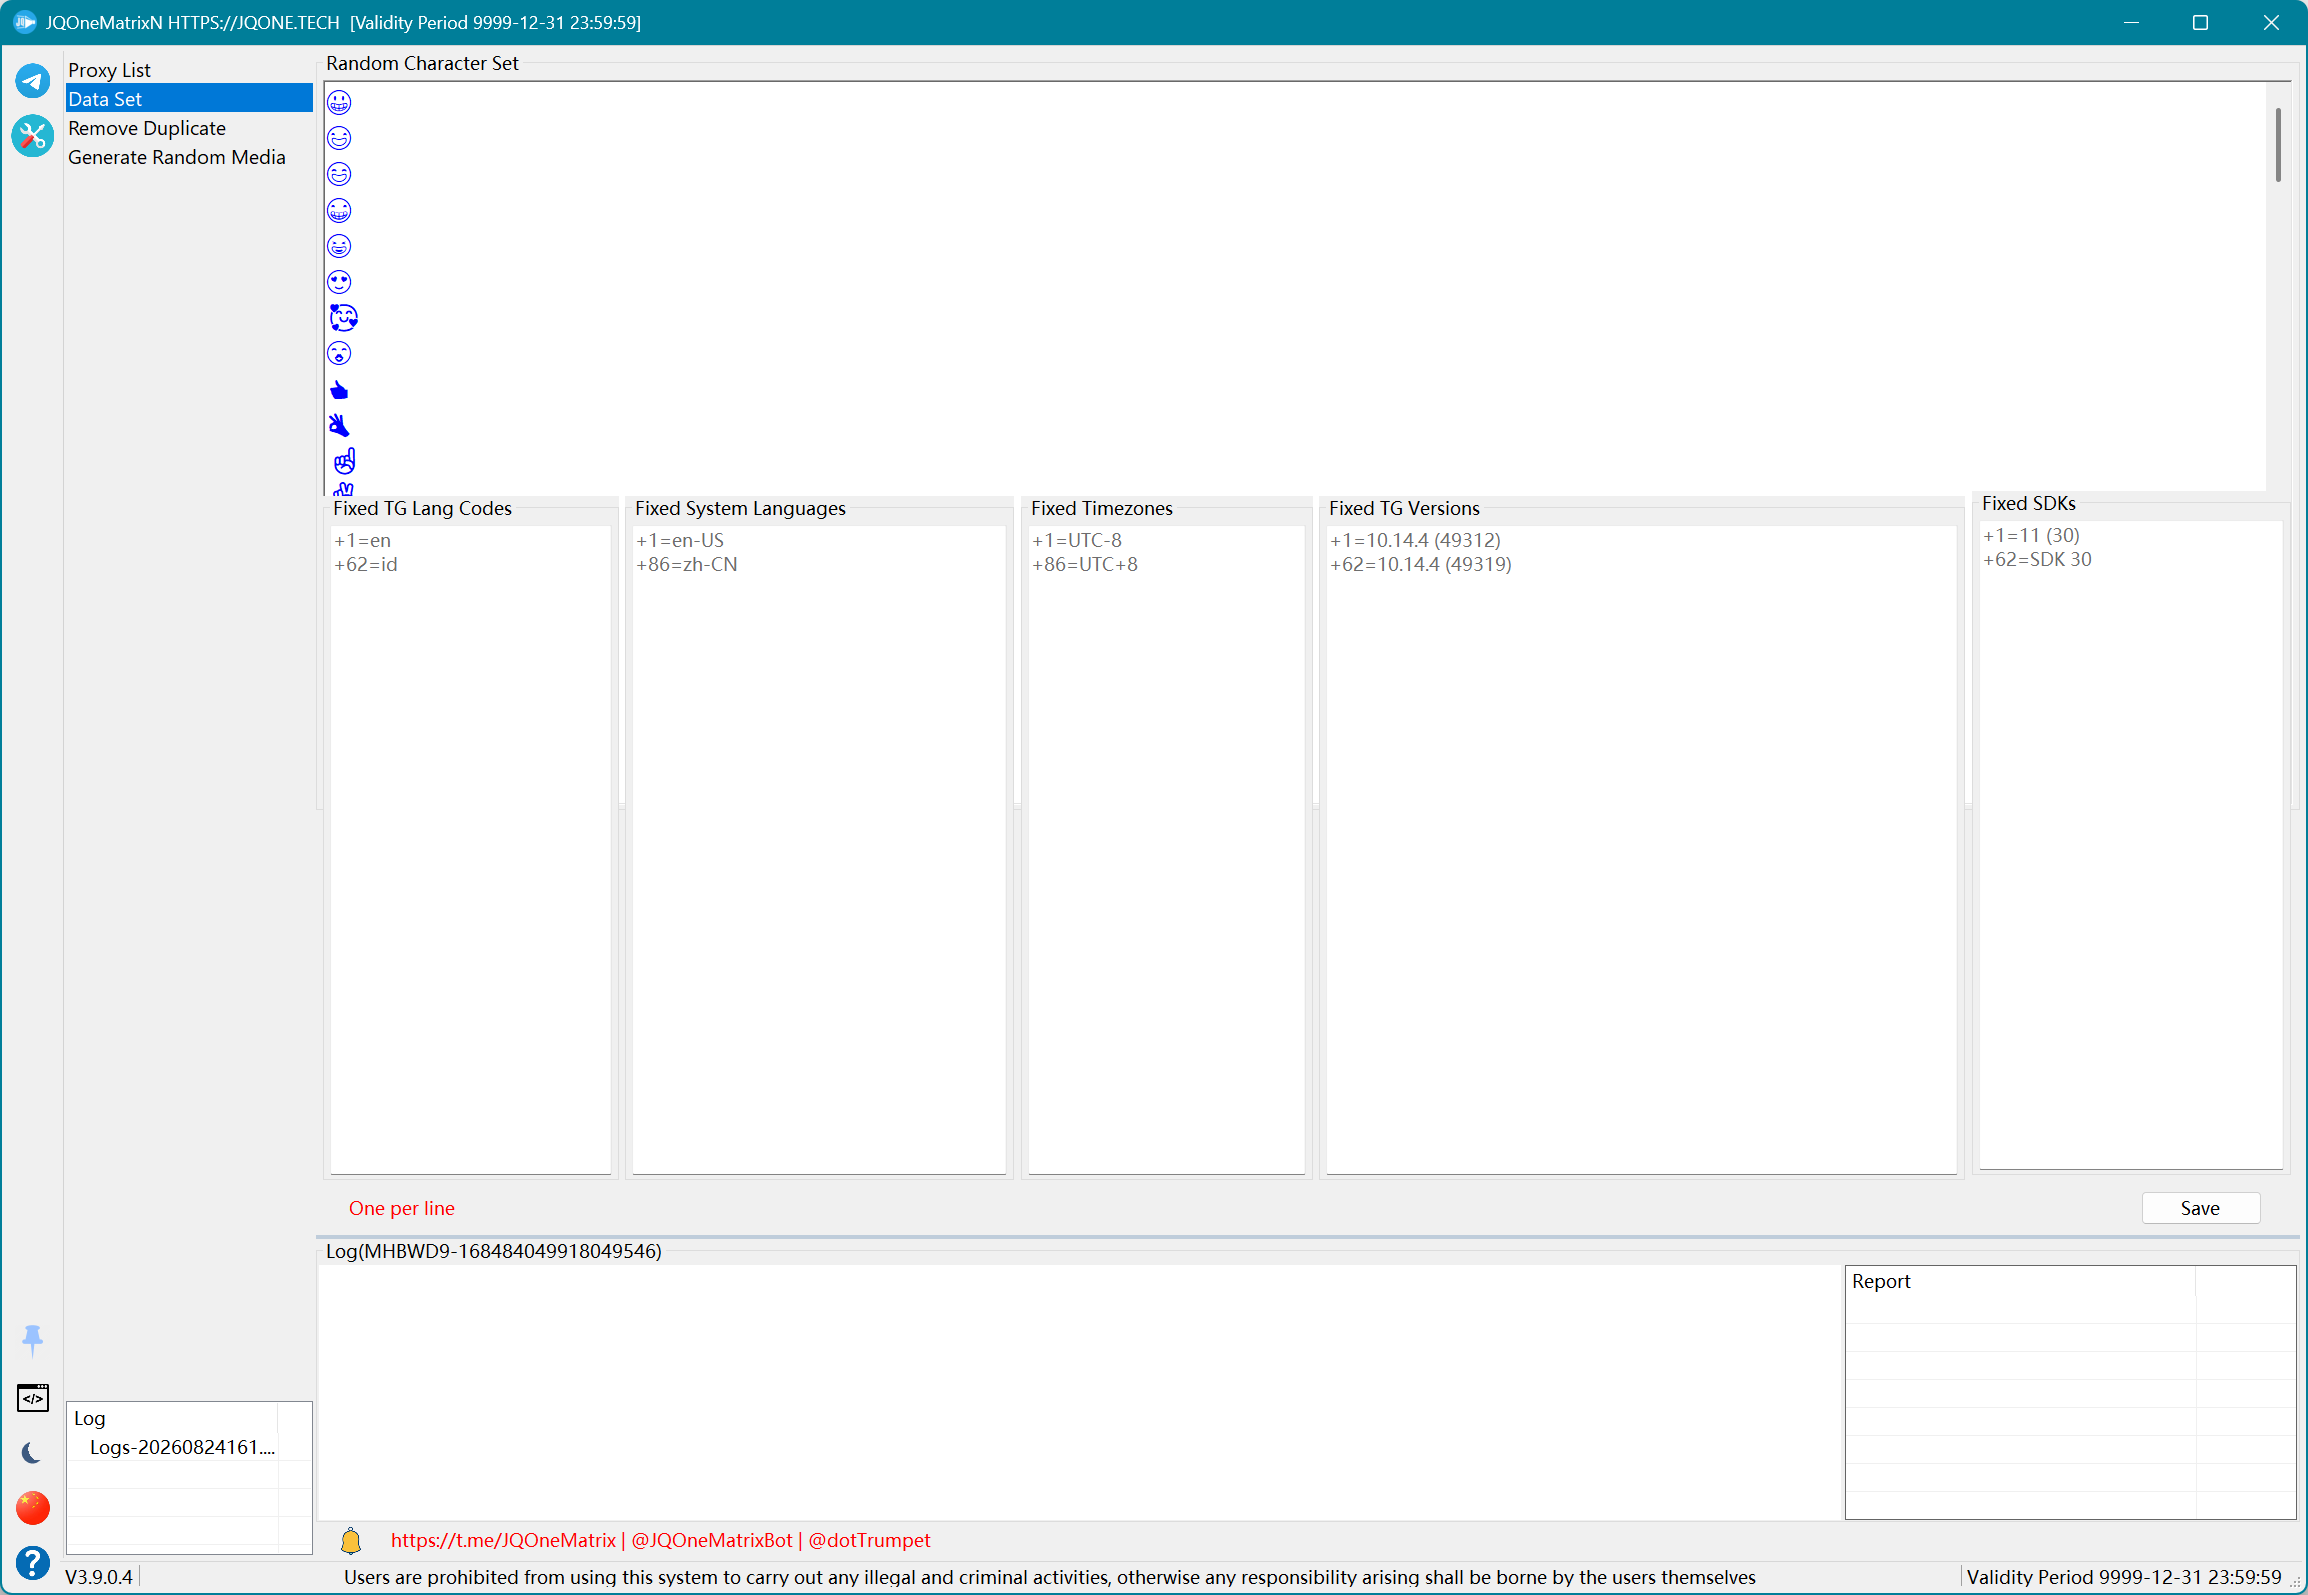
Remove Duplicate
Remove duplicate text or list entries.
Steps
- Paste the complete source list into area (1).
- Paste the exclusion or comparison list into area (2).
- Confirm that both areas contain one item per line.
- Select Remove Duplicate; the application calculates (1) - (2).
- Take the result from area (3). It contains entries present in (1) but not in (2).
Generate Random Media
Select a source media file and generate a randomized media file.
Steps
- Select Select File.
- Choose the source media file in the file picker.
- After the file is loaded, select Random Media File.
- Wait for the completion message, then use the new media file from the location produced by the application.
- To process another file, use Select File again; do not treat the source path as a batch list.
Additional information
- This feature creates a new file by adding randomized noise to media. Keep the original file and verify that Telegram can recognize and send the generated file.